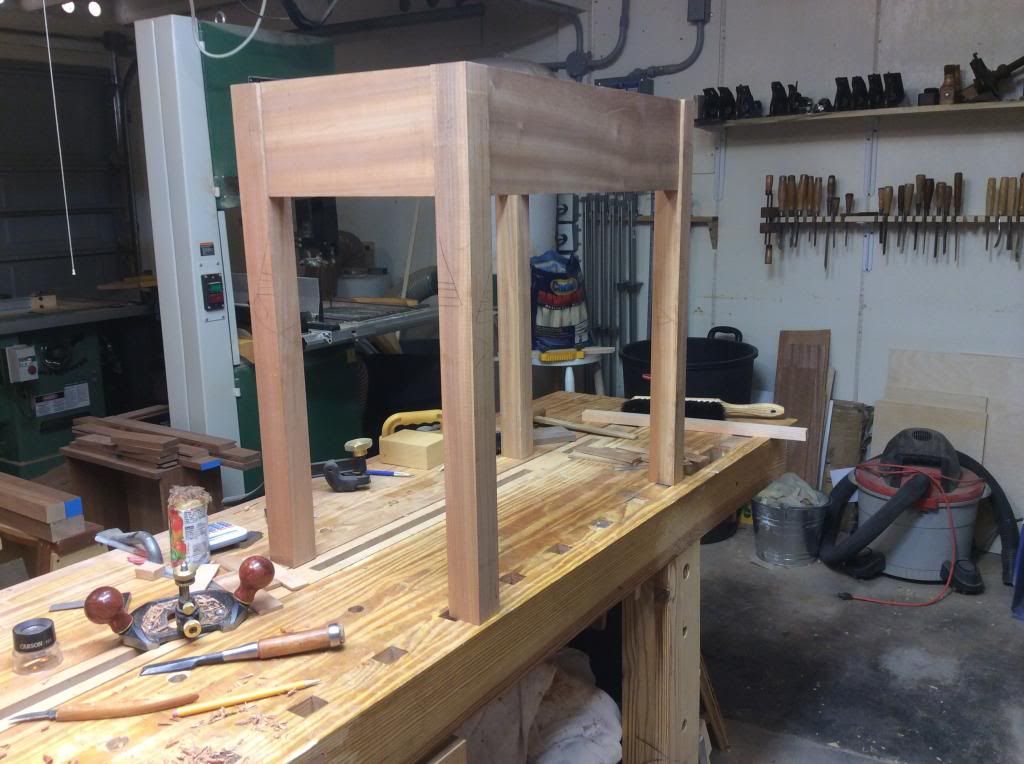
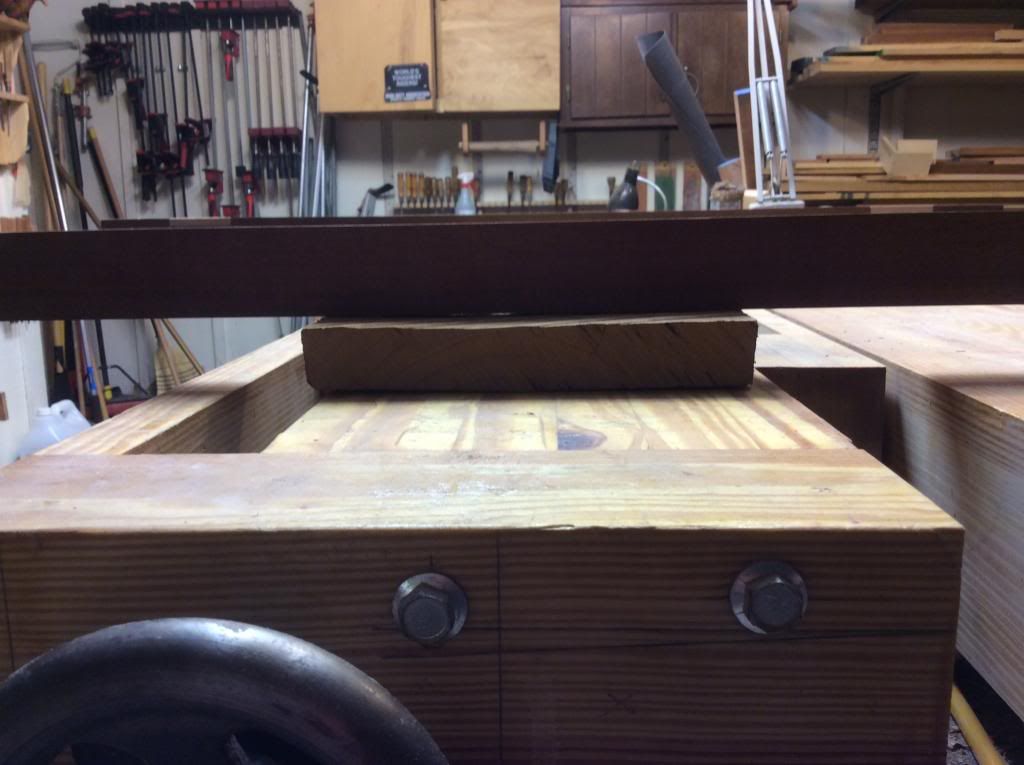
Thursday, June 05, 2014

New Bench Appliance

I've reasonably good saw skills, not the world's best but not too bad either and I know how to use a chisel. Those skills along with a little understanding of marking out and dovetails are not that big a deal but....as always there is a but...In my experience there are two areas where you are likely to screw up dovetails, most of the time not too bad but enough to require a little work to make all the joints look as nice as you would like.

The two areas are marking the dependent joint and not properly judging the compressibility of the woods when sawing the dependent joint. Knowledge of compressibility just comes with using the woods, sometimes wood you think you know can bite you but stuff happens. When it does you either make the joint over if it splits, get busy demo-ing your chisel skills or showing your great woodworking skills by figuring out how to hide the gap.

Marking the dependent joint is where most of my DT screw ups happen. I've tried just about all the different ways, using a knife, using a pencil, using a ball point pin, tails first, pins first, the "140" trick, the 'blue tape" trick, you get the idea. I've tried most ways and they all work, some a little better than others but all of them allow you to screw up the marking occasionally and it doesn't take much of a miss to make a really ugly joint. In fact just marking and sawing works about as good as anything with no more or less gappy or too tight joints and miss aligned shoulders. BTW, I will get to the point, promise.

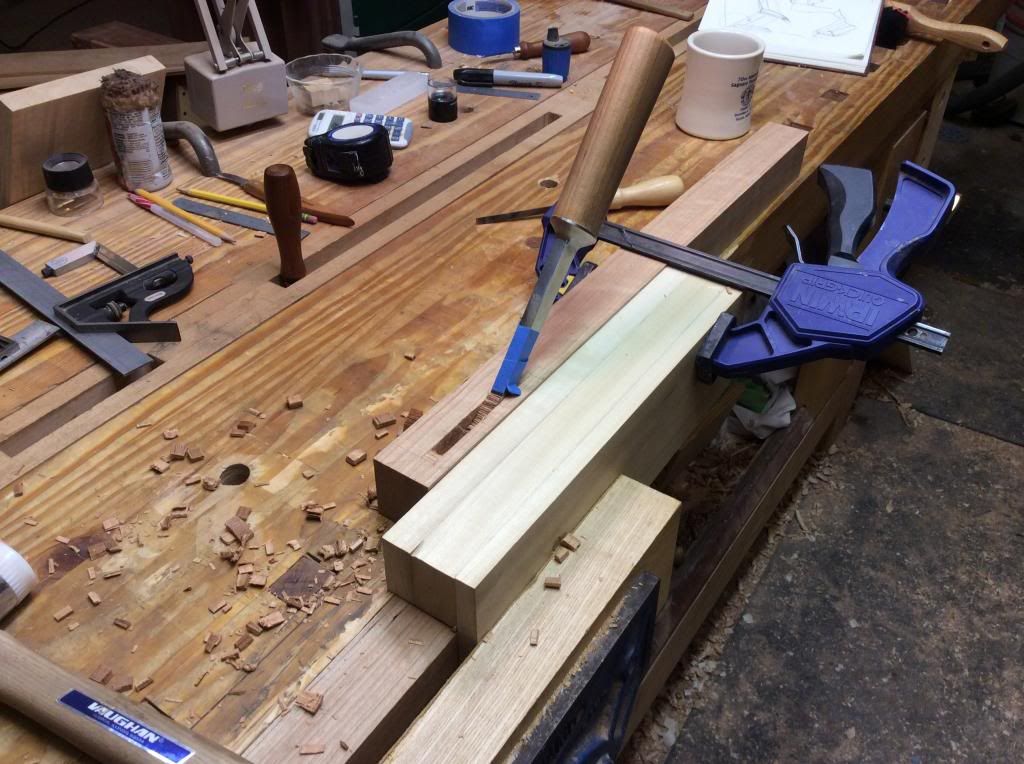
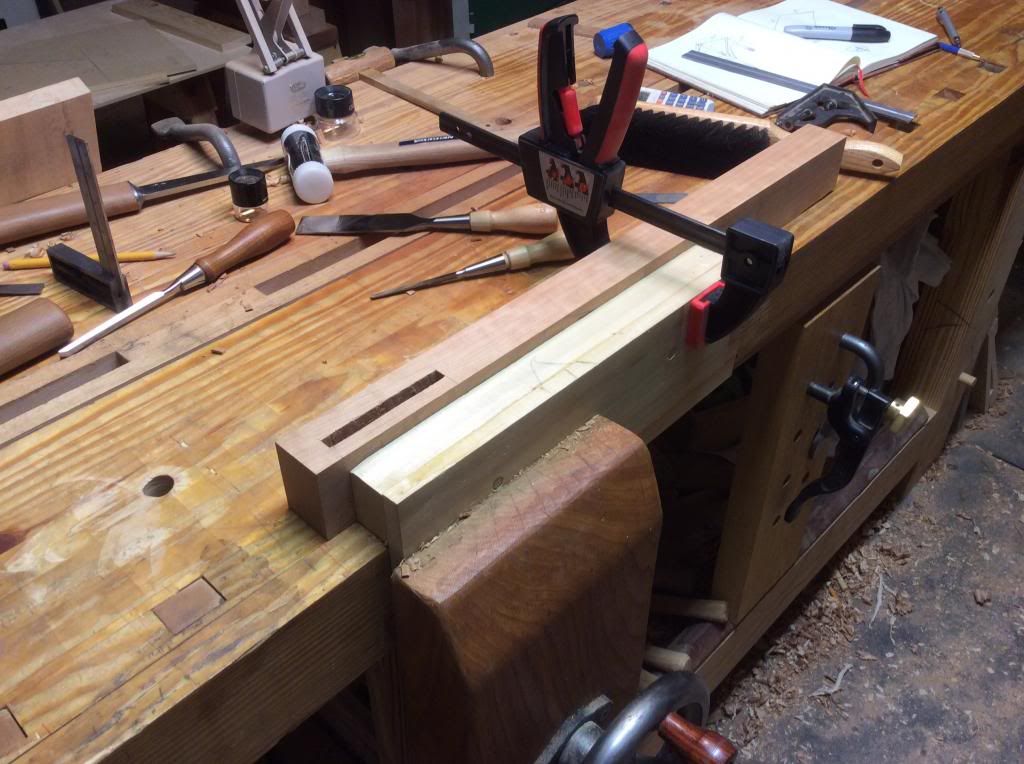
Several days ago on one of the woodworking blogs, I think Sawmill Creek, someone posted about a saw guide for making dovetails. I wasn't interested in the saw guide but I was also killing time at work so I followed the link. It was to David Barron's site and on it he had a video using the saw guide but what I found interesting was his Dovetail Alignment Board .

I cobbled together a copy the other day and all I can say is it works. It works much better than laying a plane on its side even when using the "140" trick and doesn't take the time to cut a rebate, I guess what I like about it is there are no extra steps to using the appliance.....just place your pin board in the jig, aline the shoulder of the tail board and hold the board against the fence and make your marks. It will not slip, if your marks are not deep enough just replace the tail board and make 'em deeper....it is really slick.

I know I'm probably late to the party as usual and the beer and food are already gone but that is the story of my life riding the short bus.

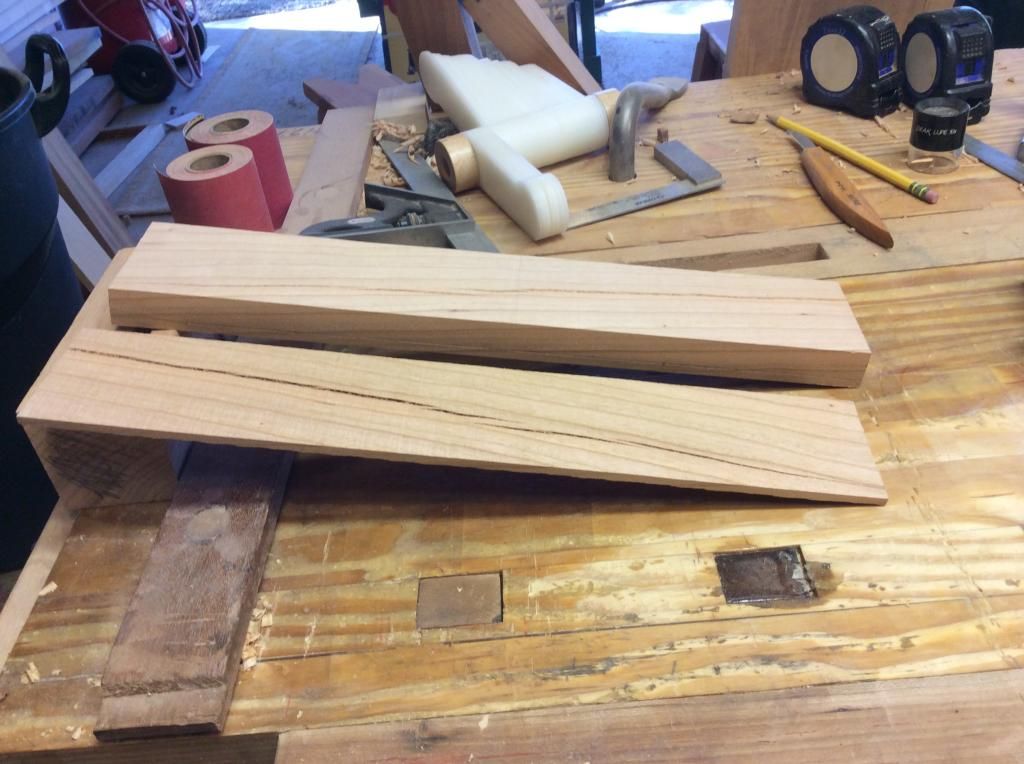
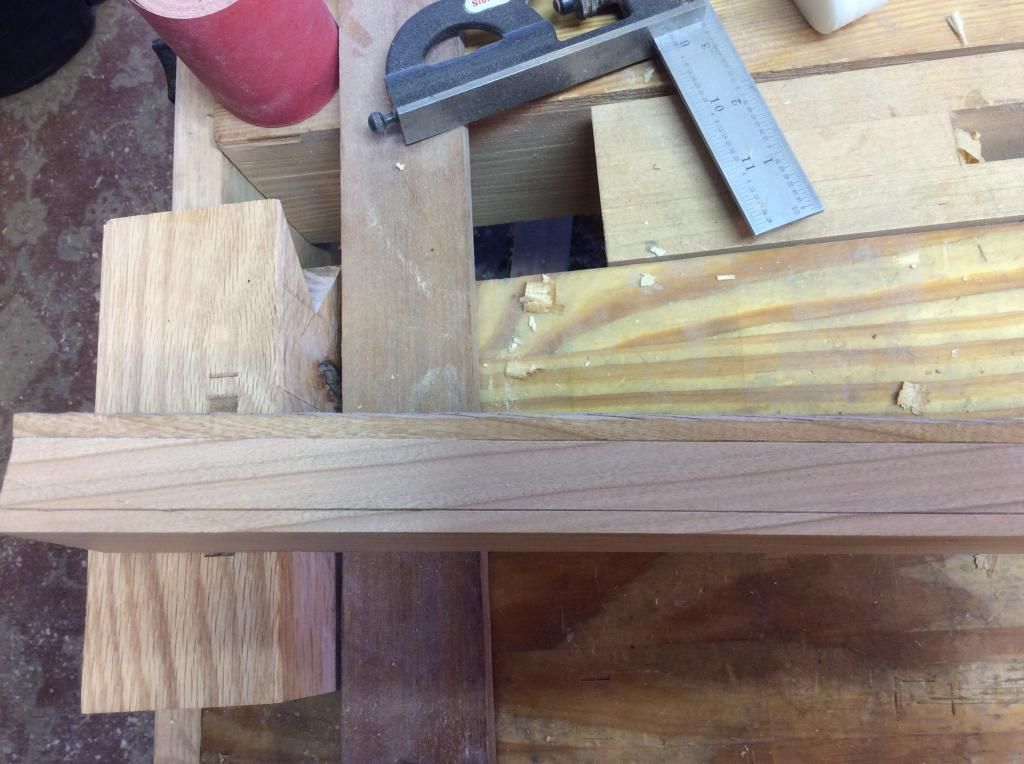
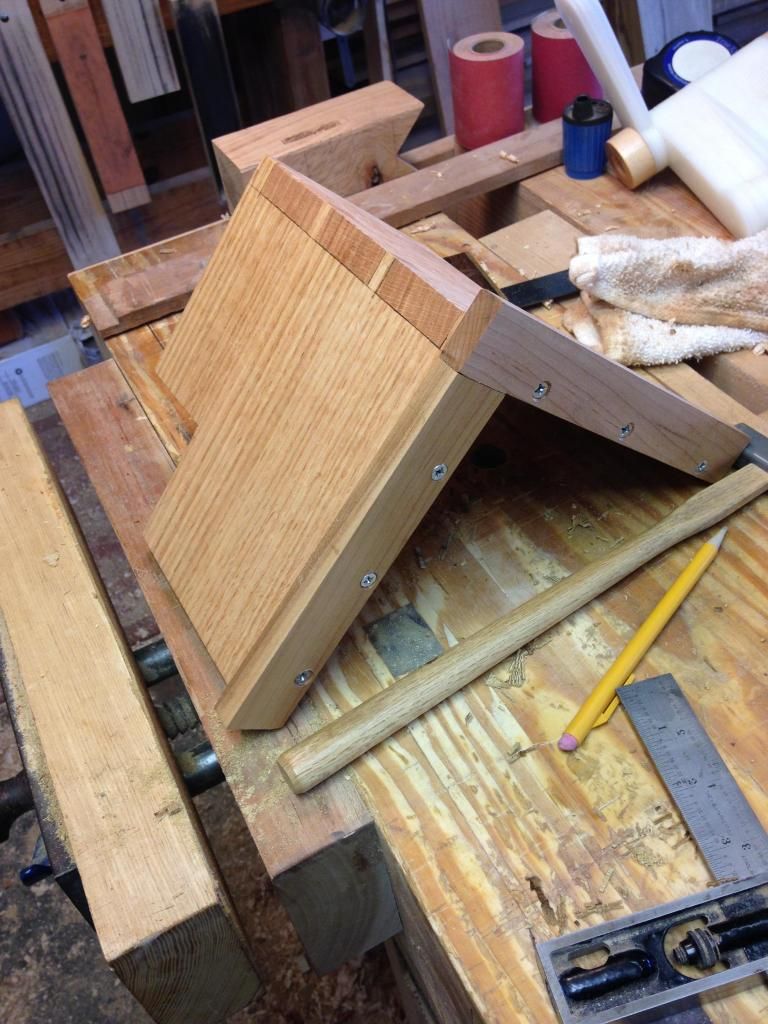
A couple of photos of the bench appliance:


The next time I cut some DT's I'll document using the jig.  


Sunday, June 01, 2014

Short Bus Rider Finally Catches the Long Bus

Only two reasons I've been so slow to go to a Lenox Tri-Master bandsaw blade, I'm a cheap SOB or I'm too dumb to walk the earth. If you know me, you know I'm not cheap. A good friend once said "Bubba you really don't like your money, do you?" he pretty much hit the target.

I finally ordered one and the USPS delivered it Saturday, because I had to clean the house and get things ready for MsOK's return (two large hairy dogs, a born slob, and three weeks of damage, there was a lot to do) I didn't have time to install it Saturday.

Bottom line, even taking into account most new blades make nice cuts, this one is worth the money. It cuts fast, smooth, and stayed square on the line. I'm glad I waited to re-saw the aprons for the hall table, I expect there will be a lot less waste and clean up.

Here are a couple of photos of the first cut with the Lenox TriMaster 1/2", I don't know if you can see in the second photo but it really stayed right on the line with no guidance from me other than holding the board against the fence and a smooth push.

Cut sides up:


Split the line and stayed straight:


Saturday, May 31, 2014

Adult Supervision

The critters and I will have some adult supervision once more, my guess is it will be a good thing. A life of eating and drinking what you want when you want it and sleeping at odd hours can't be good for your soul. Well maybe good for your soul but not so good for the body. Anyway as I type or maybe that should be input this I have one eye on Flight Aware, she has just crossed into Oklahoma and should be landing just before 2200MST.

I've done a few crossings riding in steerage and it ain't no fun, it's so bad we had a rule "Business or Better" for any crossing. Especially if we were going to relive a crew or pick up an aircraft and had to fly the next day. Anyway I expect she will be knackered but too tired and wired to sleep.

I should get a few attaboys, the house is clean, the plants did not die, and I finished a little box, a step stool, and the TFH, and only a few new tools snuck into the shop while she was gone. Not too bad.

I've rough cut the girl child's hall table's legs but have been holding off rough cutting the aprons because I had a new bandsaw blade on order. It came today, maybe I can get the aprons rough cut tomorrow so everything can have a day or two to finish doing stupid wood tricks and I can finish her wedding present before their 4th anniversary. I wouldn't want to rush things.

One last look, she is crossing Amarillo and will soon be in New Mexico and headed down hill.

Monday, May 26, 2014

There is a Season

As an ordained minister in The Church of The Flying Spaghetti Monster (FSM) and Dudeist Priest I should be allowed to borrow a little from my Judaist/Christian brothers. Whatever, I think it was Picasso that said "Everyone borrows, Artist steal". OK so maybe this isn't stealing but, and I'll get around to the point eventually. Ecclesiastes 3.1 said something like "For everything there is a season, and a time for every matter under the Heavens".

Well I've reached the end of a season, I'm hanging up my Motoport riding suit, LDComfort underwear, Shoei Helmet, Kangaroo gloves, and Sidi boots for the last time. The three motorcycles are for sale. I can no longer ride safely at night because of poor night vision and the riding I enjoy is Long Distance Endurance riding, ain't much chance of covering long distances riding only during the day. The season has passed, I've done almost everything I've wanted to do on a motorcycle, it's time to quit.

BTW, it has been one hell of a ride, I've met and ridden with some great folks. Some that can, will, and have done amazing things on motorcycles. I've showed many riders how to ride safely and in comfort through the desert no matter how hot it gets. I hope someone will carry on with that mission. But whatever, it is time for me to put The Dirty Fat Girl on the kickstand for the last time.

The Dirty Fat Girl, MsOK, and me running Hwy 180 in New Mexico:


Sturgis SD for the 69th Bike Week:


Luling, TX City Market BBQ:


Outside Ouray, CO:


California Coast:


Well you get the idea, it was great fun.


Saturday, May 24, 2014

Work Benches

As posted earlier, this last week was a tough one at work, I was in the short rows with no energy for the shop. Work, sleep, eat, and spend a few moments geeking on the web each day, that was pretty much the week.

One of the things I noticed was a number of posts on work bench builds and how folks obsess over their build and most of the time over things that do not make a rat's ass of difference. I will admit to trying different things, different vises, split tops, square dogs, round dogs and so on but I also find with each new build my bench gets simpler.

The vise you use really doesn't make a hill of beans for either face or tail. Go for the easy install and easy to use especially for the tail vise. Battens and holdfasts will do 99% of what a tail vise does, easier and better most of the time. Some day I will build a bench with out a tail vise and I'll bet I will never miss it. A good face vise, should hold, be fast and easy to adjust, and easy to install. Most early UK made metal vises fill those requirements i.e. Record 52 and its clones.

The only really important things about a bench are: Is it heavy enough? Is the joinery strong? And is it Goldilocks, neither too big nor too small?

Make it flat, heavy, and strong, everything else is lipstick on a pig.

New Philly Plane Classic Smoother

I received my new Classic Smoother from Philly Plane a couple of days ago. As I was in the short rows of a tough week at work I didn't have time to try it out until this AM. The iron was in good shape, maybe 5 minutes on the back and much less on the bevel and it was ready to go.

First impression is:....This is a freaking work of art, almost too beautiful to use. In fact when I showed it to a friend his first response was "...you are not going to use it. Are you? It should go in a display cabinet." Of course my answer was I'm going to use it and in use it is very nice. It is easy to set with just light taps, it holds the set well, and it leaves a pristine surface. It's a keeper.


Sunday, May 18, 2014

I Have a Tool Jones

I have to admit to a tool problem, put a new tool in hand and my pupils dilate, my breathing becomes heavy and labored, reason takes a vacation....it ain't pretty. It's one of the reasons my shop is full of little used tools. Ninety percent of my tools are well cared for and sharp tools ready to be used on whatever the project. The other 10% are in the process of being made ready or they are defective for some reason. But most of the tools are seldom used except for a core kit and that core kit is pretty small.

I would guess on most projects out of well over a hundred chisels I might use a 1/2 dozen, one of the pig stickers, a 1/8", 1/4"or 3/8", and a 1/2" bench chisel, and one of the paring chisels. Same story with saws, a 26"or 28" Atkins or Diston X-cut, one of the dovetail saws, a carcass X-cut, and a large tenon saw will take care of 99% of my sawing needs. Add in a router plane, a plow plane, a rabbet plane and one of the smothers plus a small wood stock planes. The misc stuff like a couple of marking gauges and marking knifes, dividers, dovetail markers, a mallet, a brace and a box of bits and I have all the kit needed for 95% of what I do.

That's a total of less than 50 individual tools and with that kit I can build almost anything if I add in a couple of bench appliances and a longer plane or two. And the truth is that is a damn generous kit.

I just came back from the shop where I roughly counted the tools on the wall behind the bench and those on the bench. there were over 200 individual tools, not counting scrappers, extra irons, straight edges, winding sticks or rules. I didn't count the tools on the west wall and cabinet, the east wall and cabinet, on the sharpening bench, nor in the tool room. My guess is well over a thousand hand tools stuck in various nooks and crannies around the shop.

If you stop and think it's pretty dumb because every one of those tools need care, used or not, and being very generous I need maybe 100 different tools. All I can say is somebody is a sucker.

Follow Up Photo

Ralph,

The top is 12-14mm narrower than the legs to (I hope) make it more stable. There is a slight flair running from about 50mm down the leg to the top so that the outer edge of the leg just meets the top edge of the top. Also I think the slight curve gives some relief, as does the curve on the stretcher, to the squareness of the basic stool.

Maybe you can see it in this photo:


ken  

Sunday

Summer is here early, it went over 100F yesterday. I have a swamp cooler in the shop and it will work to lower the shop temp 10 or so degrees until Monsoon season starts in July, but even with the cooler the amount of work that can be done in the afternoon is limited. Early morning is great and it isn't too bad after the sun goes down but mid afternoon you might as well give in and find a AC and something cool to drink. I was reminded of the facts of life in the desert yesterday as I finished up the step stool, I pushed a little hard as I was in the short rows and found myself getting the first symptoms heat injury. A short break with a couple of glasses of tea and remembering to turn on the swamp cooler took care of the problem. I love the desert, I love the heat but almost every year I have to be reminded to respect it.

BTW, with correct gear I can ride my motorcycle all day across the desert even as hot as 118F by using the same principals as the swam cooler. Only problem it's hard to get the swamp cooler to blow 85mph and still work in the shop :-).

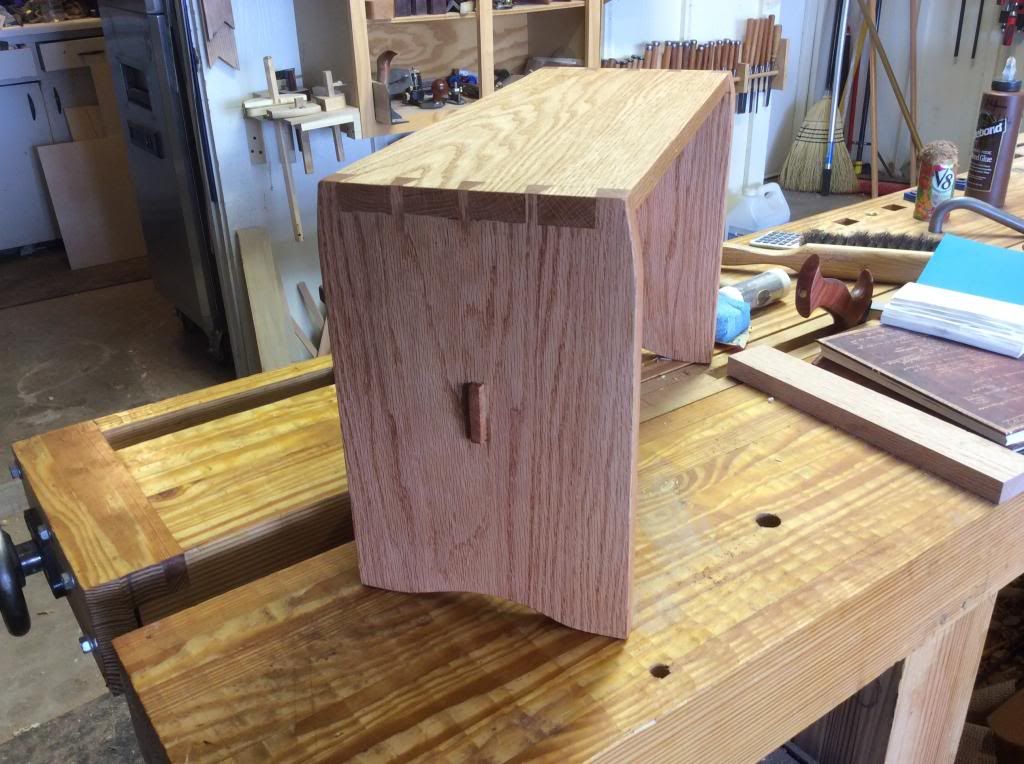
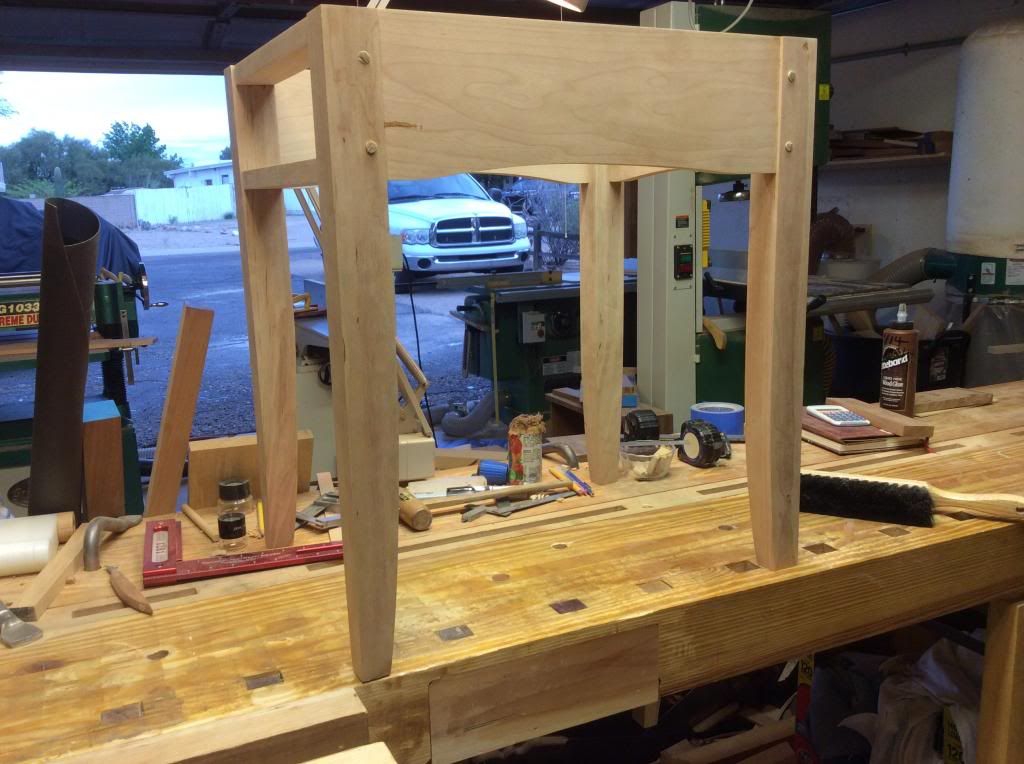
I've been making this stool for awhile, it is sturdy and a easy build but also a good project to hone skills. Most I build out of Oak and finish with Tried and True and wax.


Tuesday, May 13, 2014

LV Tapered Single Iron

I made a wood stock for the small LV tapered single iron. It sure makes it easy not having to chop a mortice for the chip breaker screw.

I made a plane using the large single iron several weeks ago, for how I use wood stock planes it was too big. This one at 48mm wide is just a couple of mm wider than the Hock double iron I usually use. Functionally not any real difference in size between the LV and the Hock iron. The LV is a little longer than I like but I can get use to it. I wish LV made a little smaller iron for making a "Block" plane sized wood stock.

Use will tell but it seems to hold the set better and is a little easier to fine tune the set.....Could just be first impression or wishful thinking. Did I mention how much easier the build is :-)?


The new LV irons are really flat, about three strokes on the 3mu diamond stone and the back was polished across the cutting edge. Three or four strokes on the "fine" diamond turned a burr on the bevel, a couple more on the 3mu to polish, a fast strop and the iron was ready to go. Not bad for a new out of the box iron. I'm use to irons taking an hour or more (sometimes days) getting prepped for first use, These new LV irons are the flattest I've found, I'm not sure what they changed but what ever they did it's working. 

Monday, May 12, 2014

Monday Tool Porn

This has been the first three day weekend where I haven't taken PTO in a long time. When I first started the current job three day weekends were the normal but that changed a couple of years ago. We went from running one line a week always starting on Monday to the current system of 23/7 (the Sim has to be down for maintenance for 1 hour every 24) with lines starting whenever. Bottom line for the last year or so most weeks have been 6 day weeks and if 5 the days off have been split....Ain't no way to live life. I hope the suits have gotten the message.

Anyway it has been nice to not feel rushed. The first day I finished the TFH, yesterday I did some house chores and tool maintenance. Today more tool maintenance and cut some blanks for wood stock planes, making one. I believe this one will be a keeper, I may shorten the back a little and will give it a coat of BLO.

The blanks:


The finished plane:


BTW, the new plane is next to the wood stock I use more than any other, it is my go to for chamfering and trimming. It is so light and easy to use either one handed or with both. The metal ones are good for heavy work but for light trimming I will pick up one of the wood stocks.

Sunday, May 11, 2014

Random Thoughts

After a good lunch and a couple of  beers I'm in no hurry to go to the shop, I've finished all outstanding projects so shop time, if any, will be spent cleaning up the shop and sharpening iron. If I get real ambitious I could pull out some lumber for the next projects and rough dimension it, but I expect most of the day will be spent scratching doggie butt, geeking, and maybe since MsOK isn't here watching "House of Cards".

One of the things on my mind is I'm often asked to teach a class on whatever, most of the time I turn it down flat, same with folks asking me to build something for money. Now, I have an open shop, if someone wants to come by I will be happy to show them how to do whatever, saw a dovetail, chop a mortice, sharpen iron or saws, build or restore a plane, whatever they would like to see. I just do not want to teach a class, too much like work. Same with building things for money. Once money enters, it is no longer fun, you are no longer an amateur, it becomes work. Money is the apple, I've ruined too many enjoyable functions such as flying airplanes, skiing, and so on by doing it for money.....Ain't going to happen again.

This morning, at the wood store, someone asked about why hand tools vs. machines. My answer as always is it is easier and quicker if you are doing one off projects. Not necessarily better, it would be tough to be more precise and consistent than a well set up jig and machine and if you do production work the machine and jig wins hands down. But for the type of work I do, hand tools work good enough and are quicker. An example is sharpening, a well set up jig will return a consistent sharp iron but it takes time to use. By sharpening free hand, I sharpen much more often because it is quick and truth be known I think a free hand sharpened iron with a slight convex bevel is as sharp as the best jig or machine sharpened iron and has a stronger edge as well. YMMV. Another example is a M/T joint, using a saw and a pig sticker I can cut and chop the eight M/T joints for a table in less time than the jig set up and by draw boring they don't get stronger. Pretty much the same story with dovetails, four for a box I can usually saw and chop as fast, more the jig wins.

Lunch

MsOK left Friday to spend three weeks visiting her folks in Scotland. I and the critters are on our own. It's tough, I'm not sure how we will survive with out supervision. The first night Sweet Maggie Dog must have felt I was lonely in the big bed all by myself, when I awoke I had Brown Sugar sleeping next to me.

Yesterday I had to spend the whole day in the shop finishing up projects with out interruptions.....how cruel is that. Today I haven't made it to the shop yet, I've been geeking and Sam the Wonder Dog and I went to the wood store for coffee this morning. I stopped on the way back home to pick up a couple of things for lunch and had to fix it myself. Oh the pain. Photo to follow.

Truth is the critters and I miss the old broad but every once in a while it's nice to just be with the critters and my shop.

Lunch before:


Lunch after:


Black Limba Top

The TFH's top is from a small piece of Black Limba our local independent wood seller had. BTW it is nice to have a guy that finds and resales wood living just a couple of blocks away. I try to support him as much as possible.

Anyway the "Wood Database" list it as easy to work with hand tools, this piece....not so much. Lots of interlocking grain and pretty soft so tear out was a problem and the top ended thiner than planned. I expect with its softness it will need to be replaced in time but for now I like the figure.

Saturday, May 10, 2014

Table from Hell Finished

I'm walking away from the TFH, it is what it is. The only problems are the joinery is first rate, draw bored M/T joints, and because of the drawer MsOK will like it. I expect I will be dead and long gone before the TFH goes.

If ever a piece deserves Goodwill this is it yet it will be there reminding me every day just how bad a screwup I can be......kinda like a wife.


Side Table from Hell

What a build. I can't tell you how many times and how close this side table came to being firewood. It may still make the discard pile but all I have left to do is install the drawer pull and attach the top. If a mistake can be made, it was made on this table. Starting from shaping the rails, to cutting button mortices on the wrong side, to screwing up the drawer during glue up. It's all been done.

The only thing that kept me going is all were recoverable and there is some really pretty wood in the build. If I keep my mouth shut when finished I expect no one will know how many screw ups that are hidden except maybe another woodworker. Oh well, the photos to follow will not be close ups :-).

A friend sent some photos of tools in a local estate sale. I need more tools like another hole in the head but....My name is Ken and....

There are some nice Japanese chisels and a good number of wood stock planes. I'm such a sucker for both. Photos if I score.

Friday, May 09, 2014

New Philly Plane

I just received an email from Phil that my smoother is ready to ship. It should be in hand in a couple of weeks. In the mean time here's a photo:

Thursday, May 08, 2014

More TFWW

I forgot to mention the tool/bench appliance I use more than any other tool from TFWW, the Gramercy Holdfast. It is by far the best and most cost effective holdfast on the market. There my be better/prettier ones made by local blacksmiths but I will bet they will not hold better nor will you be able to buy a pair for $35 USD.

I know this sounds like a commercial but I'm always surprised when talking to other woodworkers how many are not aware of TFWW and of the great products they carry.

Tools For Working Wood.

TFWW Is a first class operation. They are a source for many excellent woodworking tools, some they produce, some they encouraged the maker to produce, and some they are the only source in the states. I use tools from all the categories in my shop almost every day. The Gramercy 9" dovetail saw is my go to saw for dovetails, their 12" bow saw is perfect for sawing the waste on dovetails and works much better than the more expensive Knew Concepts coping or fret saws. The Ashley Iles bench chisels are first class and a bargain and the one tool I would have the hardest time finding a good replacement for are the Ray Iles English mortice chisels.

Like I said TFWW is a great source for tools but they also stand behind what they sell. One of the arms of my 12" bow saw split the other day. I emailed TFWW with this photo of the saw.


I asked if it was warranty or if not to sent me the part number and a price so I could order a replacement arm. This is the email I received the next day (my email was sent on the weekend).

" Dear Ken,


sorry to hear of your difficulty. We are sending you a replacement Bow Saw Cheek today. Please let me know if it does not arrive by next Thursday.
Please let me know if I can ever be of any assistance in the future. Thanks a lot for choosing Tools for Working Wood.

All the best."

It doesn't get better.


Wednesday, May 07, 2014

Sharpening Iron

The third of Ms.OK's side tables is in the short rows, I just need to finish and fit the drawer and attach the top. This is the second drawer made, the first was square when I clamped it but somewhere between the checking for square and fitting it to the table it cocked about 6mm, it made a nice parallelogram. I have to say I spent a couple of minutes scratching my butt trying to figure a way to save it but in the end sanity won and I'm making a new drawer. Which is the reason for this post.

I hate working Poplar, the only nice things I can say about it is it's better than Pine and it takes Milk Paint really well, which is good because the paint will hide the needed pookey. Bottom line it is really hard to get smooth cross grain cuts such as when chopping and cleaning up tails and pins and it eats edges which in turn leads to more tear out. Gets a little circleur but it also leads to the point of this post.

As is usual to control tear out, one answer is a more acute bevel and sharper iron with smaller cuts. Works to a point but the bevel needs some metal behind it, the iron can only get so sharp, and sneaking up on the line a 0.001 at a time just ain't going to happen.

I usually sharpen free hand but will use a honing jig and I will use my Tormek with both the standard stone and the 3000 grit water stone if needed. When I run into a tear out problem I will usually try different methods of sharpening and different angles of bevel.

In almost every case the results are the same, the jig or machine sharpened iron may work a little better for the first cut (debatable) but after that the free hand sharpened iron with a slight convex bevel will work better and longer. YMMV.

I keep hoping for a different result but it never happens.


Sunday, May 04, 2014

New Bench

I've always built and used work benches made of SYP. As I have posted before, the first bench because I couldn't find the traditional, at the time, Beech lumber nor could I afford a commercial built Beech or Maple bench. The first bench worked so well, why mess with success, all the benches that followed have been made of construction grade SYP.  I even went so far several years ago, when I re-established my shop in Tucson, to drive to Texas for enough SYP to build my current bench.

The current bench works well and there is not much that I will change on this next build except for the first time since the building of my very first bench I'm lusting after a pretty bench. I know it's dumb. I know after I build it I will drive myself crazy for the first few months trying to protect the top from spills, cuts, glue, and marks and then old habits will prevail and in a few months my pretty Beech top will be just as ugly as my SYP one.

I know all that but....I'm still going to do it.

What brought all this on was a couple of months ago a hunk of 8/4 Beech followed me home. this was the first Beech I had worked with. I made several planes from it and damn it was nice to work, pretty too. The seed was set. I started thinking about needing a second bench (almost as much as another hole in my head) and what changes I would make on the next bench build. Anyway, bottom line, the wood store didn't have enough Beech for the build so I kinda dodged that one except I asked them to find some 8/4 sized so there would not be too much waste.

I had Friday off with not much to do so I thought I would drop by the wood store to see if they had some Walnut for the girl child's hall table wedding present (she's been married three years going on four now, no one can ever accuse me of being fast). The Walnut sucked but just as I was about to leave one of the guys said my Beech was in. Well damn, that's good news, sorta of....load 'er up.

Even better the wood store was having a three day 25% off sale (I didn't know about, hadn't read my email) and because I bought over 100 BF they gave me another 5% off. One hundred and thirty BF of beautiful 8/4 Beech for just over $500 USD. As we were loading the shop man said "that's a lot of wood for $500"....I just smiled. It's better to be lucky than good.

BTW, I still haven't decided on the base, cheap out and make it out of Douglas Fir, or go whole hog and use Ash.

Thursday, May 01, 2014

Life Comes Full Circle

Last week we drove to the Texas Gulf Coast for the boy child's 30th B-Day, with the critters, Sweet Maggie Dog and Sam the Wonder Dog. With the dogs, MsOK and my OF's bladder along for the ride what should have been a 17 hour drive came close to 20 hours each way. Still not bad, about the only thing better than a diesel's road song is the Wing's while running TBMRITS (The Best Motorcycle Road In The States), I-10.

We spent the weekend in Sargent Beach, a typical old Texas beach village....run down and waiting for the next tropical storm to blow it away. Just the kind of place I grew up in as my folks were hunters and fishermen. Only this time I was one of the OFs drinking beer and watching the kids have fun. Life doesn't change, just the players are replaced.

BTW, while in Texas I picked up my VTX1300 from the boy child, he wasn't riding it so it might as well be home. Even though I did my first Iron Butt SS1000 on it, it really is just a bar hopper which also isn't bad. It will be nice to have a bar hopper for quick runs around town.  

Saturday, April 12, 2014

Four Square

As is my want, at least once but usually several times a year my heart over comes my head and I bring out the winding sticks, scrub plane, and the big boys. This year a 700mmX200mm hunk of rough sawn 5/4 Cherry was the chosen victim.


I tell myself it is to justify the shop space devoted to the big, heavy, noisy, dust producing machines setting near the front of the shop. It's true, my production would go down even farther than the already slower than slow rate it is now but damn I would be a buff OF if I did this every day.

This board has a pretty good cup and bow but not too much wind. Here is a photo of the cup side:


I scrubbed flats on the high spots so the board would lay flat on the bench:


 and started on the bowed side: 


You may be able to to see (if you make it big) the pronounced bow on the left side and a bit of wind left to right. Worked it all out with the wood scrub plane and the old Stanley #5 with the heavy cambered iron. Then finished it off with the Type 8 Stanley #8. It is another post but damn I love me some early, Type 11and earlier, Stanley's. Put a Hock or LV O1 iron with chip breaker in 'em and there is no better plane.

With the first face flat and true, I used a #3 to put a "dip" in the middle of the edge and the cambered #5 to bring the edge square to the face.


Then finished off the edge with the #8 and marked the width to 25mm:


Two down two to go. That's where I quit for the night. I should have enough board to end up very close to 25mm or a full 4/4 board, if not it should be very close.

It is a good workout, made more so because my bench is set for working with finished boards. I've been thinking about making a new bench, just because I like to build benches. I have room for a second bench and it would be nice to have one lower for using to prep stock. If I do I might have to re-think the new bench, I had been planning on making a "pretty" bench out of Beech instead of the usual SYP. Pretty may wait. 


Friday, April 11, 2014

It's Better to be Lucky than Good

Back in the day.

Like all OFs the older I get the better I was but back in the day I could fly an airplane, not airshow or combat type flying but I could take a Multi Engine airplane and keep it in its protected airspace almost no matter what the Sim Instructor and/or Aviation gods decided to throw at me that day. But....I've always known the real difference between dying in the old folks home pooping in your nappies and the last words you speak are "Oh Fuck" heard over the cockpit voice recorder is pure blind ass luck. Skill will make you luckier but if I had to choose one I'll take luck any day.

Not quite on the the same level of living or dying but this morning I had a little pure blind ass luck in the shop. Through inattention to markings on the rear apron I chopped the button mortise and a small relief curve on the the wrong side of the apron. Here's where the luck comes in, the joints were to be draw bored so if the tenon was shorter than the mortise no big deal and with the shortening of the tenon the draw bore hole moved enough that I could re-drill the draw bore hole in the tenon and still have structural integrity, add one more bit of luck, I almost always center my tenons so flipping the apron made no difference in appearance.  Bottom line, luck saved the day along with a little age, I can't tell you how close to firewood the table came this morning.

Here is the table draw bored and glued (belts and suspenders don't ch know) waiting for the the glue to dry so I can start the drawer and top.


Don't Work when Distracted

I know better, I've learned this lesson too many times yet I'll also bet this will not be the last time for a teaching moment. Bubba don't do anything in the shop other than sharpen and clean iron when distracted by work, life, or pain.  You will screw up....no maybe, no you might get away with it this time. You will screw up.

I guess I'm lucky, if I can find the board I cut the aprons from I can recover and no one will know any different but the last of the side tables may have a back apron that matches the drawer face or what ever....I know, I designed it that way. That may be my story and I'm sticking to it.

Problem is the screw up is too dumb to cop to.....big red markings pointing this side up on both sides of the apron, who can read, I had top button mortises to chop and a relief curve to cut on the bottom....BTW the relief curve was very nicely done as was the button mortice...just on the wrong side of the apron instead of where they belonged.

This table may be moved to the unfinished projects pile for a few days, I'm too pissed to work on on it today. On second thought, I've wanted to do my annual four square a rough timber and that was going to be the next project, to prep a rough timber and make a small box with out using any of the shop's machines with the exception of the band saw. I know there is a rough Cherry board in one of the wood piles. By the time I have found it and have it trued and sized my guess is I will have worked pass being pissed. Physical labor can clear the mind of trivia.

Wednesday, April 09, 2014

Slow in the Shop

I've a high pain threshold, once flew for almost a month with a broken jaw, same story with a broken arm. The arm was a perfect example of dumb ass...needed something just out of reach in the shop, there was a ladder on the other side of the shop but a 5 gal paint bucket at hand. You know the outcome, step on the bucket, bucket goes flying...gravity is powerful shit. Anyway last week I had oral surgery and either my pain tolerance has decreased or it was more than advertised. It has kicked my ass, about all I have done is go to work, come home take enough pain meds and Gin to go to sleep and then get up and do it all over the next day.

Anyway today may be the turning point, made it home, the pain was just a little background noise and I put off the self-med routine and worked in the shop for a couple of hours. I shaped the legs, drilled the draw bore holes, cleaned up the rails, and put the table together to mark the draw bore holes on the tenons....one of the shoulders didn't pull up as tight as I wanted....my guess is one of the tenons is butting up against the other and needs to be trimmed. Whatever I ran out of gas at about that time, tomorrow I will pull it apart, fix what is binding and mark and drill the draw bore holes. It's good to be in the short rows, I'm ready to move on to a different project.

Friday, April 04, 2014

Odds and Ends

I was at the local Woodcraft store a couple of days ago and they had a Woodpecker 1281 square, one of the guys there said he had one and really liked it. What the hey, it's only money and I need a good square so it followed me home. All I can say is.....it is a damn good square. Normally I like a square that is smaller but its size is not a problem. I'm really pleased with how easy it is to use, the only problem it is marked in inches and I work in metric. Not that I use the markings on my squares but I may get a metric one to go with the fractional one. I just wish they made a 6"/150mm version as well.

I'm in the short rows on the third side table build, the tenons are slipping in with minimum work, shaping of legs and aprons to follow along with the drawer. I may finish it over the weekend but most likely it will be sometime next week.

I'm ready to get the side table off of the bench, it's that time to do the once a year rough lumber to 4 square exercise. Some day I will finish and decide to sell all the machines, I doubt this is the year, but.....it could happen.

I've the new work bench designed in mind, Beach top about 610mmX2450mmX115mm (24'X8'X4.5" for the folks still stuck in the inch, stone, foot world). made of Beech with a Douglas Fir base. A Veritas end vise, my old English #52 face vise and round dog holes. Things it will not have, a sliding dead man, square dog holes, and split top.

I had oral surgery last Friday, it has kicked my ass. The last time I had oral surgery back in 1993 I ended up with a metal plate to hold my jaw together. This time feels much the same, I hope I can grab someone by the short hairs and make them understand the problem before it gets to the metal plate solution.

Sunday, March 30, 2014

Single IronPlane

Lee Valley has offered tapered plane irons for awhile. I finely got around to ordering a couple and yesterday I made a Krenov pattern plane with a Beech stock using one.

They're pretty slick. If you are like me and hate powered routers the cutting of the mortise for the double iron screw is the most time consuming step in making a Krenov plane. A single iron doesn't need one so there is one less step to screw up.

Anyway, the first is out of the clamps. I tried it on some Cherry scrap, works beautifully, easy to set and holds the set. About the only down side is the iron is a little longer than the Hock Krenov irons. I can live with that.

It's not the best stock I've made, the mouth is a little loose but it works so I'll add it to my user shelf.


Sunday Morning

I had a root canal type procedure done Friday, it was warranty work on a root canal done several months ago. The first was bad enough, a second is a PITA. Anyway the side of my face is swollen, my jaw hurts and I've very little sleep for the last couple of nights. That's the bad news, the good is sleepless nights are usually spent in the shop and the last couple held true to form.

I ordered a couple of tapered irons from LV and they arrived just in time to make a plane last night. It is in the clamps as I type, once out of the clamps I'll drill for the cross pin and finish the wedge. It will be interesting to see how it works vs. a double iron plane made the same way and of the same wood.

I'm also sawing the tenons for the third side table. I had hoped to finish it this weekend but no joy, Friday was lost because of the root canal and Saturday wasn't a lot better and today I will lose some time taking the critters for a ride in the truck.

One thing I did accomplish this weekend was ordering the Beech for a new work bench build but most of all sleepless nights afford time to think (sometimes thinking is the reason for the sleepless night, yeah I know it gets a little circular), The thoughts de jour were how can anyone live with out making things, it doesn't have to be furniture, it could be anything but I would be lost without tools and work. A life of TV, booze, and whatever would be one not worth living.

Thursday, March 27, 2014

Mortise Chopping and the Third Side Table

I'm almost finished chopping the mortises for the third side table. Unless I change my mind today, this table will have a small drawer in a Cherry base. Top TBD.

I read about all the "quick and/or easy" ways of making mortises and it's something I don't get. While I can understand a production shop using a hollow chisel mortiser, for a one off guy like myself it is quicker and easier to mark, take chisel and mallet in hand, and just start.....tap, tap, tap, and push. Do it until you reach the end, come back and take the starting section to depth, go to the next one. Takes very little time to do the eight for a table plus it is one of the most enjoyable operations in the process of making furniture. Once in the rhythm, smelling the wood, feeling and controlling the chisel as it breaks the divot free is a great pleasures that is lost using other methods.

Forgive, it is early morning, I'm minutes away from putting on the monkey suit and heading to work, and too much morning coffee.....but I sure enjoyed the 15-30 minutes I spent chopping mortises this morning, two more this afternoon and the legs will be ready to fit the tenons.


Monday, March 24, 2014

Sharpening Old Iron

Most of the time if I can figure out how things were done 100 years or more ago that is the best way to do it now. There is always a but....Flattening the back of irons may be one of the buts. One of the reasons I will replace old irons with new ones from Hock or LV, if they are available, is the vast majority of old irons will have evidence of a previous sharpening where that day's "ruler trick" was used, whatever they called it then.

What brings this to mind is for the last couple of days I've worked, as long at a time as I could stand, to sharpen the irons of a 1/2 set of hollows and rounds. All of the backs are bellied back from the edge as if the ruler trick was used and of course there is no way to buy new replacement irons. I have a choice, use the ruler trick myself which I have an aversion to and would condemn to hell (if there were one) anyone that does that to an iron or beaver away at getting the back flat.  So far beavering is winning but as the FSM knows I've looked with lust at my small metal ruler.  May she strike me dead.  

Saturday, March 22, 2014

Random Thoughts on a Saturday Morning

I have today and tomorrow off, it's been a rare occurrence to have more than one day at a time off lately. What to do, what to do,,,,hummmm... how about something different, guess I will work in the shop.

I've the wood for the third side table rough dimensioned, it has been setting for a couple of days now, I hope it has finished doing stupid wood tricks and I can start finial dimensioning today.  Funny how things work out, from the start of the three table build I had planned on this table being mostly Red Oak but as I worked through my wood a nice riff sawn 8/4 Cherry slab caught my eye. There was just enough for four legs and a spare. With a little more digging I found a 6/4 Cherry board with nice figure  that would make the aprons. My Oak table will now be a Cherry table or at least the base will be, top to be determined latter.

I told you at the get go this would be random:

My first work bench was made of construction grade SYP, not because I was a fan of SYP or anything but because it was all that I had and could afford. This was before the internet, Fine Woodworking magazine was new on the market and woodworking was a wonderful opportunity to buy tools. If I could find 'em. BTW, Garret Wade's catalog was the major source. The bug bit and I lusted for a "real" work bench of Beech but that was just out of reach so SYP was it. As the years passed I discovered that the SYP bench did the job and I built other benches of SYP and bench envy went away. My current work bench was built of SYP a couple of years ago, that first SYP bench is still in my shop and serves as my sharpening bench, not bad for a bench built by a kid without a clue and only photos from a magazine to go by. Anyway enough ramblings by a OF, time to get to the point, well maybe just a little more digression first.

Over all these years I had never worked with Beech. A couple of weeks ago I found a nice 8/4 slab of Beech at the wood store and on a whim brought it home without a clue what to do with it. I just liked the look and feel of the wood. A couple of days later the local Woodcraft asked if I would teach a class on plane making this fall and like a fool I said I would "think about it".  Part of "thinking about it" was the realization I hadn't made a plane in almost a year and that maybe it would be a good idea to make one or two before committing to teaching a class. The wood of choice by the old plane makers was Beech, Thinking about it meet not a clue slab. I made a couple of Krenov style planes from the Beech and really enjoyed how it worked. Nice wood, heavy, hard as a rock but is amazingly sensual with edge tools. Beautiful look and feel with chisels and planes.

OK, I can now get to the point: Working with the Beech got me to thinking about how nice a Beech work bench would look and how nice it would feel to work on. BTW, looks has never before been high on my list of important attributes for my work benches, still isn't too high but damn the Beech feels good and it is pretty. I have room for another bench, I would like a second bench and I have a couple of mods I would make if I were building a new bench.

It may be a done deal, Beech top for sure, maybe a Beech base but most likely choice for the base will be Douglas Fir. BenchCrafted leg vise with Criss Cross and the hand wheel replaced by a "Johnson Bar", and as always I go round and round on the tail vise....will it have one or not. If it has a tail vise I expect it will be the Veritas Quick Release Sliding Tail Vise with associated dog holes only going about half way up the bench. I think I will drop the spilt top, the split gets in the way of holdfast hole placement and I think I will keep the sliding deadman. Oh, and the dog holes will be 3/4" round, not square.

Going to the Veritas tail vise and round dog holes has little to do with functionality but mostly with ease of build. Both the wagon vise and square holes work well but not enough to warrant the extra work. Same with the split, great for holding tools while working but I find I'm always wanting a holdfast dog hole right in the split and there are other ways to hold tools. I might bias the split more towards the back of the bench but most likely it will be a one piece top. I never use the dogs on the left half of the bench and if one were needed there are other ways to make a "stop", so the left half dog hole will go as well.
Size and height will remain about the same.

The leg vise on the current bench has been replaced by a metal vise until I can replace the hand wheel with a Johnson bar. My hands are not as strong as they once were and the wheel is too difficult to close and open tight enough to hold work.

Here is a photo of the current bench:
Sunday, March 16, 2014

New Wood Stock Plane

MsOK only caught me once today, she needed help planting a tree. Other than tree planting duties, most of the day was in the shop or running back and forth to Woodcraft.

The morning was spent doing the finish work on the side table, afternoon on making a plane.

A couple of weeks ago I found some nice Beech, I've never really worked with Beech but it was clear and straight so I thought it was worth a try. My first impression while moving the board to the saw bench was "damn, this stuff is heavy". After cross cutting a 8/4 200mm wide board and thinking about resting about half way through was it is hard too. Then after cutting out the blank, came the chopping of the mortise for the chip breaker screw head, the Beech works really nice but it is hard and dense, my back may never forgive me, but I can see why it has been the wood of choice for traditional plane makers.

Anyway, cut to the chase: Beech makes a really nice plane. The one I made today has a 45mm Hock O1 iron and chip breaker. The stock is just under 70mm wide X 400mm long, and is about 45mm tall. After the build and before applying BLO I trued the edge of a Cherry board with it and it worked beautifully.

I think it will be a keeper.


BTW, one of the nice things about making your own planes is like this one can start out as a 400mm (about 16") plane but who know where it will end up.....anywhere from staying around 400mm to a Jack, or even a smoother, about the only thing I doubt I would do with it is make it into a block plane.


Second Table Update

It's finished, in the sitting room, and MsOK has given a thumbs up so I guess it will hang around for awhile. The kids and/or Goodwill dodged another one.

I finished the base, Cherry and Sycamore, with Tried & True and rubbed out with Staples Crystal Clear Wax. The Red Oak top also with Tried & True but rubbed out with Staples Dark Brown Wax. The Staples Dark Brown Wax over Tried & True has become my favorite finish for Red Oak.

With the top attached the table looks better, still not my favorite but it doesn't make me want to take an axe to it. At least not today.


On to making a couple wood stock planes and roughing out the wood for the third table. That plus walking the large, hairy, smelly, critters and a Woodcraft visit for morning coffee should finish my one day off this week. Monday starts another week of Groundhog Days.

BTW, there ain't nothing like a couple critters to bring joy into your life even if they are large, hairy and smelly or maybe it is because they are. Sweet Maggie Dog is my shop dog, Sam the Wonder Dog is a little bit of a wuss and just stands at the door peeking in hoping for a raw hide bone.

Sweet Maggie Dog:


Saturday, March 15, 2014

House Keeping

I found a Red Oak board that was perfect size for the side table , it is in the clamps soon to be removed.

I went back to the metal vise yesterday, hung it outside the legs. The leg vise looks right and the metal vise is butt ugly and I like the way the leg vise works but.....damn there is always a but, my hands are no longer as strong as they once were and with the wheel on the leg vise is just too hard to get the leg vise tight or loose. I've been trying to find a "Johnson bar" attachment that will fit the vise screw but no joy so far.

The change of the vise caused the bench planning stop to be in the way, so it needed to be removed. I found a couple of knobs with 3/8" studs to make an adjustable planning stop. I drilled a couple of 15/16" holes in the left end of the bench, tapped 'em with a 3/8" 16 tap, chopped a couple of 45 degree channels in a piece of scrap Oak and now my planning stop is out of the way, on the end of the bench and adjustable.


If I can stay out of MsOK's radar range tomorrow, I have some very nice 8/4 beech for an upcoming project, there is enough for me to cut off one edge for making a few planes. By tomorrow night I may have a new wood stock smoother and jack.

Friday, March 14, 2014

Second Side Table finished Except for Top

The second of three side tables is finished except for the top and is sitting soaking up a coat of Tried & True.  It's a nice table, sturdy as I can make one but I'm not satisfied with the wood, look, or something, not sure what I don't like but....It doesn't make me want to sit with a cup of tea and just look. Oh well the next one may and MsOK is happy with it, so I will just go on down the road.


Glue Up

I did a little better planning with this table and made sure there was enough "meat" on the legs to draw bore the tenons. It sure makes glue up time easier, a little glue, a whole lot of glue, who cares. No hurry to get it in the clamps, just do a joint, drive the peg into the draw bore, go to the next one. When you have run out of holes to peg stand it up and check for square. As you can see from the clamp it was about 4mm out across the diagonals. Pull it square and walk away. The joints on that sucker will not fail, tight tenons, loose tenons, hide glue, yellow glue, makes no never mind she is locked together.

I let the boss pick, dark top, light top. She picked dark top. Then it was Cherry or Sapele. Looks like the second table will have a Cherry top. Of course the needed Cherry board is about half way down the middle stack of wood. I'll deal with it once back from work.

I used both wood and metal planes to finish the legs. Irons in each were freshly sharpened and chip breakers set the same. I used the metal planes to remove the bulk and wood stock planes to finish. Taking the same shavings, the wood stock planes will leave a much smoother surface, almost slick, not a clue why but they do.


Tuesday, March 11, 2014

Wood Stock Planes

I'm in the short rows of the second side table build, chamfering the tenons and shaping the legs before work today and I hope to get to shaping the aprons and chopping the mortises in the aprons for the top hold downs tonight. Anyway, while using my wood stock planes I started thinking about wood stock vs. metal.

I use my metal planes more than the wood stock planes, but there are many uses where the wood stocks are better mostly because of lighter weight and the ease of working in both directions. An example is cutting bevels and chamfers. The light weight when planning a vertical board and being able to work both directions make it a no brainer as to which plane to use. Shaping beveled legs is another example, after cutting with the band saw, rough shaping with the spokeshave, and then smoothing with one of the wood stocks is much less a workout vs. doing the smoothing with a #3 or #4. Add in the weight of a modern Bedrock pattern plane like a LN for smoothing and there is no need for the gym afterwards.


Another big advantage of the wood stock plane is cost.  Some scrap wood and a LV or Hock iron with chip breaker (if you are really cheap, a recovered iron and chip breaker from a junk Stanley) and you have a very good plane for $40 to $50 USD vs, $100 to $500 for a new Bedrock style plane.

While I use the metal planes more, mostly because they can be faster and a little less fussy, if I could have only one type, wood stock or metal, I think I would end up with wood stocks. YMMV.

BTW, after making and shaping many Krenov style planes I've settled on a shape that works for me. Very simple almost Japanese style but taller and not as wide. With that shape I have almost infinite options as to hand placement, number of hands, and direction. Examples of my current shape are at the top of the Blog, reposted here. 


Monday, March 10, 2014

Second Table

When you are older than dirt sleep does not come easy.

I had social duties this weekend which limited shop time, almost zero Saturday because we were having folks over for dinner. Sunday was a little better because we were the dinner guests but bottom line, not much time either day. Here's where being an OF has its benefits, just before 01:00 my eyes popped open, I looked over at MsOK, she was watching a movie on her iPad. I have a 12:00 show today, plenty of time I might as well go to the shop.

I had finished fitting one of the tenons Sunday just before the command performance and had seven more waiting for me. Things are going well, the tenons are fitting off the saw, unless I screw up one of the remaining two (finally getting around to my first cup of coffee) the table could be clamp ready before work today. I doubt it will, I can always find something to distract but.....


Here is one of the Sycamore aprons ready to saw off the tenon cheeks:


Ready to fit:


I would like to give Lee Valley a shout out. A couple three months ago they came out with a set of large tenon saws with a introductory price of $75 USD each if you ordered both the Rip and Crosscut. Being a sucker for saws I ordered the set. I've saws that cost three, four times as much that do not saw as well. They are really good saws, I doubt you could find better at any price point. BTW, it's the same story with their smaller saws as well, I find I reach for the Carcass and/or one of the dovetail saws most of the time, leaving the "better" saws in the till.

Saturday, March 08, 2014

Mortise Appliance

A reply to yesterday's pig sticker post asked about the reference to a "mortise appliance". I used the term "appliance" a little tongue in cheek because it is so simple. The basic idea is from Robert Wearing's book Making Woodwork Aids & Devices and is mentioned in Schwarz's Workbenches in the chapter on Maintenance & Appliances.

I've added a board making it "L" shaped to move the work piece off the edge of the bench but the principle remains the same. It gives an easy way to clamp the work piece on the bench top over the leg.

The appliance/jig in the vise:


Holding the work piece:


Like many of the most useful bench appliances, simple, easy to make and is used almost every shop day. It and my bench hooks live next to each other within easy reach under the bench.

Friday, March 07, 2014

More on Pig Stickers

I know broken record and all that rot but....for mortices deeper than 25mm on one off work there ain't nothing that does 'em better nor faster than a pig sticker. I'll use bench chisels for shallow mortises and they work fine but once they go much deeper than about 15mm it's a pig sticker.

The ones I chopped last night were all over 30mm, had eight to chop and all were finished in much less than an hour, and I'm a slow worker, need my tea don't ch know. Once in the mortice, depending on the wood, I can remove a chip 3 to 4mm X 25 to 30mm with out working hard. A couple or three taps, a push against the bevel to remove the chip and on to the next chop. Doesn't take long and best of all no set up other than marking and putting the mortise appliance in the vise.

Anyway, cut to the chase.....I chopped the mortises for the second of the three side tables last night. I'll dig out whatever is going to be the rails after work tonight and unless MsOK has other plans for me I should have a table by Monday....Anyone want to make a bet.


Wednesday, March 05, 2014

Second of Three

I milled the leg blanks for the second of the three side tables for MsOK. My plan as of now is to make this one with Cherry legs and top and with Sycamore aprons. Of course that can and likely will change as I work on the build.

I went to the wood store yesterday to pick up some Walnut, Maple, and Cherry. Everything but the Cherry was slim pickings and even the Cherry only had a couple of 8/4s that were good enough to bring home. When I asked about the lack of stock, I found out they had a big sale last Saturday...for some reason I was asleep at the wheel and didn't know about it....Oh well I was working and would not have made it anyway.

I did find a couple of nice 8/4s Beech boards, short only 8' long but wide, may use them for the third table instead of Maple. While there I noticed a Frankinplane Stanley No 113, I've been looking for one for awhile but the nice looking ones on eBay are a little high to take a chance on and the others are just too rough looking. My experience with eBay is a 30 to 40% "burn" rate even when you know what to look for and even though you can send it back by the time I pay shipping and the hassle it isn't worth it....just eat the 'burn" and add it to my knowledge base. Even though the 113 was a Frankinplane and needed a different iron and chipbreaker the rest was in good shape plus the price was right.

Once home with it, I dug through my stock of spare plane parts and found a good iron and chipbreaker. I also discovered the frog screw was missing a washer and was sticking through the frog touching the iron, the washer was a little harder to find than the iron and chipbreaker but I used one from a junk No 3.  Once together it worked beautifully.

The milled Cherry leg blanks:


The Stanley No 113:


Sunday, March 02, 2014

Finished Table

I've oiled and waxed the Skunk Table and it is in the house for MsOK's approval. Now the question is does it remain in the house, go to either the girl or boy child,  friends, or Goodwill. Whichever, I expect there are few things that give the satisfaction of making something using traditional methods and materials that with care should last for centuries. Knowing the joinery is sound and tested, the design while breaking no new ground is also good. This is the time of sitting and looking, knowing mistakes were made but seeing they were not fatal. People that do not make things can not know this peace.


Saturday, March 01, 2014

Skunk Table

The Side Table is out of the clamps. After clamping up last night my attention turned to figuring out a top. As I looked around the shop and at the wood stack a Cherry panel stuck next to the bench caught my eye. I had glued the panel up months ago for a failed project, the rest of the project had been recycled into other uses but the panel had just sat there. Hummm....I said to self, that might work, a quick check with the tape and the panel was just big enough in length with a little to spare in width.

I cut it to size and beveled the edges last night. This morning I pulled the base out of the clamps and placed the panel on top. The Skunk Table was born. Jury is out, tops are easy to make and change, I think I will live with this one for awhile, maybe make a couple other panels just to see which I like but......for now it is the Skunk Table.


Friday, February 28, 2014

Making Progress

Making progress on the side table. I like the design, simple but should be strong. The added curves lighten the look so it isn't too clunky. I still haven't decided on the top, I may make up a couple or three and pick one after living with it.


There is a wood sale at our local Woodcraft Saturday, Joe brings in truck loads of wood from Ohio a couple of times a year, his lumber is rough cut and true size and usually the price is fair. I'm low on Maple and Cherry and I think there is only one small chunk of Walnut in the stacks. I expect to be slightly poorer Sunday.

I'm in the middle of my annual training at work, what a PITA. This is inside baseball but the FAA has changed and added to the training requirements (so what's new, they are always changing the training requirements) and in addition to training my line I'm attending my own G.S. and Sim training. It's really ugly, I'm old, blind, can't hear, and I think at the speed of the company computers. Oh well, by next week it will be over and I will not have to do it again until this time next year.  

Thursday, February 27, 2014

Starting to Look Like a Table Base

The legs and rails are fitted, every thing fits well and the shoulders pull up tight. I need to make a few small adjustments, shape the lower legs and the rails, run a bead on the rails and maybe the legs, make the pegs and drill for draw boring.

I've some really nice quarter sawed Sycamore that might work for a top but it may end up with a Sapele top. I'll make that decision after the glue up so I can live with it for a few days.

I almost forgot about chopping the mortices for attaching the table top. It is kinda like framing a building, the framing goes fast, it is the finish work that takes all the time.