Thursday, August 31, 2017

Marple Chisels

I have a bad jones for Marple firmer or bevel edge chisels with boxwood handles. The London pattern handles are nice as well but the simple straight Boxwood handles tickle my chisel G-spot.

Anyway I've been on a quest to find some in good shape and having some luck. Here is a small 1/4" firmer that showed up a few days ago pictured with some other bench chisels to give an idea of size and differences. From top to bottom are a Narex firmer, a modern 750, a Swiss Made Carpenters chisel, the Marple 1/4" firmer with Boxwood handle, and a LV PM v11. The first photo is of the chisels in profile view and the second in plan view.


I've several more Marple Boxwood handled chisels on the way, I expect they will arrive while we are in Oregon. They will be a nice 'welcome home'.

BTW, I get a shot in the spine tomorrow to relieve some of the pain. If it works as advertised it should take care of most of the pain until I'm back in Arizona...Surgery to follow. 

We leave for Ft. Bragg, CA Saturday morning then after a couple of days in Ft. Bragg on to Brookings, OR for a few days and then working our way up the coast. The Motorhome has a full load of whisky and wine with food filling every cabinet, even a few beers in the Fridge, DVDs and Sat Dish ready and bench and tool box loaded. It should be a good trip. 

ken 


Monday, August 28, 2017

Portable Work Bench and Toolbox Loaded

The tool box isn't filled yet but I wanted to see how everything would fit. It does very well leaving good room to carry other needed "stuff".

On the PAX side bin I have the toolbox, the two legs, chop and parallel guide, and the vise backer board.


The driver side bin has the slab, tool tray, stretchers, and in the wire basket wrapped in a towel is the screw.


I wasn't too worried about the fit because I measured carefully but you never know for sure until you fit it in. It fits :-).

Now to fill the tool box and we will be ready for Oregon.

Sunday, August 27, 2017

Japanese Style Tool Box

The last item to be finished of the portable workshop is the tool box. I finished cleaning it up last night, as much as it will be "cleaned up" it is a tool box don'tchknow, and put a coat of Danish Oil on the outside. Today comes the hard part....Deciding what tools to take. Too many and the tool box becomes unwieldy and too heavy to be "portable", Too few and either the "work arounds" take the pleasure out of making or even the project becomes dead in the water.

The list leads off with a couple of planes, I expect a #3 and a #5 with two cutter sets. A chisel roll with 1/4" through 1" plus at least one paring chisel. A couple or three saws, I have not decided between Japanese or Western, there are advantages to each. Marking stuff, squares, knifes, winding sticks, tapes, rules, and so on. Rabbet plane, plough plane, router plane....Anyway you get the idea. A couple of bench appliances like a bench hook also need to find a place as well.

Of course all this may be unnecessary because the bench and tool box may end up being a table and accessory to hold the whisky glass every evening .

Anyway here are a couple of photos of the tool box, click 'em to big 'em:


With lid open and tool tray:


See you guys on down the road,

ken


Saturday, August 26, 2017

First Project on The Travel Bench


I had to find space in the shop last night to give it a go before packing the bench away in the Motorhome. I can't tell you how impressed I am with the bench. Because the slab is only 50mm (2") it is different than my French/English bench with a 100mm (4") slab but not in a particularly bad way, it just has a different feel. I went through most bench operations while making the tool tray for the Japanese style tool box. It worked perfectly, rock solid and stable for all operations. I even enjoyed the leg vise, I've never been a leg vise fan but the wood screw makes it work well. Here are a couple of photos of how I left the bench last night. BTW, not a lot of open floor space in my overcrowded shop, this was about the best I could find.

The tool tray is waiting my picking up a piece of 1/4" plywood for the bottom so it can be glued up. Once that is done it will be time to put together a tool kit. I do not want too many tools but too few is just as bad. I figure a #5 and a #3, a chisel roll (1/4 through 1" and a paring chisel), a panel saw, two back saws (may replace the Western saws with a couple of Japanese saws), mallet, squares and marking tools, a set of bits, the cordless drill is already in the Motorhome's tool bin, winding sticks/straight edge, sprit level, two Ark stones and a strop, a couple of tapes and 6" rules, two hold fasts, on the fence are a plough plane, a block plane of some sort and a spokeshave.

I expect I will drill a couple of 3/4" holes in the hind leg for hold fast storage and then it is finished for now.

Here is the bench as I found it this morning:


One more from the other end:


I expect we will be on the road heading Northwest by Friday. Bridger may ride with us as far as ClearLake CA.

ken


Friday, August 25, 2017

Deep, Short, Narrow Mortises

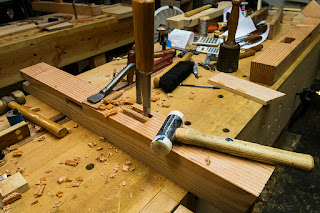
I know, I know, I'm a little weird but I enjoy chopping mortises most of the time. I find a Zen like state.....tap, tap, lever, tap, tap, lever, repeat until everything that does not look like a mortise is removed. I can do the eight or sixteen needed for a table almost as fast as they can be done by machine. The one exception is a short, narrow, and deep mortise, like the one I had to chop for the vise garter last night. It was almost enough to make me buy a mortising machine. If there had been two of 'em I expect the AmEx would have been whipped out and I would be finding room in my overcrowded shop for another machine.

By the time I got to within about an inch of the promised land instead of chips all I could remove was dust or a stuck pigsticker. After an hour of whack, whack, try to lever and getting either dust or a stuck chisel I dug out the drill and drilled out most of the waste, paring out the rest to clean up. What a PITA.


Moravian WorkBench Finished

Talk about working without a net. We leave for Oregon one week from today and all that is left to do is a little "clean up" on the bench and make a tool tray for the tool box. All done with a insane work schedule which BTW I'm working every day up to leaving. The joinery on the bench is not the prettiest I done but it is solid. My excuse is the whole thing was done in a rush....That's my story and I'm sticking to it.

I'll pick the Motorhome up from the RV shop this afternoon and then the moment of truth. Did my measurements work or did I have a brain fart and nothing fits in the proper storage bins. I do have a backup plan, I don't want to use, but if nothing fits in the bins I can carry it all in the Honda Fit Toad.

BTW, if you look behind the fan the tool box is standing on end.


See you guys on down the road,

ken

Wednesday, August 23, 2017

Vise Screw Is Here

The Vise screw arrived late yesterday afternoon. We leave for Oregon in just a little over a week, things are getting down to the nut cutting with little time left. That is the bad news. The good is everything is falling into place and the work bench with tool box may make the trip.

The vise chop is almost finished, all that is left is shaping and glueing up the parallel guide. After that boring the screw hole in the vise backer, making the mortise for the parallel guide in the vise backer and mounting the nut. And the fat lady will sing something like "I want you to love me like you loved me when you really did".

No photographs because the camera battery is still DOA.

The tool box is finished other than a sliding tray.

Parts for the Motorhome are to be drop shipped by Friday....And he sticks the landing to cheers of the crowd. Like I have said many times it is better to be lucky than good.

Photos when I can,

ken

Monday, August 21, 2017

Waiting On The Vise Screw

The vise screw is scheduled for delivery sometime tomorrow. While waiting for the screw I'm putting together a Japanese style tool box to transport the needed tools.  That may make carrying around a work bench worthwhile or maybe not..

It is a simple build, I'm sure I'm making it more complex than needed but that is the Western way :-). I cheated and dug out and blew all the dust off the old biscuit joiner. BTW, it took a couple of minutes of butt scratching to remember how to use it. Finally figured it out and used it for the end butt joints. The cut nails should add a little to the strength but I suspect they will be more decorative  than anything else.


I'll tongue and grove the bottom slats if time permits.

I have not decided on a sliding tray or not, right now I'm leaning toward yes.

Labor Day is barreling done on us and I have no days off before we leave for Oregon.

ken

Saturday, August 19, 2017

Installed Planing Stop on The Portable Bench

Today I installed a planing stop and drilled the dog holes for the holdfasts. Those two are the last jobs other than installing the vise. ETA for the vise screw Is sometime Tuesday, until then I'm pretty much dead in the water.

Thinking I was going to be moving most of the bottom group of lumber in the wood storage pile to get to the wood for the vise chop. I had MsBubba standing by with gloves on her hands to help find the best board for the chop and maybe save my back and a trip to the E.R. After moving the scrap barrels out of the way what do I find but the perfect 8/4 hunk of Beech on top of the lumber. All I had to do was bend over and pick it up.  As I have often said...."It is better to be lucky than good".

Here is the vise chop board in place:


Because the Fujiflim X-Pro1 battery is dead and the charger is in the Motorhome (still in the shop waiting for a part) the photos are coming from my iPhone. Making them look right in Photoshop is more work than I want to do. Sorry. Also the dog holes really are vertical in spite of their looking like they are drilled at 45 degrees in the photo. Anyway here is the bench top with the installed planing stop and a row of dog holes.  


Looks like the bench may be finished in time for the Oregon trip.

ken


Friday, August 18, 2017

Outdoor Kitchen with Bar

The outdoor kitchen's bar is finished. Not a lot of time do do anything but post a couple of photographs....Gotta go to work in a couple:


MsBubba did a great job on the bar tile.

ken


Thursday, August 17, 2017

The Joy of eBay

The Motorhome is in the shop for it's annual fluid change and prep for the Oregon trip and of course the camera battery has died and the charger is, you guessed it, in the Motorhome.  Long way around to no photos with this post.

I seldom buy off eBay because, let me count the reasons, burn rate, hidden defects, hidden defects, and burn rate. I've been looking to add to my firmer chisels, both bench and paring. Just because I do not buy I do look and a couple or three days ago there was a Weatherby 1/2" firmer with a paring blade that didn't look too bad. It was obvious the seller had done some grinding to clean the chisel up some but the big factor from the photos I could see the back of the iron was pit free.

I bet you can tell where this post is going. While grinding the gunk off the seller dubbed the back. Two hours of work on the back with my 120 grit Atomia and about 1/32" off the bevel and I have a usable chisel. I would have paid twice as much for the chisel if the seller had just removed the gunk and left the grinding to me.

BTW, if you have a Tormek you owe yourself the new model 77 jig. The Weatherby chisel is a perfect example why. Many older firmer chisels do not have parallel sides, the tip will be wider than the tang end. With the model 77 jig it is no problem, tighten and loosen a couple of screws until the blade is square and you are set.  There are other improvements as well, damn fine jig.

ken

Monday, August 14, 2017

No Joy On The Screw But The Firmer Chisels Arrived

First impression of the Narex firmer chisels is good, the chisels have nice balance, the backs, of at least the 26mm, are very slightly concave. Less than 3 minutes on the 400 Atomic and it was flat. The bevel and back honed up quickly on the med India and Hard Black Ark developing a nice burr quickly and got a beautiful 'polish' on one of the hard JNAT's.

They may be keepers,

ken

P.S. Ralph you shouldn't have but It looks like a keeper and thanks. I love tools, it is a sickness but there is nothing as satisfying as holding and using a old tool. The feel of the wood and the fit, how it can be perfect with nothing extra but everything needed to do it's job. The 'old ones' had much knowledge, it is a shame so much has been lost.

MRI Today

Not much done today. They gave me a "happy pill" so I could stay in the MRI tube long enough to get the needed image.  Damn it is a loud sucker, it would help if they gave you a countdown clock so you would know how much longer. Anyway bottom line I was an adult and did as told with the help of meds.

It's after 1700 here and still no UPS girl with the vise screw. I'm also waiting for a set of Narex firmer chisels. Tracking claims they will be delivered before 2100 maybe both will come.

What's with no one making classic firmer chisels? I've been watching eBay, damn I hate to buy off eBay, for a while because new is almost impossible to find. I did break down and buy a "buy it now" 1/2" Weatherby firmer a couple of days ago. It cost almost as much as the 1/4" to 1" set of Narex firmers. I hope the Narex are as good as most say they are because buying off eBay is such a crap shoot.

I of course need more chisels like a new hole in the head but I've a real jones for some firmer chisels....Why?  Because, just because. My story is I'm tired of the cuts on my left hand index finger from my paring chisels but the real reason is because

ken.


Sunday, August 13, 2017

More Portable Bench

It is getting close both to time to leave for Oregon and finishing the bench in time to take it with us. If the vise screw shows up next week finishing should not be a problem. All that is left is to install the vise, a day to a day and half max.....said the fool.

The tool tray is installed, the hunk of wood on the front is the back support for the vise, it needs the parallel guide mortise chopped, the screw hole drilled and the nut installed.  The rest will be stuff done to the chop.

When we return I expect this bench will be MsBubba's and I will build another for the Motorhome. Nothing wrong with the bench it is solid but because of use of construction grade DF and rushing to finish it is as ugly as granny panties.

Of course I could get distracted by some other project....squirrels!


ken

Wednesday, August 09, 2017

A Side View of Bench

I wanted a side view of the Bench on the blog:


I have to go in today to finish the check ride started last week. Once home, if I'm not too pissed to work, I'll take the bench apart and clean up the base and stretchers. I'm still thinking about painting the base, if I do the first step will be a coat of shellac. 

ken

Tuesday, August 08, 2017

Slab is Attached

I set the Slab a few minutes ago. I had to give it a go so I clamped a makeshift stop to the slab and grabbed a hunk of Sapele scrap and the #5 Jack. Not bad, in fact damn good. Bench was rock solid until I started testing to see when it would slide. I did make it move a little but I would never take a shaven as thick even with the scrub plane. Weight does make a difference, you could push with a Jeep and the English/French bench wouldn't move but it also takes a derrick and a PTO to lift that sucker.


More clean up, have I ever told you how much I dislike working with construction grade DF, make a tool tray for the off side, and install the vise once the screw shows up. The fat lady is warming up backstage.

Monday, August 07, 2017

Tormek SE 77

A quick note touting the new to me SE 77 square edge jig. I've had it on the shelf for several months and had not used it. Mostly because it has a couple of extra knobs and with my attention span lately reading a "how to" even as short as the 77's was more than my feeble brain could handle.

Turns out those extra knobs will allow you to adjust the grinding angle (bevel angle is still adjusted by projection) and can help with putting on a camber. Tormek has changed the design of the clamping mechanism slightly and claims the jig can be used with short, thick, and even non-ninety edged irons like Japanese ones. That I haven't tried but would be a good feature if it works.

The new 77 is heavier and slightly thicker than the old model 76 and seems easier to set the iron against the 90 stops (could be my imagination).

Might as well cut to the chase....If you have a 76 is it worth buying a 77? My answer after using it is an unqualified yes, but as my old friend Ken would tell me often "...(I) don't like my money very much".

The 77 jig fixes two drawbacks of the SE 76 jig. While I haven't used the 90 degree adjustment, the lack of it was one of my major heartburns with the old SE jig. Sometimes you just couldn't get the edge to grind 90 degrees. Mine always seemed to grind heaver on the right side of the blade. I'm sure technique had a lot to do with it but it will be nice to be able to "zero" it out.  BTW, I ground five chisels last night and none had a heavy side. Go figure. The additional cambering authority is by itself worth toting the note.

Add in a 10" CBN wheel with the SE 77 and the Tormek really makes a good grinder, good enough I'll keep mine and use it.

Sunday, August 06, 2017

Base Together

The base is finished, it just needs trimming and clean up. I'm impressed, even without closing the box, slab not installed,  it is rock solid.

I still think I will paint it with a red undercoat and black over coat of milk paint, both to hide the numerous mistakes and mostly the butt ugly DF.

As I have posted before, the design and engineering of the little bench is impressive. From a wood workers view point it is a fun build with brindle joints, through mortises, and housed dovetails along with the tusk tenons and each joint is there because it is the best joint for purpose. If I had all the time in the world to think about and design a portable bench I don't think I could come up with a better design.

Better construction for sure but design not likely.

BTW, the next one will be better and  it is such a fun build I expect there will be several more.


ken

Saturday, August 05, 2017

Long Stretchers Finished

I've finished the long stretchers. To finish the base I need to fit the small dovetail stretchers just below the long ones then clean and trim the base parts before gluing up and pegging the sucker. I'm still waiting on the vise screw but it is not needed to mount the slab or do the tool tray.


Of course there are decisions to be made: Do I drink whisky and chase MsBubba around the pool this afternoon or buck up and finish the bases with the shop temps running well over 38C....life is full of difficult decisions.

Beavering Away

I made it to the shop early this AM not that it has helped much. Sweat is pouring and breaks are often. But whatever, the bench is taking shape. I finished  chopping the second tusk mortise and fitting the tenon key. After a short "cool down" and posting of the morning results I'll get back in the saddle.


Yesterday afternoon was a waste. I had nothing booked until the last minute one of the suits realized another instructor and I were in our "late grace Month" and we had to be checked now. The significance of "late grace" is if I'm not checked before the end of August every client I trained durning the months of June, July, and August will have non-compliant training and would have to be flown back to be re-trained and re-checked on our dime. Nothing to do but monkey suit on, drive to work, meet up with the other instructor and the TCE that is checking us....All bitching about everything because all of us were wasting a day off. 

The other instructor went first and I flew right seat because he had more things needing checking. He flew a pretty nice ride considering we seldom touch the controls. After he finished we broke for coffee and another round of bitching about the unfairness of life and all things great and small. Back to the Sim, climbing into the seat was interesting because my back didn't like how I did getting into the right one and liked my technique of climbing into the left seat even less. 

We started getting switches switched and buttons pushed when my right seater looked up and the visuals were 'flickering' , enough to make him want to toss his cookies. After much back and forth, and trying different scenes, day, night, dusk, dawn, landing lights on/off, good WX, bad, different airports we gave up and wrote it up. Now the Sim is AOG (aircraft on the ground) and is down until the techs can find and fix the problem. Several hours later after more coffee and bitching the Sim Techs threw in the towel and we all went home.

One more thing, the tech at the MRI shop called during all this mess to inform me that even though my insurance approved doing a MRI the didn't approve paying for one done by the shop the Doctor sent me to. The Monday MRI is cancelled and I'm pissed. It is really difficult to get me, MsBubba, and the MRI machine all in the same place at the same time. Now I have to start all over. 

The day did end on a high note with the pool, whisky, MsBubba and of course Sweet Maggie Dog dropping her ball on my head so I will throw it back into the pool...Life isn't all bad.  

ken 

Friday, August 04, 2017

First Tusk Tenon Key Finished

Three more to go. Once the last three keys are finished I will clean up the inside faces of the legs and glue and peg those suckers together.


I can't claim to be in the short rows but I can see "em.

ken

Thursday, August 03, 2017

First Fit of Moravin Bench

There is still a lot to go but I wanted to see how it will look...Not too bad.

There is a set of small dove tailed stretchers to fit near the bottom of the legs. The tops of the legs will be planed flush across and the pegs to hold the top will need installing. All the tenons need trimming flush or to length as will the slab and someday glue and pegs to keep it all together.


 After that a tool tray to fill out the top and a vise once the screw arrives.

The good news: You don't have to squint too hard to see a bench.


Wednesday, August 02, 2017

One Long Stretcher Mortise To Go

One to go, it will have to wait until tomorrow. Shop is already too hot too work, I'm sweating all over my tools. Here in the desert usually only two thing will rust your tools; sweat and blood. So far this morning I've dodged the blood.

Anyway I like what I'm seeing so far and what little research I've done on the Moravians indicates the bench may work very well. This style bench was a job site bench, unlike the English who tended to build their benches on the site the Moravians made their job site benches portable.

Botton line I'm looking forward to giving it a go. Here is a photo of one long stretcher in place, waiting for the last mortise for the other side.


BTW, major butt scratching before chopping the third mortise, much back and forth to insure the mortise was placed correctly. Simple but, I've been known to screw it up.

Old Fart medical, skip it. It is boring as granny panties but it gives me a place to note what is happening.

For the last three months I've had constant back and leg pain for most of every day. worst early mornings, on the 1 to 10 scale hitting 7 to 8 at times for an hour or two after getting out of bed. After a couple of hours I could move around but still in low level pain with no strength in my legs. This was every day with no escape other than whisky and sometimes a couple of pain pills until this Saturday. I started a course of Methylprednissolone and within a couple of hours all pain disappeared and I've been pain free now for going on four days. I know once the course of meds is finished the pain is likely to return but....It gives me hope that it can be controlled without surgery. MRI this coming Monday should tell the tell.

Sorry for the digression,

ken

Tuesday, August 01, 2017

A Photo of Chopping the Double Mortise

Title says it all. A quick photo of chopping the mortises before chopping out the middle web.


I'll use a 1" chisel to chop out the middle and then the 1 1/2" bench chisel to finish up the ends and maybe smooth the walls a little.