Friday, November 09, 2018

Stretcher Fitted to Front Base

I've started the joinery on the bench base. First is the upper stretcher, then the middle mortise and tenon, and last the bottom dovetail. If MsBibba doesn't spot me and forgets I'm in the shop I may complete the leg joinery this weekend. I doubt it will happen but it could.

When I first started making Moravian benches I thought the three different joints on the base was an affection, maybe even showing off but after living with several benches I've come to appreciate the thought that went into and utility of the joints. I know broken record but the sum of the Moravian bench is greater than the parts.

Upper stretcher fitted to the front base:


Camera angle makes it look cattywampus. Everything is pretty square for just one stretcher fitted.

ken

Monday, November 05, 2018

Tomorrow

Please vote tomorrow if you have not already voted.

When I checked the stretcher blanks this AM one was a little off square. I'm not sure how it happened but whatever, MsBubba to the rescue. We ran it through the joiner one more time. It will be slightly smaller than the other but no big deal as each is individually fitted to its leg assembly and the stretcher mortise needs to be loose with about 6mm-10mm of vertical play.

For the most part the legs are marked out, I just have to look at them for awhile, long enough to "see", as Don Juan put it in "Don Juan a Yagui way of Knowledge", before I make the first cut.


ken

Sunday, November 04, 2018

More Bench Build

Slab is finished. Legs and stretchers are trued and dimensioned. The scut work is done. With almost every build, at this point I swear this will be my last bench. Who knows, someday it may be. Whatever, the enjoyable part of the build is next. There is still heavy stuff to move around but for the most part it is a one person job. The joinery is fun, a bench isn't furniture. it is a tool and if a joint isn't perfect as long as it is strong who cares. Same with a dent or two, after a month or so in the shop they will be joined by many others.

I'm taking a break, it is a beautiful Fall day in the desert and the Day of The Dead. I expect MsBubba and I will try to find a Mexican Cafe with a patio. If there are not too many cerveza consumed I'll start marking out tonight.

ken 

Saturday, November 03, 2018

Bench Build

The leg blanks are glued up and sized. The stretcher blanks are in the clamps. Tomorrow I'll size the stretcher blanks and maybe even start on the joinery. I'm working the backside of the clock next week so it may be slow going. There is no real hurry but I'd like to get that sucker off my plate, it has been hanging around the shop much too long.

Stretcher in glue up:


I had to enlist MsBubba to run the stretcher halfs through the jointer. Tomorrow after they come out of glue up I'll really need her help with sizing the stretchers. That's a good part of the reason I spent so much time trying to find suitable 12/4 stock.

I enjoy building benches but the parts sure get big and hard to handle in a one man shop. If anyone wants to learn to build workbenches have I got a deal for you :-).

ken

Thursday, November 01, 2018

Shop Changes

Moving the 10 lbs. around the 5 lbs. space.

I've been trying to figure out what to do with the table saw for some time, I hope to never see a full sized sheet good in the shop and I've a track saw to break it down if one ever shows face. That makes the table saw obsolete except for cross cutting and a hand saw can do most of the cross cutting. The problem is my saw is a pretty good 3 HP cabinet saw and if I sold it the return would be pennies on the dollar.

For now I refuse to give it away but it sure has taken up some valuable real estate in the shop. A couple of days ago I was trying to figure out how to run the workbench 7' stretchers through the jointer. The only way was to move the jointer. That lead to moving all the machines to new places in the shop and the table saw with rip fences removed pushed against the west wall where it can still be used to cross cut if needed but very much out of the way and taking up little space. BTW, those are the workbench leg blanks leaning on the table saw and the workbench slab against the north wall.


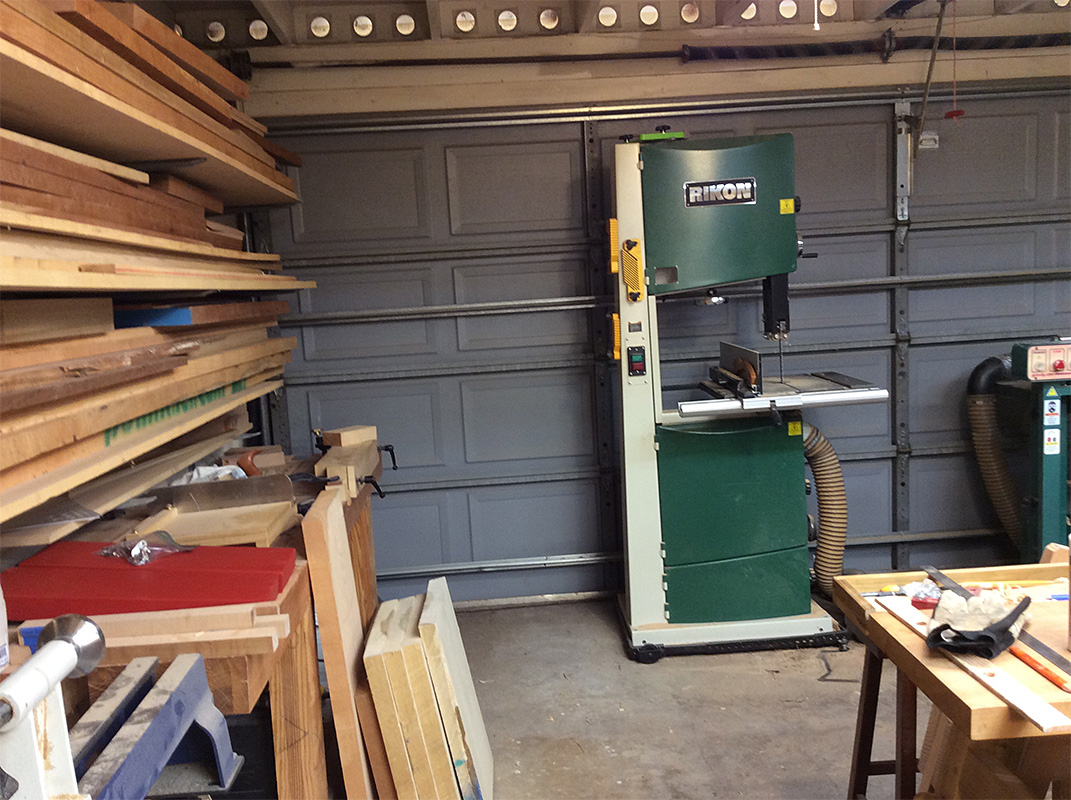
From left to right at the front of the shop so the outfeeds go out the door are the bandsaw, planer, and jointer.


I'll give it a go this morning as I finish dimensioning the workbench legs.


The local Woodcraft is having a parking lot boot sale on the 17th. I hope to clear more "stuff" out of the shop then. Some really good tools will be on my table. I expect to take the portable workbench and the shave horse along with a lot of good chisels, some joinery planes, a bench plane or three, a dozen or more good hand saws, marking gauges out the kazoo, and so on. It is time to clean out the dust catchers. I don't expect either the shave horse or the bench to sell but the shave horse was a prototype and one of my next projects is to build another but "prettier" one and there is not room for two shave horses in the shop.

ken

Tuesday, October 30, 2018

Stick Chair Finished

The stick chair has been moved from the shop to one of the sitting areas. I'm not sure where it's home will be, could be the kitchen table or maybe one of the bedrooms. Bottom line it is out of the shop and on to finishing the new workbench.


I've lived with MsBubba too long and have caught some of her ways. This morning after looking at the options for jointing the long stretchers I started moving machines. Just like MsBubba and the furniture I didn't really change much functionally but the machines are all in different places.  The big change is the tablesaw is against the West wall and out of the way. Photos when it is all hooked up.

ken

Monday, October 29, 2018

Saguaro

A week or so ago Jonas over at Mulesaw asked about Saguaros. This is a is a partial answer. Our house is on the edge of the Saguaro National Park so we are surrounded by Saguaros.

Here is a photo of our back garden Saguaro. A few years ago the top developed the "leans" and a year or two later it fell off and took one of the arms with it. I figured it was a goner but has recovered and is adding new arms.


Saguaros are very slow growing a 10 year old plant may be less than two inches tall yet by the time they put on arms around 100 years or so they can be 40 or more feet tall.

Saguaros define the Sonoran desert, it is the only place they grow. Basically if you see a Saguaro you are in the Sonoran Desert and if you do not you are in some other desert like the Mojave. Not totally true but close enough. They feed and shelter many of the desert critters including the two legged kind. Our saguaro has been the home of a nesting pair of Gila Woodpeckers for years.

Saguaros can live a couple of hundred years and after the die they are still useful. From the Desert Museum's web site: "After the saguaro dies its woody ribs can be used to build roofs, fences, and parts of furniture. The holes that birds nested in or "saguaro boots" can be found among the dead saguaros. Native Americans used these as water containers long before the canteen was available."

They flower in the Spring and are pollinated by birds, bees and the lesser long-nosed bat. Native Americans celebrate the start of their growing season with a drink made from Saguaro fruit.

A photo of a Saguaro skeleton MsBubba has covered in lights, I doubt you can make it out but there is also a "boot" in the middle of the shelf to the left of the skeleton.


One more photo. Looking to the West Northwest towards the Tucsons and Saguaro National Park from our back garden.


Click 'em to big 'em,

ken

Sunday, October 28, 2018

Shop Sized Moravian Bench

Back in July or August I made a slab for a new shop sized (non-portable) Moravian style workbench. After finishing the slab I ran into a couple of problems that stopped progress. The first was getting my wood for the base, I wanted to use 12/4 Ash. The local wood store said the Phoenix store had it in stock and would deliver with the next shipment. The next shipment no joy but it would for sure be on the next one. Yep you guessed it, the check is in the mail. By this time I was getting ready to spend September in the PNW so everything slid until we were back from Oregon. Once back I'm back in the chase for 12/4 timber for the base after a week or so of back and forth with the wood store I quote "The Ash is too checked and ugly to sale but we do have some 12/4 Hard Maple at $13 USD a BF instead. Ain't no way I'm using $13 USD wood for a workbench base, glue up or not.

Cut to the chase. They had some 8/4 Beech on sale for just under $5 USD a BF, so it needs glue up, for $ 7 USD a BF I can handle that. Just under $400 USD I have my base plus some spendles and legs from the cutoffs. I've broken the Beech down and will start glue up of the legs and stretchers this afternoon. If work and honey dos do not interfere too much I should have a new bench in a couple or three weeks.

The chair drying between coats of paint with the bench parts in the background:


The chair will need at least two more coats of red, that's the bad news, the good is milk paint dries almost as fast as it is applied.

The stretcher and leg glue ups will take a couple of days to complete. I do not have room or clamps to do 'em all at one time. BTW, my bench building days may be ending soon. Wrestling bench sized timber kicks my butt anymore, I ain't as strong as I once was. That said, I expect I have at least one or two more benches in me and I want to replace my butt ugly shave horse with a nice one that will break down for easy transport.

ken


Wednesday, October 24, 2018

Levi's Chair Gets A Big Brother

The title says it all.


I'm going to live with the chair a couple of days before deciding on paint or oil.

ken

Tuesday, October 23, 2018

Chair Is In Glue UP

The chair is in glue up. I haven't decided on paint or not. Four different woods and a seat that is a little difficult, my guess is it will end up painted. The only real question is is the chair worth the time and effort it takes to paint.

It has been a great learning project but there are some design elements that could be done better. Again I think I will live with the chair for awhile before deciding. Whatever, building stick chairs is a hoot. I love the process and even better I love the results.

If I paint it will be milk paint with a red or black undercoat and either black, gray green, or blue finish coat.

Here is the chair in clamps:


One more:


I found a hunk of 8/4 Poplar the other day that should yield at least five seat blanks. the next one will have thinner back spindles and I expect I'll form them with a drawknife and spokeshave. I like the octagon legs and expect the next chairs will continue with them. Soon I'll add a crest rail and arms, maybe the next chair or the one that follows.

BTW, I sat on it before glue up and it is really comfortable.

ken

Wednesday, October 17, 2018

Legs Dry Fitted

I have finished the legs and have dry fitted them into the seat. They look good, angles are not perfect but close enough to be no problem.

Chair from the side:


From the front:


The seat still needs some shaping and of course cleaning up. After shaping the seat I need to make four sticks/slats for the back and a crest rail. This sucker is close to being in the short rows.

I'm still waiting on my 12/4 Ash for the new bench base. If the Ash isn't available I think Red Oak is and is close enough in price to the Ash to be a reasonable substitute. The bench's slab standing in the corner covered in dust is bugging me. It's time to fish or cut bait.

Once the bench is finished, unless MsBubba has other plans for my time and as always if she does "yes dear" is the correct response, will be another stick chair made with a Poplar seat and painted with contrasting base/finish milk paint. In the queue as well is a stick table/desk. I'm not sure which will be first.

Plans are being finalize for a trip to Houston over the Winter Solstice to honor the most important day of the year (MIDOTY), MsBubba's birthday, with the kids and so I can meet the newest Grandpeanut. I'll take tools and bench with us so I can repair the changing table that was damaged when shipped.

A busy end of the year.

ken 

Tuesday, October 16, 2018

Boot Sale

Our local Woodcraft had a parking lot Boot Sale last Spring. It was successful enough they agreed to having another this Fall. I'm hoping they will continue with a twice yearly schedule. This Fall's sale will be November 11th, it's on my calendar and I have the day off.

I expect to offer a few large items as well as the usual small hand tools. I hope to rid the shop of several dozen hand saws, 20 or 30 chisels including a set of LV PMv11 chisels. I've had the LV chisels for several years (early adopter) and have never developed any love. It's a shame because they look good and I'm sure the iron is good but they don't feel right in hand plus they are the only chisel handle I've ever split. LV replaced the chisel with no question but one of the other chisels has a hairline crack. Anyway they may be great chisels but not for me.

I will also try to reduce my stock of dust collecting joinery planes and maybe even a bench plane or two. Marking gauges, what do you want pin or cutting? I haven't decided if any of my surplus sharpening stones are in danger. I expect not but it could happen. The large items will be mostly photos and I do not expect to sell 'em but showing a photo never hurts. Whatever, someday, hopefully soon, I wish to rid the shop of the table saw and the jointer.  The two large items I will take to the boot sale are my prototype shave horse and the portable workbench.. The shave horse works great but is as ugly as granny panties and the portable workbench because I need a surface to show and maybe demonstrate some of the tools for sale. I'll put a price on the bench in case someone is interested.

The shave horse will be priced to go because I want to make another (prettier) one and there's no room in the shop for two. The workbench I would sell if offered enough to make building another worthwhile but this one is close to perfect and I doubt it could be improved on in any significant way.

BTW, I'm sure I've told you how much I enjoy working on the portable bench :-). The folks that originally designed the bench knew what they were doing. It is pared down to the essence of "workbench". There is nothing extra but nothing missing and it is incredibly stable for its mass because of the design of the base. When I first built the bench I did not understand or appreciate the subtlety of the design I just wanted a small portable workbench and the Moravian bench is that. Only after working on it did I began to understand the art and knowledge of the original builders.

A gratuitous photo of the bench in use just because I can:


ken


Sunday, October 14, 2018

Shaping Legs and Seat Blank

I've been supervising a new instructor for the last few days. Before that, for the last two weeks I was on the late PM to early AM shift. I actually like the shift for about a week. No suits in the building, just do your thing and go home, but after a week the lack of good sleep starts to affect me and by the end of the second week I'm just bone weary. To jump from two weeks of the night shift to a week of supervising is cruel and unusual punishment. Woe is me, enough kvetching for now but if you read about an old fart Tucsonian eating a pistol next week there could be a good stash of tools for sale.

I've been in and out of the shop today between taking care of Casa Chaos and MsBubba.

The new chair's seat blank is mostly ready for the legs.


And I'm shaping the leg blanks before cutting the tenons.


The jig does a good job of holding the legs for shaping and with a sharp iron in the #5 it is pretty quick work. I've thought about making a similar jig to hold the leg blanks for running through the planer and may yet. Of course I'm always in the middle of shaping the legs when I think about making the jig and by that time it is easier to just continue doing it by hand.

The seat blank is Honey Locust and it was a pretty gnarly board but it was close to the right size and had been hanging around the shop for a few years. I haven't a clue what will happen when I knock the legs home. There is a good chance it will split, oh well shit happens. If it does I'll go find a nice hunk of Poplar or maybe Red Oak, clean the hide glue off the leg tenons, and start over.

Friday, October 12, 2018

Making Crossgrain "v"

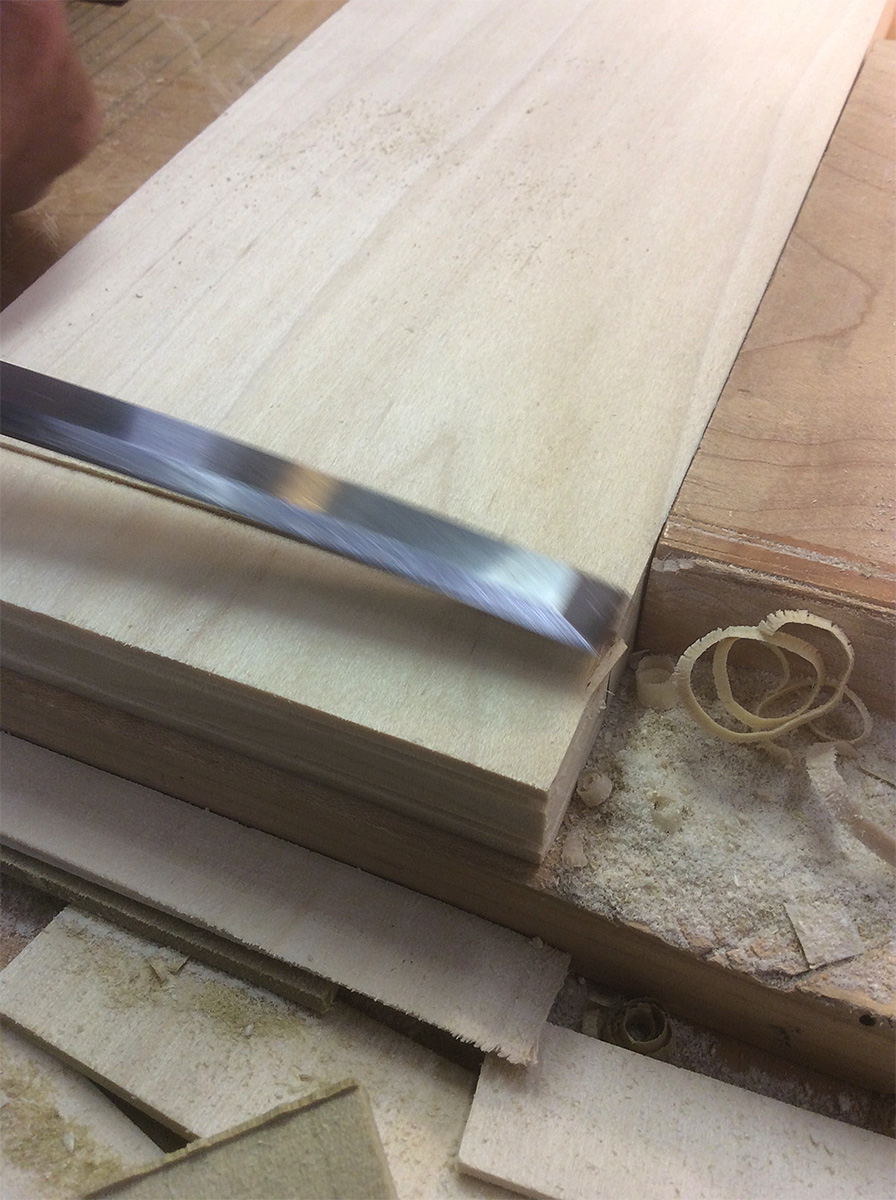
Ralph over at Accidentalwoodworker posted about making a "v" for sawing cross grain. I've found the best way to make the v-cut is to use a long paring chisel and cut cross grain vs. with the grain, Here are some photos of the process:


Next:


Finish:


It makes a much cleaner "v" than doing it with the grain.

ken


Monday, October 08, 2018

Seat Blank

The Honey Locust seat blank is out of the clamps and I marked it off using the seat template I made Saturday. After marking I trimmed the blank close to the line with the bandsaw. Now it is drawknife, spokeshave, and #5 to smooth the edge. I expect I will put a heavy chamfer on the front and side edges, undecided on the back edge, before moving on to drilling and reaming the leg mortises.

The seat edges being trued and smoothed:


I need to go through the wood pile to decide on the leg blanks. Right now I'm thinking either Beech, Red Oak or even White Oak. The Honey Locust in the wood pile's grain is too swirly to make good legs. Once the leg wood is picked then the next decisions are the shape, round, octagon, or tapered and which way, and done with the lathe, plane, drawknife, spokeshave, or some combination of one or more.

All the options are half the fun because there really isn't a correct one. 

BTW, have I ever told you how much I love the portable Moravian bench with the Lake Erie wood screw vise? For as light as it is and portable, it is almost as stable as the main bench. The only time the main bench is better is when sawing crosswise across the bench. Then you can feel the weight difference.

I sure will be glad when the woodstore comes through with my 12/4 Ash so I can make the base for a shop sized Moravian bench. The wood screw is here, the Beech slab is finished. All I need is 30 or so board feet of Ash to finish that sucker off. A couple of weeks max if I can get my hands on the wood.

ken

Sunday, October 07, 2018

Chair Stuff

Levi's chair is out of the shop. For what it is I'm happy with it, I think it meets most of my design criteria. One last photo:


Last night I glued up a seat blank using some 8/4 Honey Locust. I've not a clue if it will be a good seat or not but....

Ipad and Messenger are not playing nice with the glue up photo. Whatever, once the seat blank is out of the clamps I'll use this template to size and mark the seat.


While waiting for the seat blank to come out of the clamps it is "shop clean up" time. The tool room is a total mess and will take most of the day. The main shop mostly needs dust and shavings pick up with some organization.

The local Woodcraft should have a parking lot "Boot Sale" soon so I expect a good part of today's clean up will be spent loading boxes for the sale. 

ken


Friday, October 05, 2018

WorkBenches

I've built a few and worked on more.

As I wander around the net I often come across posts of new builders fretting about their build. What kind of bench, what wood, which vise and where to place 'em, and so on. All understandable but also a waste of time for the new builder. Just build something that is strong, cheap and fast to build, then go to work making things. After working on the bench for awhile things about it will drive you to barking at the moon and then it is time to build another. If you are lucky and pay attention to your needs and not to bench building posts and books, after a couple of cycles you will end up with a bench that works.

The posts from new builders are what they are. The posts that bring out my inter curmudgeon are the ones with photos of the new completed bench that has a different type vise on each corner, is wide as an aircraft carrier, has rows of both round and square dog holes, has a sliding deadman on each side and a bench jack standing by, and is finished so slick you can see your face like in a mirror. And even better only took two or three years to complete.  BTW, almost every single "feature" of the bench combined with all the other "features" would have me barking at the moon faster than the first build it "strong, cheap, and fast" bench.

OK rant over, it will soon be time for my afternoon meds.

ken

Tuesday, October 02, 2018

Levi's Chair

I finished up Levi's chair last night and just put on the first coat of Danish Oil. There was a moment or two thinking about using Milk Paint to finish, maybe the next one.


The next question is how to get the chair to Houston before he is too big to use it.

ken

A Couple of Photos From The PNW

One more photo of the portable workbench in the wild. This one just outside Trinidad CA. I've removed the vise and vise backer board and I'm making an adjustment to the backer board. The vise screw backer board parallel guide mortise (whew that was long) was a perfect fit in the desert of Tucson, on the coast of California not so much. I had to take a couple or three shavings off both sides to get it to function. After the adjustment it was smooth as silk.


This one is Ugly Dude sitting on a log near Cape Lookout OR with Sam the Wonder Dog and Sweet Maggie Dog is digging for rocks in the background. BTW, this may be Sam's last trip. The harness is there so I can help him up the RV's stairs. I wish I had a video of the whole process, sad but at the same time funny and shows just how much heart dogs have.


Click 'em to big 'em.

It was a great month but it is also good to be home. I finished Levi's chair last night and will put some finish on it today. Photos after the first coat of finish.

ken

Monday, October 01, 2018

Back From PNW

We made it back to Tucson midday Sunday. It was a good trip with few problems other than the usual tech problems with cell phone coverage, internet, and Satellite TV (tall trees).   Two small glitches with the motorhome, the outside door handle stopped working at the second fuel stop in Needles CA. and on the way back between Barstow CA. and Needles CA., it was a very gusty and windy day, a gust hit the motorhome from the side and blew off the over door retractable awning. My guess it was 50 to 70 knots strong. It was a good thing no one was following closely or near the motorhome when it hit.  BTW, ain't nothing as fun as a 400 mile day keeping a motorhome between the bar ditches on a gusty/windy day.

The door problem was fixed by getting the ladder out of one of the bins and going through the drivers side window, opening the door from the inside and then removing the latch system. For the rest of the trip we had to use the deadbolt to hold the door shut, no real problem just a PITA.

I didn't have much use of the portable workbench this trip, while it didn't rain a lot there was mist and fog most days. I did set the bench up in the Fort Bragg CA. site for a couple of days and did a little work on a small box (didn't finish it). Anyway here is one of the few photos of this years portable bench in the wild. Notice the whisky glass on the tool chest. It was a very good day.


Because of WX and fire we didn't stick to plan but were pretty loosey goosey and in the process found a new favorite place to go and one not so favorite place. Grants Pass OR while not too bad is not one we are likely to re-visit. Trinidad CA. is great. we stayed there instead of Brookings OR. because of smoke and liked it so much we spent a couple of days there on the return trip down the coast. It is a beautiful place with a great bay for kayaking and even has a nude beach. We didn't go to the beach, no need to cause the locals to need eye bleach.

We made it as far North as Cape Lookout OR. kinda cold and misty the whole time, MsBubba loved the WX and the hiking, the dogs and I spent our time walking the beach, chasing tennis balls, and Maggie finding rocks to throw at my feet. The Cape Lookout area is a beautiful part of the Oregon coast.

If you know anything about RVs you know Quartzsite AZ. Quartzsite is the winter boondocking capital of the world, at least according to Google. I finally got to spend a night in Quartzsite on the way home. It was a little early for all the snowbirds so a place for the night was easy to find, maybe  someday we will show up mid Winter.  

ken 

Sunday, September 09, 2018

Reading Unplugged Shop Posts

I’m on the road for the month of September with just an iPad for a computer. For some reason I can’t post replies. Whatever, Jonas’ post on cutting brass had me LMAO, wives are like that.


MsBubba and Maggie playing on the beach near Trinidad CA.

Ken

Tuesday, September 04, 2018

Blogger isn’t Letting Me Reply On The iPad

Blogger is being a PITA. If I can’t figure it out there will be no replies until we are back in Tucson.

Ken

Saturday, September 01, 2018

On The Road

Posting and replies will be spotty for Sept.

ken

Monday, August 27, 2018

Levi's Chair

Progress is slow on the chair with most of my free time being spent on getting the motorhome ready to leave Friday/Saturday for Oregon.

I've turned a couple of sticks for the back to see which I like best. One is pretty thick but with a taper. The other is thin. Of the two I believe the thin one works best. The only question is can the thin one stand up to a growing four year old boy. I expect we will see.


BTW, I could turn the thick stick around and have the thick part of the taper on the bottom, and it is a thought.

I still haven't heard from the woodstore about my workbench Ash. I need to give them a call.

ken

Wednesday, August 15, 2018

Chair Bottom Finished

Levi's chair base is finished. I'll start the four sticks and top rail this afternoon after work, maybe, if it isn't too hot to work in the shop.

It may be a little high for Levi, if it is it is easy to cut down. I will include instructions on "how". If things do not get too crazy with work, critters, getting the motorhome ready for the Oregon trip and keeping Casa Chaos from falling down I could have the chair finished in a few days. Will not happen but I could.

Chair base, leveling the legs:

ken

Monday, August 13, 2018

One Key Installed One To Go

One key in place, working on second:


Once the second key is glued in I'll clean up the seat and fit, wedge, and glue the legs in place. If I can find a few free moments this week the chair will be finished. Only problem, finding those few free moments matching up with a shop cool enough to work in.

ken

Sunday, August 12, 2018

Keys For The Seat Bottom

Because the seat is a glue up I'm keying the two halves, belts and suspenders dontchknow.


Next up after finishing the keys is cleaning up the seat and knocking the legs home. Once the legs are fitted the back slats and comb will finish the chair,

Work is trying to force my retirement or at least it seems that way. I've six days in a row starting Monday with one off followed by ten in a row. As much as I enjoy my work I don't enjoy that much of it in a row. I don't mail it in and after a line (usually three or four days depending on the Regs the crew is training under) I need a couple of days to recover. It ain't been happening.

All that is to say even though I'm near the short rows it may take a couple of weeks to finish the chair.

ken

Saturday, August 11, 2018

Progress On Levi's Chair

The legs, leg tenons, and seat mortises are done and fitted, kinda of. The left rear leg is a little off, I should be able to go in with the reamer and fix it enough so it isn't too noticeable.

I need to shape the seat, make four spindles and a crest rail to finish. Here are a few photos of the progress so far:

Setting up to ream the seat.

Checking progress.

Seat and legs.


As always click 'em to big 'em,

ken

Friday, August 10, 2018

Chair Leg Blanks Finished

Four leg blanks finished and ready to shape the tenons on the lathe.

Even with the short legs and the woodie, it is a sweatathon this time of year. There were a lot of water breaks getting to this point.


I can't say I'm in the short rows but just four small back spindles and a crest rail to go before fitting it all together.

BTW, the little portable bench is amazing. Solid as a rock, perfect height for planing, and the wood screw leg vise holds better than any vise I've used. It is a joy to work on.

I haven't heard from the woodstore about the Ash for the new bench but Lake Erie Toolworks emailed the wood screw for the vise is on the way. We are only a couple of weeks away from the Oregon trip so even if the Ash shows up next week I don't expect the bench will be finished before the middle of Oct. or latter.

See you guys on down the road,

ken

Tuesday, August 07, 2018

Ten Pounds In A Five Pound Box

In the never ending quest the move the deck chairs, to fit the ten pounds in a five pound box, I shoved the machines around the shop this morning.

A couple of things set me off. First the band saw and the planer are my most used machines and both had restricted movement areas. So all the sweating and huffing was to clear up the work space around the band saw and the planer. Also I expect to replace the Ricon bandsaw with a 18" Powermatic the next time the Powermatic's go on sale. If that happens, the table saw may go away fixing some of the space problem.

A couple photos of the new arrangement. Dust collection and electrical are not hooked up yet because I want live with the placement for a bit first.


I hate to give the table saw away but it is used very little and it takes needed space. The shame is if it is sold I might be able to take MsBubba out for a good dinner on the sale, maybe.

ken

Shaping The Legs

I'm shaping the leg blanks for Levi's chair before taking them to the lathe to turn the tapered tenons. I've found the best tool for shaping the legs is a ECE Jack plane with a light camber. It is light, easy to hold, and can be set to take good chunks of wood each pass without turning your arms to noodles.


I'm not sure how the chair will look when finished. The seat is near full size but the legs will put seat height at about 250mm vs. 460mm for an adult chair. Whatever, it should be bulletproof. 

ken
   

Monday, August 06, 2018

Tormek SE-77

Simple changes can make big differences. In my love/hate relationship with the T-7 sharpening system most of the hate came from the SE-76 jig. It would not handle thick irons or ones without parallel sides and if anything was out of alinement you just had to live with it. In addition it was (almost) impossible to camber an iron.

The new SE-77 jig addresses almost all of those difficulties. Best of all it makes putting a camber on your cutters very easy. Here is one of my Jack plane's iron fresh off the Tormek.


Most of the time I do not grind but this iron had a couple of deep chips and after few minutes on a 120 grit diamond plate and no real progress it was off to the Tormek. As you can see a nice smooth camber and was quick and easy. Also it gives a very good base for sharpening by hand until I do another deep chip.

For some time I've had one green eye and one red with the Tormek. Stop/Go, sell it or not. The Se-77 changed all that, it would be a hard job to pry it out of my cold dead hands now.

ken

Sunday, August 05, 2018

New Welsh Stick Chair for The Grandpeanut

The boy child and his wife just had a new grandpeanut, a girl type named Abby Ray. She's a cute little sucker but I guess all grandparents say the same. Anyway the first grandpeanut isn't much of a peanut anymore. They grow fast.

With two of 'em they need another chair for the table and chair set I made a couple of years ago. I started on it this morning. This one will be a small Welsh stick chair. What I expect will happen is the old chair and table will be passed down to Abby Ray and sometime in the next year I will make a new table and a couple more chairs for Levi that are a little larger than the current ones.

Here are a couple of photos drilling the mortises for the legs.

Down the sight line:


The resultant:


Click 'em to big 'em.

I've really starting to like building vernacular furniture and even better I like looking at and using the builds. As a hand tool wood worker stick chairs, staked tables, and boarded chests just fit my house and my eye.

ken

Saturday, July 28, 2018

12/4 Ash

I took the motorhome to the shop yesterday so they can look at a couple of squawks before we leave for Oregon. The woodstore is just a few blocks away from the shop so I stopped by to see if there was any word when my Ash would be delivered. They said maybe the first week in August. I'm not betting on it but if it is I may be able to finish the bench before we head to the PNW. If not then the bench build could stretch into Thanksgiving. I hope not but it could.

ken

Package of Love From UK

Several days ago the ten Marples bevel edge chisels from the UK showed up in the mail. They are pretty much what the photos showed and what I expected. The Boxwood handles are dark from use, there is plenty of blade life left, and the steel is in good shape. Whoever owned the chisels took good care of them.

That person was either or maybe both a carver and "old school". The backs have never been flattened. You can see a very slight bevel on the back of each chisel. Carvers are known to sharpen that way as are old school wood workers. I've heard Richard, The English Woodworker, talk about his father lifting the chisel a few degrees when working the back of his chisels. He usually says something like "I can't stop the old man from doing it".

I've a decision to make. Either I waste maybe a mm of steel to rid the back of the slight bevel or I just continue the practice. At this time I'm pretty agnostic. I will say I've plenty of flat backed chisels to use.

A photo of the ten:


Because I was out of chisel rack room I had to find someplace to store 'em. After a bit of butt scratching I figured if I moved the long chisel rack down a bit and the short chisel rack up just a little there would be room for another rack between. Because the racks were going to be so close I put a floor and guard on the two short chisel racks.

Photo:


A photo of the bench wall with the tool chest. I know it doesn't look like it but I've cleaned up the storage and moved almost all the tools that are not in daily or frequent use somewhere else.


As always click 'em to big 'em.

ken

Thursday, July 19, 2018

Slab Is Done.

Damn it is a heavy sucker. I'm a few years older than when I made the main bench slab and with it I did the whole thing single handed. This time I had help and the two of us old farts wasn't enough I had to call on help from the neighbor. Even with three it kicked our butts.

Whatever it is done and stacked in a corner out of the way until it is needed to fit on the base. For now I'm dead in the water until the 12/4 Ash is delivered.

After this afternoons sweatfest a break may be good. I just hope it isn't too long.

A photo of the slab standing in the corner:


ken

Wednesday, July 18, 2018

Slab Glue Up Done

The last of the slats/slabs are in the clamps. Towards the end those suckers were heavy for just one old fart to move around. MsBubba made it home just in time to help with the final glue up and moving everything in place to clamp. What a difference four hands and arms make.

Tomorrow a friend will help me take the slab out of the clamps, check it for wind and run it through the planer until everything that is not a slab is removed.

In the clamps:


ken


Outer Slabs

One outer slab is out of the clamps and one is in until I return from my AM Sim. Those suckers are getting heavy, or at least they seem to to this OF. Truth is they are slightly less than 70 lbs. each.

This afternoon I'll join the two outer slabs with the middle slats to complete the bench top. Tomorrow I've asked a friend over for whisky and a little help running the joined slab through the planer to finish it off.

Now I just need to get my hands on the 12/4 Ash to start the base. I would like to finish before the Oregon trip but who knows, depends on the Ash and vise screw.

One glued up outer slab and one ready for glue up:


MsBubba leaves tomorrow for Houston to "help out" with the new Grandpeanut. The dogs and I will be without adult supervision for a few days. Extra dog biscuits for all and I might be able to have a big bowl of sticky rice :-).

ken