Tuesday, May 17, 2016

Jnats

I've posted much of this on SMC but here it is in Blog form.

After all these years of always going back to Ark Oil Stones as my goto honing and finishing stones. These times they are a-changin', I've mostly made the transition to Jnats for honing and finishing. As with all things wood and especially with all things sharpening....YMMV.

When sharpening I try to look past shinny and instead look at the final scratch pattern and the edge produced. Honing and finishing on Jnats give me the best I've been able to see of both and I've been like a country song with sharpening stones, I've danced with most of the pretty girls.

Japanese Natural Stones in addition to having an organic beauty can be very easy to use with less mess and they tend to not be "fussy", not needing flatting as often as synthetic water stones. The biggest problem with Jnats is they can become an addiction with the user always wanting just one more stone...."life would be perfect if only I had that Nakayama Asagi I saw on So's web site". BTW, the Nakayama Asagi from So is in the mail.

My Sharpening Bench set up with Jnats:


From left to right. In the stone pond is a Karashi set up stone. If I had to guess it is about equivalent to a 1000 to 2000 synthetic stone. On the Karashi's right is a Takashima Ooban finish stone. The Takashima is not a very hard stone, from Lv 3.5, but produces a beautiful slightly hazy finish with a very attractive Jigane (the soft iron backing the hard steel). To the right on the bench are two more Jnats. the first on a holder that says 1200 is a Aiiwatani Kiita finish stone that is a little harder than the Takashima. Both the Takashima and the Aiiwatani give a finish much like a 8K to 10K synthetic stone. The last stone is a Tsushima Nagura, it has been painted with a traditional black Cashew Lacquer on all sides and the bottom. Again this is just a WAG, as it is on all the stones, the Tsushima is about a 5K to 8K stone.

The following photo is of three chisels, the two outer chisels were honed and finished on Jnats, the middle chisel was honed and finished on Sigma Power Ceramic stones. You may be able to see the difference in the Jigane between the chisels. The light on the left chisel obscured the Jigane but it is almost exactly the same as the chisel on the right. What you can not see is the scratch pattern, while the Power Ceramic sharpened chisel out shines the Jnats it does not have as fine a scratch pattern.


The Jnats work beautifully on Western chisels as well, here is a AI chisel next to a Japanese chisel both finished on Jnats. IIRC the finish stone was the Takashima Ooban.


As always....Click 'em to big 'em.

ken


Wednesday, May 11, 2016

A Journal Entry

Just a warning, todays post is a journal entry. Before Blogs I kept a journal, not every day but often....Kinda like I Blog. Lately the Blog has been more about woodworking than anything else because I've been doing woodworking more than anything else. On to today's journal entry.

The last three or so weeks can best be described as interesting....And that is where I will stop. I wrote a lot of boring stuff no one but me would care about and it was too boring even for me. The short version: The last three weeks have been spent dealing with a series of un-related health issues. None of which were serious but enough to keep me from working. As a list: Type 2 diabetes, passing a Kidney stone, Tearing my right biceps tendon, and last a week of bronchitis that has kicked my butt. 

I've a journal entry so a couple years down the road and I try to remember when and what happened I can see a date and a list.

Maybe something on the tool chest lid or another tour of the shop in the next post, hell even a post on sharpening would be more interesting. Whatever, some bright object will catch my eye. 

BTW, the 'Wing is in the shop, I figure with my soon going part time I might have time to do a couple of RTE's. The Dirty Fat Girl may run TBMRITS (I-10) once more. 

See you guys on down the road,

ken 

Tuesday, May 10, 2016

Tool Chest Lid

No photos because, who knows....The stock for the tool chest lid had been setting on the end of the main work bench for a couple of days waiting for me to finish moving the shop fixtures around and making room on the benches to work.

I'd marked the stock out several days ago so all that was needed was room and setting up to start chopping the four mortises. I decided on 3/8" mortises mostly for two reasons, the mortises were going to be 50mm deep and I find a deep 1/4" mortise a real PITA to chop. May be technique but there is a big difference between chopping a 1/4" vs. 3/8" mortise. The only problem was the rails are not quite 4/4 leaving the cheeks a little thin. BTW, the rails are Cherry......I bet you can see what's coming from a mile away.

Sure 'nuff about 40mm into a 50mm mortise, the last of the four needed, the cheek split. I must have looked at it for five minutes working my way through the 5 stages of grief before the first "fuck" followed by several more. After finishing the required cursing and then looking at the split, it wasn't in an area of high stress and it was clean and attached, I opened it up, squirted some glue in the gap, clamped that sucker down, and went to Costco to graze on the free samples and to pick up something for dinner.

When I took the clamp off this morning, even knowing where the split is, I can't see it. Once coffee time, scratching doggy butt, and getting Msbubba out the door is done, I'll carefully remove the last 10mm of the mortise and then start on the tenons.

The panel is ready for glue up.

Sunday, May 08, 2016

New Configuration AKA 10lbs "Stuff" in a 5lb Shop

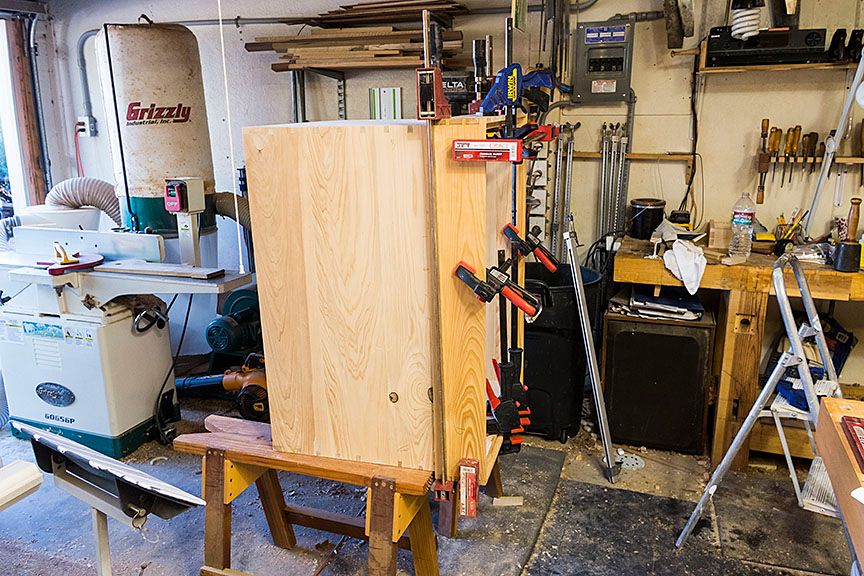
One of the reasons for the marking gauge post the other day was I needed to move some of the shop fixtures around to make room for the new tool chest. Today was the day.

I had plans to make all new fixtures, even picked up some Cherry "shorts" at a shop fixture price to do the job but as I looked and measured I figured out that the old fixtures would work with just a little rearranging. Faster than a speeding bullet I was on it before I could change my mind.

Here are some photos of the rearranged shop:


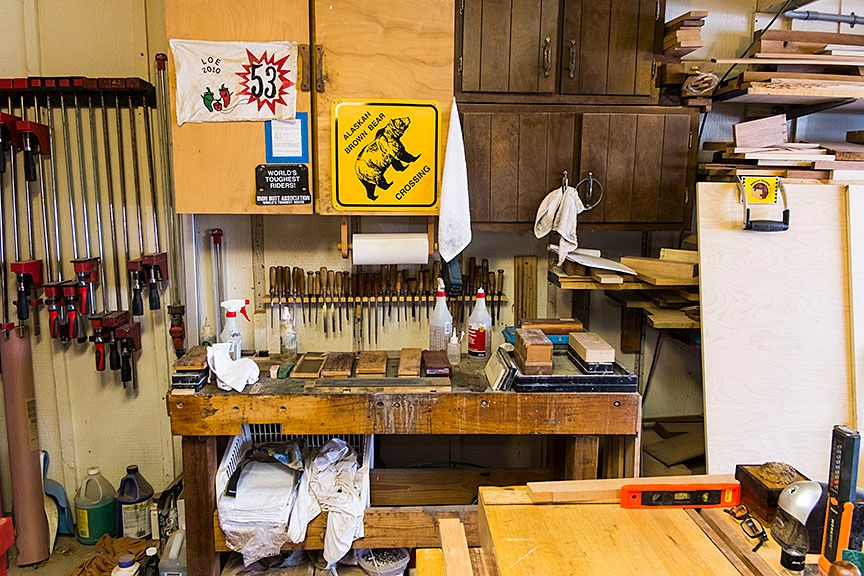
The east wall from the working end of the main bench. Not much, if anything has changed on this side. On the sharpening bench the left end is used for Ark oil stones, the right for the Jnats.


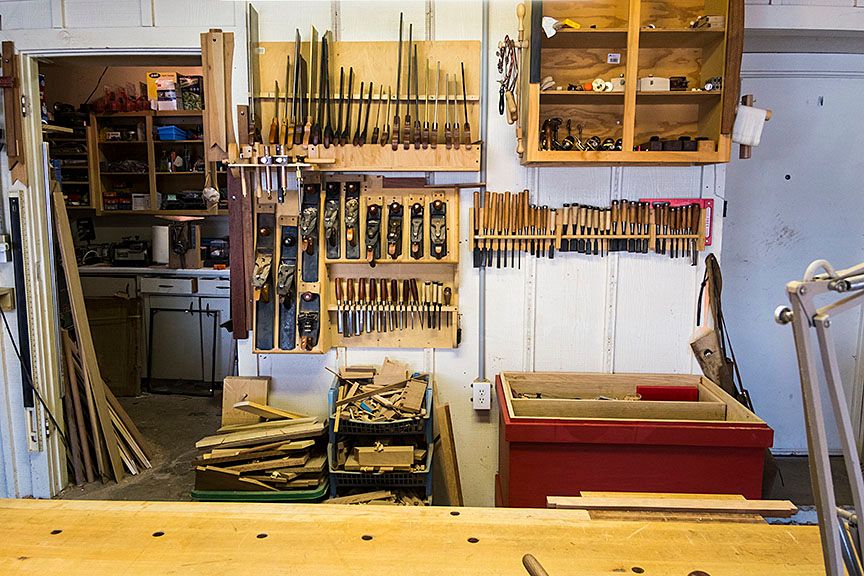
The north wall from the back side of the main bench. The saw till is in much the same position but just a thin one lower. The plane till moved from the right to the left and much lower. The chisel till stayed on the right but is raised enough to fit under the tool chest lid (once finished). and the junk cabinet was moved high to the right. You can see where the red tool chest will live.


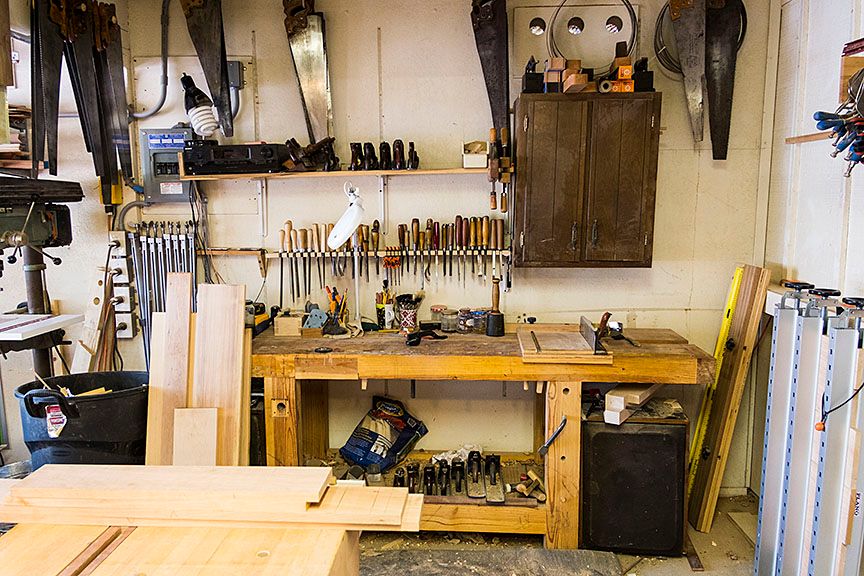
The northwest wall now has the Plano Vertical Panel clamp mounted. One of the wall cabinets was removed. the other moved to the west wall and higher, and the shelf and chisel rack were shortened.

No matter how much I squint it is still too much stuff. No matter how much I move it around it is too much stuff. I am working to cull but even that is slow because it is either throw it away if you want to be shed quickly or it will move out very slowly if you want to find a good home. I'm in the slow phase for now but the throw it in the trash-give to Goodwill is looking better all the time.

Bob, thanks for the note....My heart goes out to you and your family.

ken


Wednesday, May 04, 2016

House Keeping

In my endless quest to put 10 lbs of stuff into a 5 lb shop, I spent the day rearranging the deck chairs. How's that for mixing metaphors?

I needed to clean out an area at the right end of the secondary work bench so the wall can be used to mount the Plano Vertical Panel Press. That required removing a couple of wall cabinets and re-installing one of them. In turn the cabinet install required cutting down the length of a couple of shelfs used for chisel and plane storage. Not to bore you but you should get the picture, moving one thing required moving two others which in turn required emptying and moving four other storage areas.

In the moving of storage units I found a number of marking gauges that had been squirreled away for various reasons.  Ended up being close to thirty of 'em, most of which had been put away because I found them lacking in some way. Many because the fence and stem would not lock at 90 degrees. BTW, I posted about the marking gauges on SMC earlier.

Anyway here's a photo of the herd, the most used ones are near the rear:


A photo that may show what I'm talking about. I pulled three example marking gauges out of the pile. One was my goto kinda high dollar Marples combination gauge, next was a cheap as you can buy Marples combination gauge, and last was a pretty high dollar marking gauge from one of the better woodworking retailers. 


Pay no attention to that round blue thing at the bottom but from left to right the better Marples, the cheap Marples, and the not very cheap gauge. The lines were made by locking the stem then putting fairly light pressure left and knifing a line followed by approximately the same pressure right and making a knife line. The right two knife lines diverge at about 2 degrees. 

Is it easy to fix? Yep, all the maker has to do is pay attention to where the locking screw pushes the stem. 

As always YMMV and does it make a big whoop, not really just me being cranky but one thing I hate is a marking gauge fence that wiggles once locked. Even it there is no chance of it moving fore or aft the wiggle bugs the hell out of me. 

ken

Monday, May 02, 2016

Back on The Short Bus

It seems I've spent my life riding on the short bus, tilting my head like a dog looking for a treat, and being the last to know something. It's happened again.

A year or so ago I did my teenager rebel against getting old and said no mas, no mas to watching my diet.....If I die so be it....I can't takes it no more, and went on a binge of eating and drinking just what I wanted when I wanted it....Damn life was good. Except I went from around 200 lbs (about 30 lbs over weight) to 240 lbs. Damn Bubba you are fat, your "fat" pants are tight and you haven't seen the equipment in months.  Bottom line, about a month ago it's back on low carbs, forgoing my loved beans and cornbread, tacos, and any thing else that is good including beer and whisky.

Life sucks.

MsBubba to the rescue. Yesterday while surfing the web she came across an article that said: "Whisky has no carbs", the skies are blue once more, the birds are singing, and there is a rainbow on the horizon.

Of the two, booze or food, I would pick food any day but one is a hell of a lot better than none. BTW, maybe I enjoyed the new found freedom a little much last night but that 12 year old Macallan was sure smooth going down.

Other than a boozy afternoon I did get a little done in the shop. The Cherry shorts for the tool box lid have not showed. It's not a big deal, I can make and fit the lid with the box loaded, so that is what I did. The big advantages of loading the box are twofold: I get it out of the middle of the shop and placed where it will stay and I get most of the tools moved to their new place so I can move forward on making 10 lbs of stuff fit into a 5 lb shop.

I did not clean up the interior of the box, all the joinery markings are still there, I did not plane or sand either the inside or outside of the trays and dividers, or the inside of the box. I figure in a 100 years or so if, and it is a big if, it doesn't become a toy box per Bob then folks looking at it might enjoy seeing the tool marks and the marking out of the box and joints.

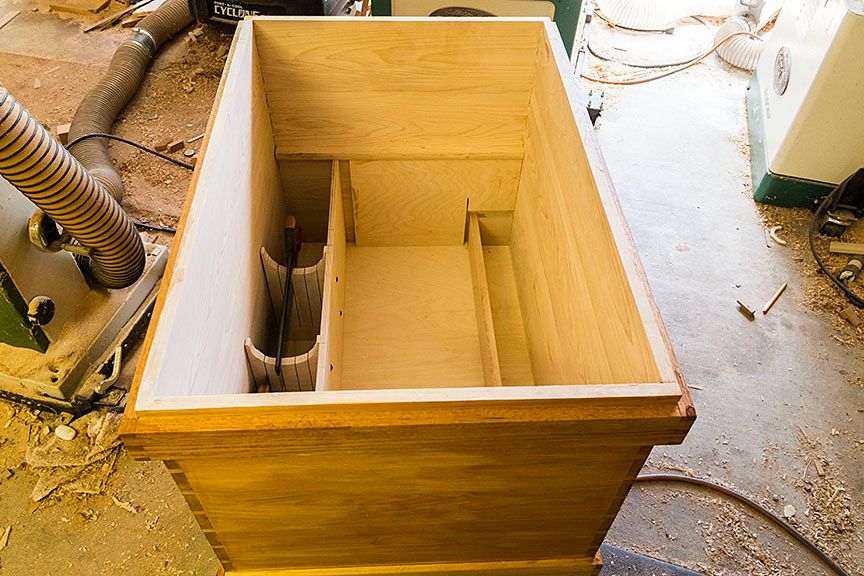
I expect the "load" will change many times but here is the first load. Top drawer mostly things used daily and/or normally found on the workbench. Second drawer most of my joinery planes and tools. Back side of case H&R's with molding planes, middle wood stock bench planes, front wall will have a chisel rack and saw till. All subject to change often.


Some photos:


From the side with both drawers open.


The front with both drawers open.


The front with drawers closed to the rear and some toes.


The front with drawers closed forward and a red belly.

Not too bad considering how life gets in the way. Looking back I started the tool box build around the first of March, so a couple or three months for the build. I can live with that. 

ken


Saturday, April 30, 2016

First Coat of Paint

Just what the title said. I'm making the second tray while waiting for the first coat of "Red Pepper" milk paint to dry.

It will take a couple more coats of the Red Pepper and then it will be decision time....Stay Red or use a overcoat of another color. One of the things I like about Milk paint is as it wears it doesn't flake but will reveal the paint and/or wood under the top coat. If I decide to go with a different top coat the question is.....Which one? Black always works well with a red under coat, I've never tried Blue over red and think it might be interesting. I expect yellow or green would be kinda indifferent.

Whatever I'm ready to move on to either the travel work bench or some shop furniture, unless MsBubba has other plans.


ken


Friday, April 29, 2016

One Down,,,,One to Go

Heard a loud "pop" in my right shoulder a couple of days ago while doing some honey do's around the house. I've a appointment with the Shoulder Doc Monday, I expect he will want to cut. In the meantime I'm learning to work one handed .

I'm pretty much in the short rows on the tool box, one tray down and one to go. I expect I'll finish the second tray in the AM. Then it is just paint and lid to finish the sucker off.

I'd been holding off on the top, waiting for the new Plano Vertical Glue Press to arrive, turns out UPS delivered it last Monday, "Left on Doorstep". Whatever, Advanced Machinery has found it and will see it is on its way this coming Monday.

I've a spreader holding the saw till in place while the hide glue sets and I've tried a few things to see how they fit. Only problem found so far is the Japanese paring chisels are too tall to fit on a side wall, I'll have to make a paring chisel till in one of the trays.

If I can stay out of MsBubba's line of sight tomorrow it will have at least a couple of coats of milk paint by sundown.


I've found some very nice 4/4 Cherry shorts at an attractive price. The second tray is Cherry from the shorts and I plan on using them for the lid and panel. If I do, the lid and panel will be left natural with just a BLO finish. The inside will be left unfinished down to leaving the pencil marks and joinery notes. My excuse:....It's a tool box.

ken 


Monday, April 25, 2016

More You Gotta Love Hot Hide Glue

One more reason to love hot hide glue. When I went to put the bottom of the first tray in the box, the top runners were a silly mm too wide.  What to do, what to do? After running through all the options the best and easiest was to dig out the heat gun and a wet rag to undo the glue up. No harm no foul, cut about 6mm off the runner and re-glued 'em. Anyway, I'm stopping at two trays, both about 250mm deep. Tomorrow I will finish the trays and start the lid.

ken

You Gotta Love Hot Hide Glue

I'm working on the inside of the tool box. I needed a break from moving that sucker around. With making the partitions and trays there is no lifting and grunting, just some ass scratching trying to figure out where everything goes and how big it needs to be. The good news is once the lower tray runners are installed right or wrong it is pretty much a done deal except for deciding on one more or two more trays.

For installing runners and dividers inside a box there ain't nothing better than hot hide glue because it is almost impossible to set clamps. With hot hide glue you can just do a "rub joint". As you should be able to see in the photo, the lower runners are setting on a spacer as I wait for the glue to cure.

Once the glue cures I'll decide on one or two more trays. I'm leaning towards two more but....I need to see how much space is left after the the lower tray is completed.


The saw till is on the left side of the photo (will be the front of the tool box) and it has 4 slots for saws. I figure two hand saws, one X-cut and one rip and two back saws both carcass. space on the right is for the molding planes and H&R's. Center area is for the bench planes and maybe a joinery plane or two. 

I expect there will be room for a chisel till on the front wall over the plane till and maybe on on the back wall as well, it will depend on how wide I make the trays.

No matter how big you make it, and this box is too big, you run out of room before you run out of tools.

Sunday, April 24, 2016

More Tool Box

The tool box shell is kinda done. It has a coat of Shellac to seal the Cypress and I expect I'll paint the outside with some color of Milk Paint. Maybe Blue or Yellow, who knows. I've a big can of Black and a big can of Barn Red, it could end up with any of  'em.

I should be farther along but....Life always steps up anytime you get cocky. This time along with the stone I've been in AFib for the last couple of days. My energy level ends about the time I walk to the shop. Bottom line, I've been working through it but production level is pretty low. Besides it is a heavy sucker and every time it needs turning over it kicks my ass.


Lots of less than perfect work in the making but it is square enough and strong enough to do the job. Of course MsBubba during one of the many times she helped move it to a new position said...."Oh this would make a perfect toy box for the grandpeanut". She didn't call him the grandpeanut but I've got to have some freedom of expression. Of course she is correct, a slightly smaller version would make a good toy box for Levi....Maybe by the Winter Solstices Celebration.

I'll start on the frame and panel for the lid tomorrow as well as the trays. Neither of which should take too long. 


Thursday, April 21, 2016

Tool Box Update

I've been beavering away on the tool box, at least my version of beavering away. I just finished glueing the upper skirt on. Tomorrow will see the bottom installed and a start on the rails and stiles for the top. I expect I'll wait for the Plano panel vise to arrive before glueing up the top's central panel.


I may start on the trays as well. The box is sized for three trays, one large and two smaller ones. 

It could all go reasonably quickly, the Doc will not give me a return to work sign off for another week....Oh darn, I have to stay home and work in the shop.

Anyway pooky and paint on the outside, enough tools inside to hide the mistakes. It should work well for it's intended job and not be too ugly.

The "splotchy" look is where I used a wet rag to wipe glue off just before taking the photo. There was a bunch of it on the end panel. 

ken

Wednesday, April 20, 2016

Kidney Stone

I will not go into all the gory details, there is not much of anything more boring than someone else's medical condition but.....This time is special :-). The E.R. could have made a good porn movie, the nurse was young and beautiful with very long blonde hair and the Doc matched her in every detail other than her hair was a little shorter. The only thing missing was a good male lead.

Anyway, got up yesterday morning not feeling on top of my game but semi-functional. Even tried to get ahold of any of the "suits" to get someone to takeover my afternoon clients. No suits were available, I was functioning, and this pair of clients are among my favorite to work with, so it was off to work I go. I made it through the Brief and we, the clients and I, moved into the Simulator for four hours of sitting in a dark box with my pushing different combinations of buttons so as to make their life miserable. Me? I usually have a great time, said with a diabolical laugh.

Cutting to the chase, about the time the Sim came on full motion the Kidney stone kicked into overdrive. Whoo Nelly...push the Motion button to bring that sucker off motion (takes forever when you are in a hurry, which I was). After a visit to the head for a Porcelain Buick drive, I got a friend to drive me home, then MsBubba to drive to the E.R. and once they gave me the "happy juice" I went about casting the rest of my porn movie.

BTW, I have a high pain tolerance, not much slows me down.....this kicked my butt.

I did get a little done to the Tool Box before leaving for work and the E.R. I found a nice hunk of Red Oak, enough to make the upper skirt, and I got it rough dimensioned. I think there is also enough to make the top's dust skirt as well. If not, I'll use the cut offs of whatever I find for the rails and stiles. I should make some progress on the box as I expect to take a few days off while waiting for the stone to finish passing.

One other thing, while putzing around in the shop I found useable wall space for a Plano Vertical Glue Press, I expect I'll be seeing my UPS girl soon.

Sunday, April 17, 2016

Tool Box Progress

The bottom skirt is on the tool box. The box is what it is and the bottom skirt is cooking. It is not my best work but, it is square, the joinery is bullet proof and there is nothing that a little "pooky" (highly technical term for water putty or anything else used to hide screw ups) and paint can't fix.

Bottom goes on next. I still can't decide between Cypress or Baltic Birch ply. Top Skirt and a lid to go, both should be reasonably quick because neither will require much butt scratching. The next three days I'm working a mid day shift and not much gets done either before or after work on that schedule. If the current work schedule holds and I get a couple or three days off in a row following the next three it will not be long before I finish this sucker.

Rob Porcaro over at Heartwood pointed me to something that could be useful. I expect a Plano glue press   is in my furture.  A Plano glue press would have helped on this glue up and I expect the panels would have been at least 3 or 4 mil thicker if I had used one.

A couple of photos, you can't tell but under those clamps is a skirt attached to the bottom of a tool box:


Another view:


ken


Friday, April 15, 2016

Tool Room

For the last week or so I've been "cleaning" the Tool Room aka Fibber McGee's closet. It had finally become unusable, you can only have so much stuff in a finite space before it becomes no mas, no mas.

The Tool Room reached that point a couple of months ago. Anyway I've been beavering away, picking up each treasure and giving it a thumb's up or down. The ups mostly had to be put in a holding area until space was created, the downs went to a holding area on the front deck.

MsBubba has been understanding so far.

While it is a long way from done you can almost see progress and a kinda image of how it will be once finished. Of course once finished the process starts anew. "What do I do with this thingamajig? Hell I don't know, stick it in the tool room." A year or so later I'm back to posting a "Tool Room" post.

Here is what has come out so far:


The tool room from the right end:


In the other direction:


From the door way:


Still a ways to go and a lot of junk on the floor but.....

When I've needed a break from cleaning, well maybe you can't call it cleaning a better term is maybe moving stuff from one pile to another, I've worked on the tool box. It's not the best box I've made but it should be square enough and strong enough to use as a tool box. Paint and pooky can hide a ton of sins.


Click 'em to big 'em.

ken


Thursday, April 07, 2016

Simple Answers

For as long as I can remember I've tried to live by two principals. The first is a quote from Plato:"Opinions without knowledge are shameful and ugly things". The second is a quote from ken hatch: "There are no simple answers to complex problems, if there were it wouldn't be a problem". I ran across a cartoon today that encapsulates the second quote.


Wednesday, April 06, 2016

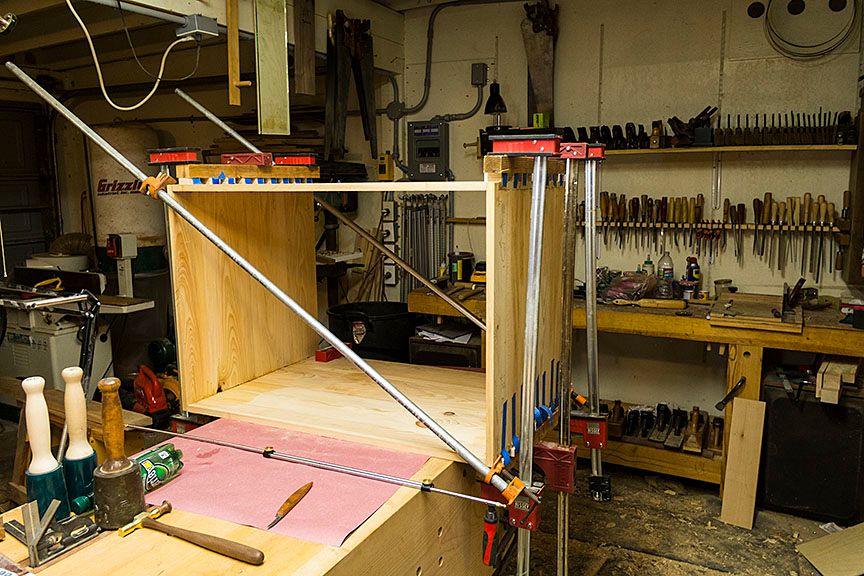
Glued Up

The sucker is glued up.

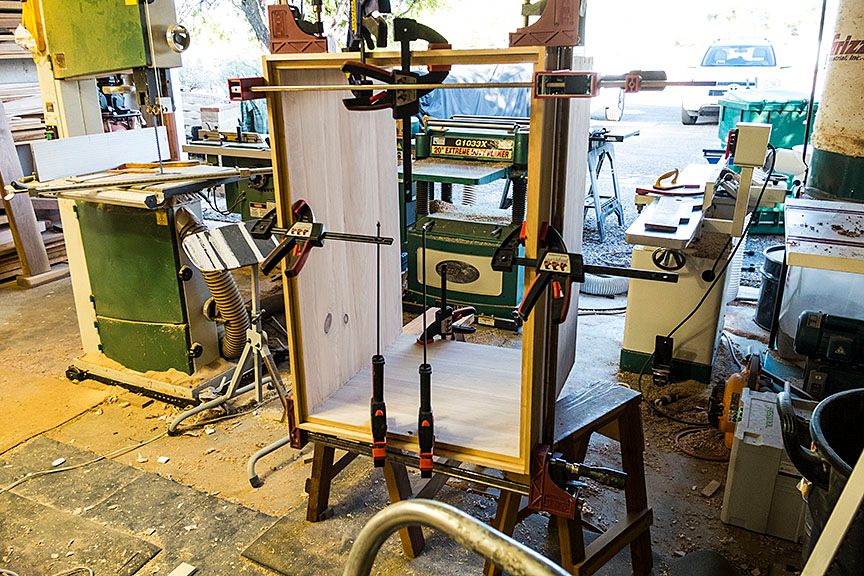
When it has been awhile since the last big box glue up you forget just how much work it is to do without a helper. Everything is too far away, falls off, or slips. Anyway here is my basic set up for solo glue up:


Checking the position and making sure things fit:


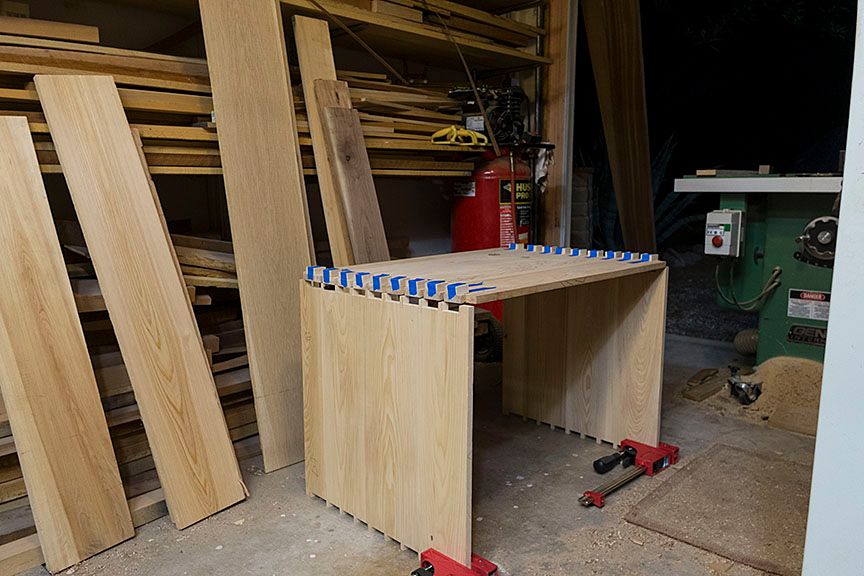
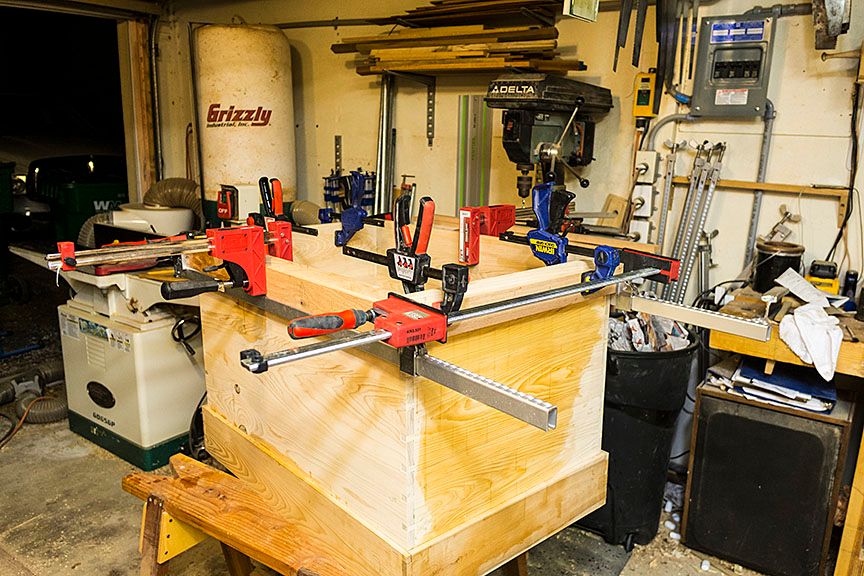
Glued up and square for now. We will see when the clamps come off, as you can see I had to pull it square....Never a good sign. Other than being very soft the Cypress was nice to work with hand tools but.....At least this batch of Cypress, never stopped doing stupid wood tricks. I finally gave up and figured the dovetails will pull it straight enough for a tool box or it will make a nice fire. Once out of the clamps what will it be, firewood and I start over or I make a lid and some trays. Either way works for me. 


While waiting for decision time, tool box, firewood, tool box, firewood.....It is on to cleaning out the shop.

I'm making three piles. The first is "junk" no one would want and going to Goodwill, the second is for Craig's List, things that are too big to ship or not worth much but still too good for Goodwill, and the third is a eBay pile, some of which I'll list here as well. One of the eBay items will be my Tormek T-7 system with most of the accessories and three wheels, the standard, a Japanese 3000 water stone, and a (IIRC) 180 CBN wheel. Watch the blog because I'll list thing here first before listing on eBay.

ken 


Monday, April 04, 2016

Back To Chopping

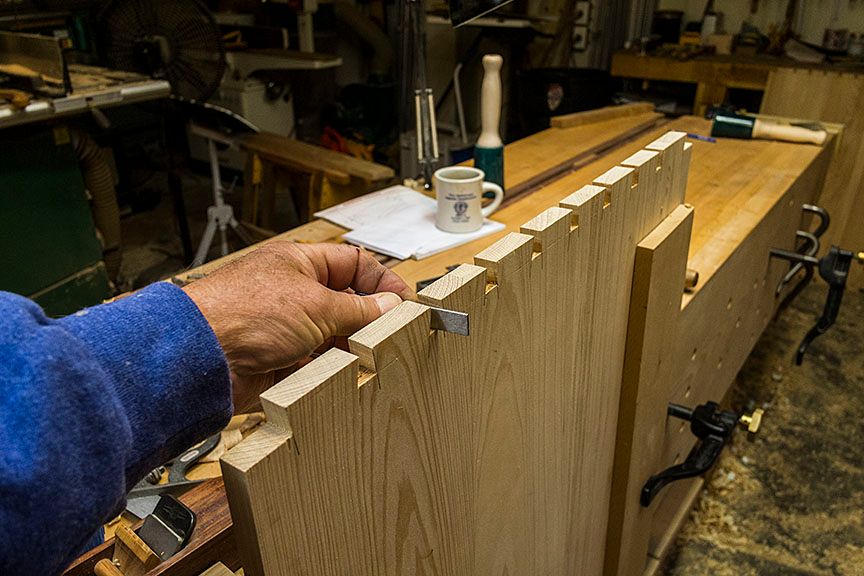
Because of the size of the panels I used a turning saw to saw most of the pin waste on the tail boards. It works and is faster than chopping and paring but......There is that damn but, life would be so much easier with out buts. With no support and a soft wood like Cypress if there is any waste greater than a mm I do not think you can get a chisel sharp enough to prevent tear out. Anyway that's my story. On the pin board I've gone back to my normal chop/pare leaving support wood in the socket until the last little chop.  It makes a much nicer socket floor. The only problem is it is slow.

Work forgot I'm alive this week and I've a few days off in a row, yesterday I had entertainment duties but today has been a shop day. By tomorrow I should have a box or at least four sides to a box.

Here is a photo checking the floor of the pin sockets:


The Cypress is easy to work other than needing care to prevent tear out and denting easily but damn it loves stupid wood tricks. I've given up on trying to keep it square and flat. I figure once I glue it up the dovetails will hold it close enough for a tool chest. If not, maybe it will make a good butt massager.

ken

Thursday, March 31, 2016

Sawing The Tails

We made it back from Fort Davis/Big Bend, Texas Monday evening. Close to a perfect trip length, about 600 miles, an easy one day drive. Easy for me though MsBubba may be warming up to the idea of a Class A motorhome.

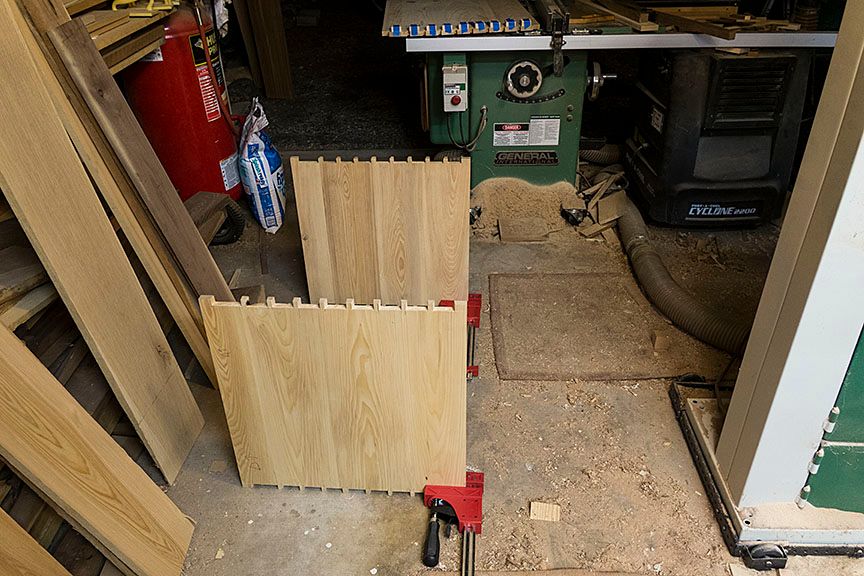
I've early AM shows at work all week so progress will still be slow on the tool box/work bench. I did get the tail boards sawn and most of the pin waste removed. The pin sockets are ready to be cleaned. BTW, what a PITA big panels are to work. Here are a few photos of the tail boards.

Tail board marked out:


Sawing the tails:


Most of pin waste removed:


Most of the time I do not saw out the waste. On smaller projects it is just as fast to chop but on panels this large I go for a "turning" saw to remove most of the waste.

I received a box with four saws from Mike Allen last Thursday just as we were walking out the door for Fort Davis. I didn't have time to open the box and look at the saws until yesterday, the saws were very well packed. After unpacking the four, I used the 8ppi x-cut to saw the end off a hunk of 8/4 Cherry that was handy. What a great saw, more with photos when I have time.

ken 


Thursday, March 24, 2016

Tail Board...It's Better to Be Lucky

I didn't plan, just grabbed a dimension out of my ass...."that looks about right". Turns out "that looks about right" just fits in the Moxon and because of the the size of the panel it will be easier to saw the tails and pins in the Moxon. Cut to the chase Bubba.....The boards just fit, a silly mm more and they would not fit. I expect if that silly mm had been there I would be figuring out the best way to get rid of it on all four panels instead of photographing the panels in the vise.


No sawing for a few days. The monkey suit goes on after I finish morning coffee and it's off to sit in a dark box for four hours. After finishing the dark box sitting I'm driving to Fort Davis, Texas for the weekend with the whole crew, MsBubba, Sam the Wonder Dog, Sweet Maggie Dog, and the 5th wheel in tow.

See you guys on down the road,

ken
  

Wednesday, March 23, 2016

Voigt Jack

I'm almost through prepping the panels for the tool chest build. Steve Voigt send me a new Jack, it arrived just in time to help with the panels. What a sweet plane, While I used the ECE Try for some of the prep, most of the grunt work was done by the PhillyPlane Jack and Steve's Jack. with final smoothing done with Steve's Smoother. The PhillyPlane Jack has a lot of camber, just slightly less than the ECE scrub, Steve's came with almost perfect camber for a Jack. Working the three of 'em made getting the panels ready for dovetailing a piece of cake.

I made an unforced error cutting one of the panels to final size and left a big honking knot right in the dovetail line. Can you say "Condor Tail" to work around the knot. Anyway here are the three on the final panel, from left to right the PhillyPlane Jack, Steve's Jack. and Steve's Smoother:


One more of the three:


If you have any interest in using wood stock planes you need to act fast while the wait time for a new Steve Voigt plane is reasonable. As far as I know Steve is the only maker making classic double iron planes. It is too long a subject to go into tonight/this morning but that is a very good reason to buy one of his planes as is the fact they are beautifully made and are a joy to use right out of the box.

Sam the Wonder Dog has recovered and is back to his old self, demanding treats and scratches. He had me worried for a couple of days as he is getting older. Here is a photo of MsBubba and Sam on the day he followed me home from the dog pound in 2010, a true pound puppy. BTW, you have to question how he ended up in the pound, he was almost perfectly trained, healed like a show dog and knew most of the standard commands, it was love at first sight.


Remember click 'em to big 'em,

ken


Saturday, March 19, 2016

Whisky Snob

I may be becoming a Whisky snob. My line up of single malts grows by the week and there are even a few bottles of Whiskey joining in the queue.

While I'm a neophyte at this Whisky thing there are a couple generalizations I think I can make, wrong or not, Lowland Whisky has a more peat/smokey taste while the Highland Whisky's have less peat and more fruit flavors. If you like fruity/sweet Whisky go for for one of the American Whiskeys, I have a glass of Jack Daniel's Single Barrel Rye on my desk as I type, it is like drinking desert.

The price/smoothness/taste sweet spot for Whisky seems to be 12 years old, after 12 years the price takes off like a Lear 24 headed for FL450 with little change in taste or smoothness. Or maybe I just haven't enough tasting experience to tell the difference.

Anyway here is the current line up, not necessarily my favorites but the bottles that are open and I'm trying. The second from the left, Glenkinchie, is one of my favorite Lowland, peaty, Whisky's.  I do not know if you can see in the photo but the Jack Daniel's on the right is much darker than the McCallan on the left. I suspect that is because of different types of casks used in aging.


Sam the Wonder Dog is a little under the WX, he gurgles when he pants, it's off to the Vet Monday. In the mean time he is getting away with things he knows better than to do.


I worked this AM, so what's new, but found a couple of minutes for shop time. Some spent prepping the panels for the tool chest build but mostly taking care of a couple of trim problems in the RV. BTW, tools are good. I had some Home Depot 1/4 round I tried to make look "right" but no joy. So I dug through the wood pile and found a Red Oak cutoff, trued an edge then went to work with a "horned" smoother to get it close to shape and finished with one of the "rounds".  The more I use my woodies the more I like 'em. I've a couple more coming from Steve Voigt, a Jack that is in the mail as I type, and a Try that should come soon.

Next weekend we are off to Fort Davis, Texas with the RV in tow to see the Grandpeanut and do some star gazing. See you'll on down the road.

ken


Sunday, March 06, 2016

Tool Chest First Panel Glue Up

The Cypress has set for a couple or three days and is still reasonably straight and I have several hours before putting on the monkey suit for work. Might as well get a panel glued up.

First task is to decide out how the boards will fit, taking grain direction, and reference side into consideration and to mark out the panel. The task is easier for these panel because they will be painted so no need to include figure in the decision.

Here is the first panel marked out with a furniture maker's triangle, face mark, lines across the joint line to help aline the panels while prepping the glue surfaces, a ">" to show expected grain direction, and a "A" to indicate panel position in the box:


After marking out the panel I put pairs of the boards in the vise to true their glue edges. The first step is to create a shallow hollow in the middle of the glue edges:


Then come back and take full length shavings:


Glue pot warming up the liquid hide glue:


Glued and cooking:


Just three more to go before starting the dovetails.


Wednesday, March 02, 2016

Tool Chest

I know I'm a broken record but....Work is crazy, I'm in the middle of 13 days in a row. We are going to have a come to Jesus meeting soon and if they can not give some reasonable assurance that the abuse will stop I'm going part time.  I hate to do it because I still enjoy my job and feel I'm returning some of the investment others made in me when I first started flying....Enough kvetching, on to something at least interesting to me and maybe to you.

The boss aka sweetie pie, bunny rabbit, light of my life, and even more important SWMBO has been on my case to make a tool chest and small work bench to carry when we go RVing. She has noticed after a couple of days of sitting in an RV park I'm ready to be back in the shop. There is only so much beer, whisky and tacos a man can enjoy at one time. Usually it is a couple or three days for me. Anyway that is the back story.

Today I had a couple of spare minutes and used them to prep some cypress for the tool chest. It is rough dimensioned and stickered.  I'll give the wood a couple of days to settle and then cut to final dimensions and clean up any stupid wood tricks.

The outside of the chest will be approximately 600mm X 900mm X  600mm. Here is a photo of the stickered wood. If you squint you might be able to see a tool chest or maybe not.


Monday, February 22, 2016

Odds and Ends

The last couple or three weeks have been a zoo. As always it is work related activities causing the zoo. Five days off in the month of Jan and maybe the same in Feb.  Enough kvetching.....on to a couple of things I've wanted to post.

First is the new dovetail square. So simple but works better than anything else Ive used. setting the pin board:


Setting the dovetail square:


Setting the Tail Board:


Ready to mark:


It works and is easy to make and use.

I received a new double iron smoothing plane from Steve Voigt a couple of weeks ago. Here is a little tool porn:


And a photo of the plane's mouth:


Not much work has been done in the shop since the first of the year. Mostly tool maintenance and sawing practice just to keep the skills sharp. I have been fettling a couple of Kanna's as well, once finished I'll post some photos. 

As always....click 'em to big 'em.

ken   


Monday, February 08, 2016

Dovetail Square

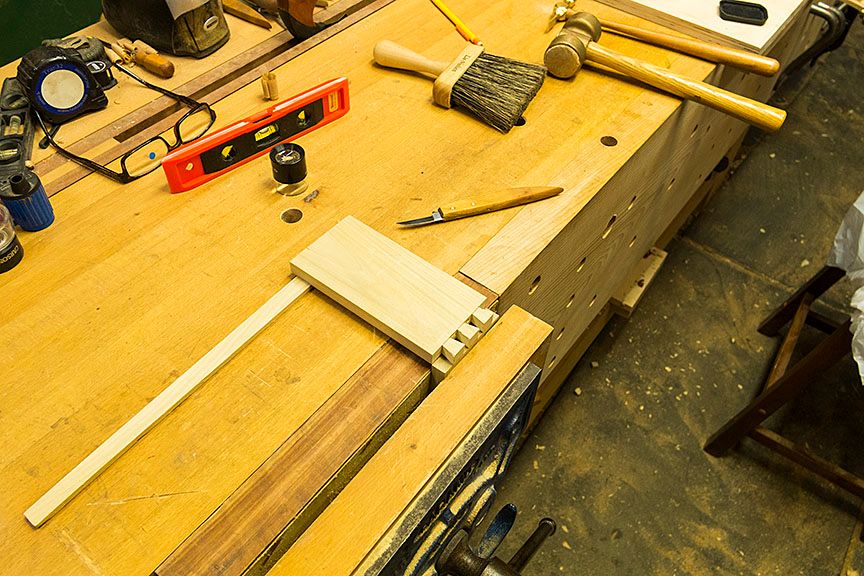
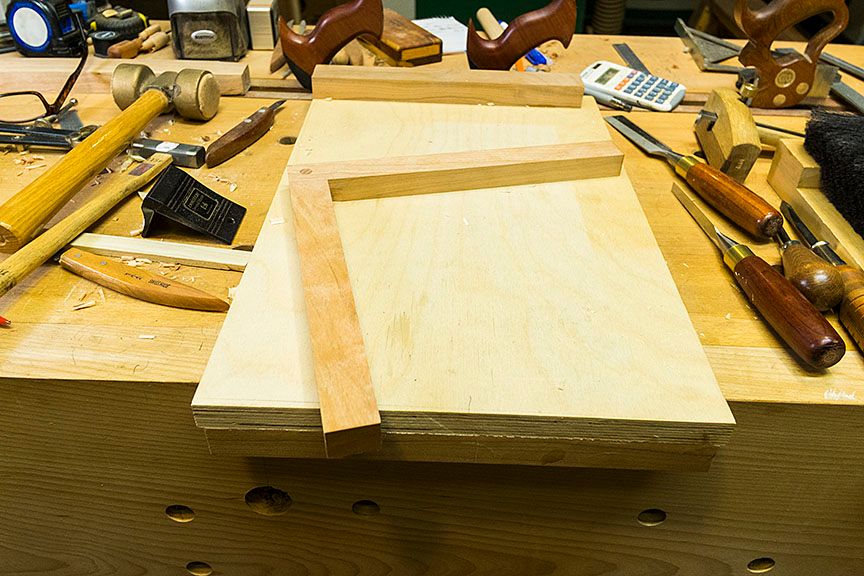
Derek Cohen posted some photos of a small bench appliance on the SMC forum. It's for squaring up tail and pin boards for marking out the pins. I made one last night, in between doing my one day off from work this week "honey do's". It was a quick build and a good thing because shop time was very limited. That woman drives me like a rented mule of course sometime I act like a rented mule as well :-).

It has a simple pinned lap joint holding some scrap Cherry legs together. In use, raise the pin board just higher than the vise jaws with a thin piece of scrap. Use the same piece of scrap to hold the tail board at the correct height, square the tail board with the dovetail marking square and mark out your pins. A piece of cake or as my foreign clients would say "a sheet of cake".


This morning I made a quick and dirty set of dovetails to test the appliance out.  It is a winner, the base alignment was perfect. I could not feel the slightest difference between the boards. Now the question is....Why didn't I think of it first?

ken