I'll use a 1" chisel to chop out the middle and then the 1 1/2" bench chisel to finish up the ends and maybe smooth the walls a little.
Occasional postings on working wood, motorcycles, aviation, life, politics, art and food.
Tuesday, August 01, 2017
A Photo of Chopping the Double Mortise
Title says it all. A quick photo of chopping the mortises before chopping out the middle web.
Monday, July 31, 2017
Chopping Mortises
The Moravian Work bench requires a number of large (wide) mortises. In the video Will Myers uses the drill and pare technique for all but the four small (common size) mortises. While I've never been a fan of drill and pare I decided to use it on the cross leg mortise. Four of those suckers are enough to convince me I'm still not a fan. Even the last one was not easier or better than the first. For the long stretcher mortises I've gone back to my standard chop the sucker out with a pig sticker. For these because they are so wide I'm using my widest mortise chisel and chopping a mortise on each side of the mortise then chopping out the waste left in the middle. In effect because it is a through mortise chopping four mortises and then cleaning up the middle. The first one took a little over thirty minutes to chop and fit, including time spent wiping sweat off my face and glasses. It was over 105F at the time. Much faster with less set up time and cleaner better fitting mortises.
Some day I will learn to stick with what works. BTW, the late great Guy Clark had a song about what works. I'm not sure of the reason but that part of West Texas over a few years period produced some great singer song writers, from Guy Clark, to Roy Orbison, to Buddy Holly.
Damn, I almost caught that squirrel....Anyway, morning should be cool enough to get the other three mortises done. Except for some clean up and making the tusks the base of the bench will be finished. Then it's waiting on the vise screw I ordered a couple of weeks ago, come on UPS girl you are holding up progress.
Some day I will learn to stick with what works. BTW, the late great Guy Clark had a song about what works. I'm not sure of the reason but that part of West Texas over a few years period produced some great singer song writers, from Guy Clark, to Roy Orbison, to Buddy Holly.
Damn, I almost caught that squirrel....Anyway, morning should be cool enough to get the other three mortises done. Except for some clean up and making the tusks the base of the bench will be finished. Then it's waiting on the vise screw I ordered a couple of weeks ago, come on UPS girl you are holding up progress.
Sunday, July 30, 2017
Sharpening Bench
I've posted about my sharpening bench before but because it is so important to efficient work I'm adding a update. Of all the tools and appliances in the shop the sharpening bench is second only to the main work bench and is located just off the left end of the main bench, just a step or two away.
The sharpening bench was the first work bench I built. At the time I hadn't a clue, I had started reading Fine Woodworking and knew I needed a wood working bench but couldn't afford a ready made. I don't know if you have seen very many Russian airplanes, if not you may not understand the reference, The bench is like a Russian airplane, if you didn't look too hard it looked somewhat like a wood working bench. I made it out of SYP because that was all I could find, not knowing that CS would many years later make a SYP bench fashionable. Bottom line over the years it has worked well in several different shop roles, the last being as a sharpening bench.
I've tried many configurations for the sharpening bench, just the primary stones on top of the bench, both oil and water stones on either end, even at one time having a Tormek on the bench. What I've settled on is just the primary use stones along with the primary strop, horse butt leather with green stuff, on the bench and all other stones stored in cabinets above the bench.
In the stone pond are my goto stones a med India and a Translucent Arkansas oil stone, Sometimes I will change from the Translucent to a Hard Black Arkansas. The Translucent has a better "feel" than the Hard Black, it has a little "tooth" where the Hard Black is slicker than snot. Scratch pattern and speed between the two are about the same. Go figure. Right now there are a couple of Spyderco stones sitting between the Arkansas stones because yesterday I had to sharpen one of the few A2 irons in the shop. The Spyderco's will return to the oil stone cabinet soon. On the far right you may be able to see a diamond lapping plate, I used it the other day to lap and re-fresh some oil stones Ralph at the accidental woodworker blog was kind enough to send me. The lapping plate will also return to its place in the oil stone storage cabinet above the bench.
The oil stone storage cabinet also stores misc junk and several (way too many) honing guides.
In a separate cabinet to the right are my water stones, man made stones on the bottom shelf and natural Japanese water stones on the top shelf.
It has taken time to get to this point, the old story of kissing frogs, but for now unless I get another bright idea to try this is my basic sharpening set up.
If interested click 'em to big 'em.
ken
Saturday, July 29, 2017
More Travel Bench
Progress is slow on the travel bench. The back is acting up most days now and add Tucson in July to the mix, work slows to a crawl. That's the bad news, the good is for now there is no hurry, there are still a couple of weeks before the vise screw arrives and I will not need the bench before Labor Day.
I've almost finished the base. All that is needed is a couple of dovetails for the small lower stretchers and the Mortises for the long stretchers. The slab is ready to cut to length and I still need to make the tool tray. At the current pace three or four days in the shop will finish the build.
Here are a couple of photos of the base on its side so I can mark out the long stretcher mortises.
I go for a MRI next Friday to try and figure out what is happening with the back. For awhile last week I thought about putting it off but the back had other plans.
ken
I've almost finished the base. All that is needed is a couple of dovetails for the small lower stretchers and the Mortises for the long stretchers. The slab is ready to cut to length and I still need to make the tool tray. At the current pace three or four days in the shop will finish the build.
Here are a couple of photos of the base on its side so I can mark out the long stretcher mortises.
I go for a MRI next Friday to try and figure out what is happening with the back. For awhile last week I thought about putting it off but the back had other plans.
ken
Friday, July 21, 2017
Progress On Travel Bench
The travel bench is coming along. The legs are dimensioned, the top bridle joints are done. Next is to finish chopping out the through mortise and the dove tail socket. Because the legs are at a 15 degree angle the stretcher mortise will have to wait for the stretcher glue up and tenon. The top is a slab so all it needs is to be cut off to final length.
I've a wood screw and nut on order. The screw and nut may take 2 to 3 weeks for delivery. I hope I'm waiting on the vise screw to finish the build.
Here are a couple of photos of the legs:
There are not many days off over the next couple of weeks which will slow the build as will the mid-afternoon heat. Still this is such a simple bench it should be ready well before the Oregon trip.
ken
I've a wood screw and nut on order. The screw and nut may take 2 to 3 weeks for delivery. I hope I'm waiting on the vise screw to finish the build.
Here are a couple of photos of the legs:
There are not many days off over the next couple of weeks which will slow the build as will the mid-afternoon heat. Still this is such a simple bench it should be ready well before the Oregon trip.
ken
Sunday, July 16, 2017
Back From Several Days In The Motorhome
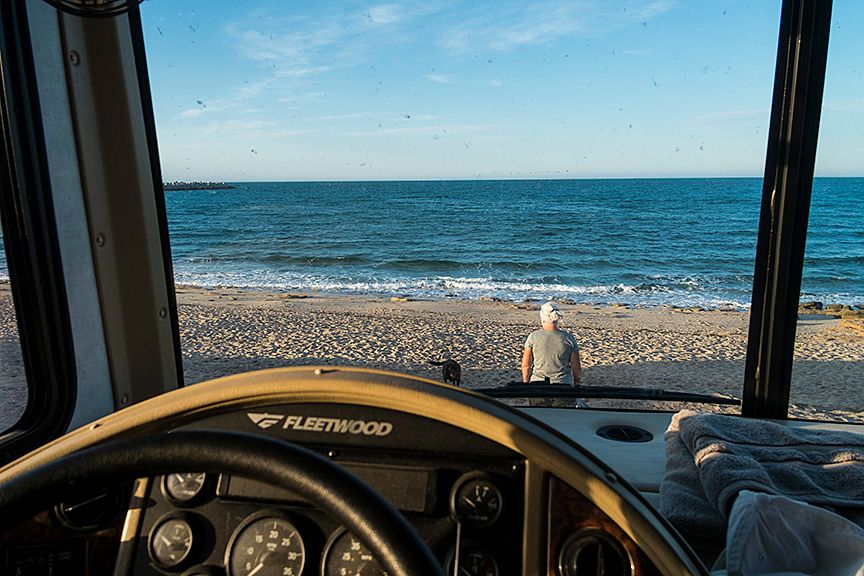
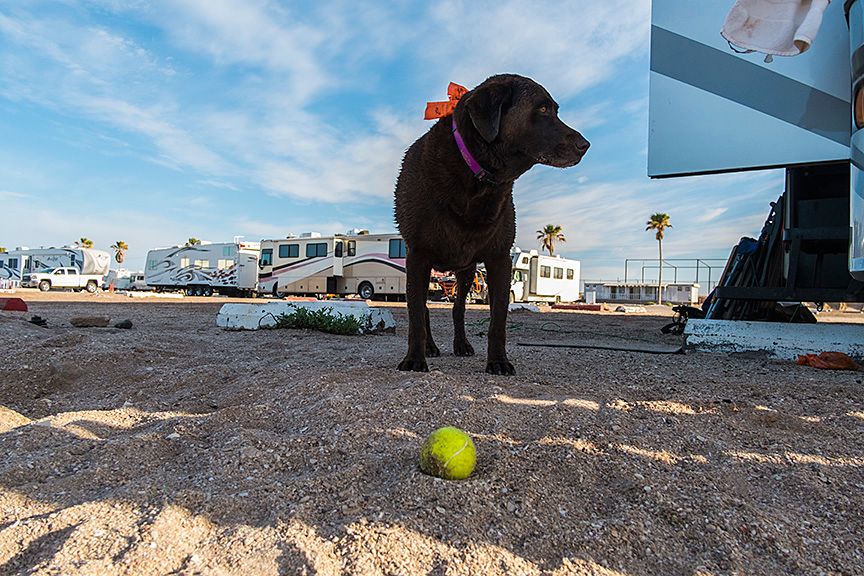
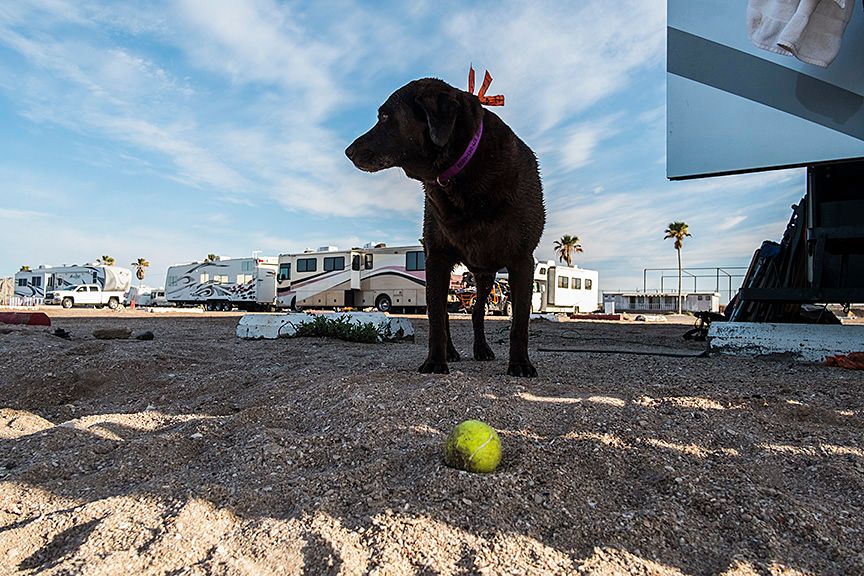
We, MsBubba, Sam the Wonder Dog, Sweet Maggie Dog, me Ugly Dude, returned from several days visiting one of Southern Arizona's State Parks in the motorhome. It was a nice place with a small lake and good views of the mountains. Waiting back home was a package from Ralph of the Accidental Woodworker blog.
In it were two Smith's Arkansas oil stones, a hard white and a soft. I refreshed and flattened both on a diamond lapping plate before taking steel to stone. The soft stone raised a burr quickly as did the hard white. A few strokes on the strop and I had a very sharp chisel.
Thanks Ralph, as you know, I loves me some Arkansas oil stones and these two have a very good feel and did a great job on the chisel.
As some of you may know I've been trying to figure out a portable workbench for the motorhome after watching Will Myers' video building a Moravian work bench it is the one. Most benches I've looked at or designed in my head always had a "yes but". If this bench has a "yes but" I haven't found it.
Anyway on to the chase....I've started the build. I found a 8/4 European Beech slab that is just under 280mm wide and will end up 1800mm long. The legs are DF as are the long stretchers. I found scraps of Cherry and Sapele in the wood pile for the short stretchers. The legs and stretchers, except for the long stretchers, are dimensioned and marked up. I would have started chopping mortises and sawing tenons except this is Arizona in Aug. Monsoon is here so not only is it well over 100F the RH's are also high. By 10:00 AM shop time was over.
Photos to follow,
ken
In it were two Smith's Arkansas oil stones, a hard white and a soft. I refreshed and flattened both on a diamond lapping plate before taking steel to stone. The soft stone raised a burr quickly as did the hard white. A few strokes on the strop and I had a very sharp chisel.
Thanks Ralph, as you know, I loves me some Arkansas oil stones and these two have a very good feel and did a great job on the chisel.
As some of you may know I've been trying to figure out a portable workbench for the motorhome after watching Will Myers' video building a Moravian work bench it is the one. Most benches I've looked at or designed in my head always had a "yes but". If this bench has a "yes but" I haven't found it.
Anyway on to the chase....I've started the build. I found a 8/4 European Beech slab that is just under 280mm wide and will end up 1800mm long. The legs are DF as are the long stretchers. I found scraps of Cherry and Sapele in the wood pile for the short stretchers. The legs and stretchers, except for the long stretchers, are dimensioned and marked up. I would have started chopping mortises and sawing tenons except this is Arizona in Aug. Monsoon is here so not only is it well over 100F the RH's are also high. By 10:00 AM shop time was over.
Photos to follow,
ken
Sunday, July 09, 2017
Outdoor Kitchen
My part of the outdoor kitchen build is close to finished. All I have left is to install the drain and pull wires, all the idiot says...what a wanker. I must say pulling wires is one of my least favorite things to do, for one reason among many after finishing you think..."damn I could've had a V-8". There is always another outlet you wish you had installed or something could have been done different. By that time it is what it is.
Anyway here is the bar. It is waiting for MsBubba to finish the tiles for the counter top and a foot rail.
In the right background is the sink, here is a closer look.
Anyway here is the bar. It is waiting for MsBubba to finish the tiles for the counter top and a foot rail.
In the right background is the sink, here is a closer look.
The finishing may take awhile, we both go back to work Monday and the following weekend is a long one. I'm burning the last of my PTO before I lose it on 08/03/2017. It is hard to believe I've been with the company going into my eleventh year. Time flies when you are having fun...or maybe it is just the toilet roll effect, it goes much faster when you get near the end.
ken
Friday, July 07, 2017
Monsoon Is Here and Other Random Thoughts
Monsoon has been teasing us for awhile, yes, no, yes, no but tonight it is here. No Thunderbumpers at my house but outside, several hours after sunset, it is still hot and feels like we are in Houston.
MsBubba was on the roof last night for who knows why and found a couple of the pool's solar heater mounting pads had pulled lose. Long story short, a early morning trip to HD for a gallon of Henry Tropi-Kool to patch the roof. Before I finished the repairs it was boiling hot, I ain't as young and bullet proof as I once was. My butt was well kicked.
I did manage to get one coat of spar varnish on the outdoor sink counter (Bridger had just finished building for us) after the roof work but that was it. The rest of the day was spent watching videos, reading about the sky falling, and nursing my bad back while the AC worked hard, even the dogs looked at me like "fool, there ain't no way no how we are going outside...chill".
Over the next couple of days I will put on another coat or two of varnish on the sink counter, finish hooking up the sink, pull a few wires and my part of the back garden kitchen build will be done. MsBubba should fire the tiles for the bar counter top next week. In a week or so we should have a functioning back garden kitchen and bar.... Now if we just had friends that were not as old, cranky, and broke down as we are :-).
For some time I've been trying to figure out a useable portable work bench to carry in the motorhome. everything I've thought of or looked at was always "yes but" until today's heat forced browsing. Will Myers has a video of building a knock down Moravian work bench. I haven't built a bench in a year or so so it is time to build a bench anyway and this one looks to be perfect. Now I just have to find time to finish it before the September trip to Oregon.
As bad as the Japanese tool box is I expect it will be finished and used for the Oregon trip with, I hope, the knock down Moravian bench. The fun part will be figuring out what goes in the tool box and what stays home.
After a day of "fuck" every time I moved a little wrong I gave in and took a couple of pain pills. Thirty minutes and a little single malt later I was in the shop doing the most enjoyable shop thing there is....sharpening irons and chisels and then turning a nice sized hunk of Walnut into a very small hunk of Walnut mostly with my wood stock planes. It just doesn't get better than a well built, well tuned woodie with a sharp iron on a beautiful wood like Walnut or Cherry, I even took a couple of swipes at some White Oak. Life is good.
See you guys on down the road,
ken
MsBubba was on the roof last night for who knows why and found a couple of the pool's solar heater mounting pads had pulled lose. Long story short, a early morning trip to HD for a gallon of Henry Tropi-Kool to patch the roof. Before I finished the repairs it was boiling hot, I ain't as young and bullet proof as I once was. My butt was well kicked.
I did manage to get one coat of spar varnish on the outdoor sink counter (Bridger had just finished building for us) after the roof work but that was it. The rest of the day was spent watching videos, reading about the sky falling, and nursing my bad back while the AC worked hard, even the dogs looked at me like "fool, there ain't no way no how we are going outside...chill".
Over the next couple of days I will put on another coat or two of varnish on the sink counter, finish hooking up the sink, pull a few wires and my part of the back garden kitchen build will be done. MsBubba should fire the tiles for the bar counter top next week. In a week or so we should have a functioning back garden kitchen and bar.... Now if we just had friends that were not as old, cranky, and broke down as we are :-).
For some time I've been trying to figure out a useable portable work bench to carry in the motorhome. everything I've thought of or looked at was always "yes but" until today's heat forced browsing. Will Myers has a video of building a knock down Moravian work bench. I haven't built a bench in a year or so so it is time to build a bench anyway and this one looks to be perfect. Now I just have to find time to finish it before the September trip to Oregon.
As bad as the Japanese tool box is I expect it will be finished and used for the Oregon trip with, I hope, the knock down Moravian bench. The fun part will be figuring out what goes in the tool box and what stays home.
After a day of "fuck" every time I moved a little wrong I gave in and took a couple of pain pills. Thirty minutes and a little single malt later I was in the shop doing the most enjoyable shop thing there is....sharpening irons and chisels and then turning a nice sized hunk of Walnut into a very small hunk of Walnut mostly with my wood stock planes. It just doesn't get better than a well built, well tuned woodie with a sharp iron on a beautiful wood like Walnut or Cherry, I even took a couple of swipes at some White Oak. Life is good.
See you guys on down the road,
ken
Wednesday, July 05, 2017
Shop Made Chamfer and Round Over Plane
Long ago I made a series of shop made planes like those made by James Krenov. After trying shaping on several I found the best shape was just a block of wood much like a Japanese plane with the cutter pretty much centered in the stock. With the block of wood shape the plane is comfortable to use with either hand in any direction, pushing or pulling. In addition the planes are very light weight for their size. It makes the plane very handy for final shaping.
Chamfering and round-overs are about the only things I use the planes for but for those uses I haven't found anything better.
Here are a couple of photos of the most used ones. First is the small near block plane sized one:
Next is two together, the block plane sized and one about the size of a #3 Stanley:
Both work about the same, which one I use depends more on which I see first than the size.
Chamfering and round-overs are about the only things I use the planes for but for those uses I haven't found anything better.
Here are a couple of photos of the most used ones. First is the small near block plane sized one:
Next is two together, the block plane sized and one about the size of a #3 Stanley:
Both work about the same, which one I use depends more on which I see first than the size.
Tuesday, July 04, 2017
Wood Stock Plane Setting Jig
Andy asked how the setting jig worked.....Dangerous thing to do unless you want to roll your eyes to the back of your head and/or get some sleep.
Calling it a jig is a stretch but because it has a hanging hole I'm going to. The jig is a long piece of float glass glued to a board with a hanging hole for storage. Here is the jig's home when not in use:
Most of the time I only use it after removing the iron for sharpening. Even then it is not used all the time but it makes the first set very quick and easy. Place the stock on the jig making sure both the stock and the glass plate are clean.
Set the cutter on the bed with light finger pressure holding it against the bed and glass while replacing the wedge. Once the wedge is in place give the wedge a tap to set and start planing.
Most of the time the plane will cut slightly thicker than the finest smoothing cut, about where you want it for most uses.
It works with any Western style wood stock plane I've tried. Here are some more photos with different style planes. All with no other adjustment other than first setting of the cutter on the float glass.
Calling it a jig is a stretch but because it has a hanging hole I'm going to. The jig is a long piece of float glass glued to a board with a hanging hole for storage. Here is the jig's home when not in use:
Most of the time I only use it after removing the iron for sharpening. Even then it is not used all the time but it makes the first set very quick and easy. Place the stock on the jig making sure both the stock and the glass plate are clean.
Set the cutter on the bed with light finger pressure holding it against the bed and glass while replacing the wedge. Once the wedge is in place give the wedge a tap to set and start planing.
Most of the time the plane will cut slightly thicker than the finest smoothing cut, about where you want it for most uses.
After several passes with the Joiner:
It works with any Western style wood stock plane I've tried. Here are some more photos with different style planes. All with no other adjustment other than first setting of the cutter on the float glass.
Andy, for a thicker shaving tap the iron, for a thiner shaving tap the top of the stock in front of the cutter (on the strike button if it has one), to remove the cutter and wedge tap the back of the stock. I hope this helps and wasn't too painful. Remember click 'em to big 'em.
The long plane and the coffin smoother were made by Steve Voigt, a young guy, and as far as I can tell the only maker of double iron planes in America. They are works of art and with both a reasonable price and wait time. At least that was the case when I ordered mine. BTW I also have one of Steve's Jack planes and if he decides to make any other type of plane I will be waiting with AmEx in hand, his planes are that good.
ken
Japanese Tool Box and Setting Woodie Irons
As I have posted before I want a traveling tool box to carry in the motorhome while I'm driving Ms Daisy around the country. I built a classic western tool chest a year or so ago but it turned out to be too big....even if it would fit in the motorhome bins it would take at least two twenty somethings with strong backs to get it in and out. I tried to talk MsBubba into finding a couple of boytoys but she said no way. Oh well back to the drawing board.
The woodstore had some kind of Pine, not cheap, close to $5 USD a board foot but was in 12" width by 8' or so. I made Levi's toy box out of it and it worked pretty good because I used dovetails for the joinery and the boards I used were OK, a little wind and some cupping but not bad enough to keep the dovetails from pulling everything together. Which was good because the boards were too thin to take much off truing them up.
Cut to the Japanese tool box. The board that was left developed a bit of wind setting in the shop. So much there was no way to true it and have any board left. I decided to press on hoping I could pull the wind out while joining the box. I did but....it is a big but...the cut nails busted out on the last joint. I put a couple of screws at each corner, which is what I should have done in the first place or even better have chunked the board and used another straighter one for the build.
Here is a photo of the busted out nails. I will finish the box and use it in the shop, with the screws in the corners it is strong, just ugly, and will make good shop storage. The next Japanese tool box will be made of Poplar so I will have some wood to work with. It will be a little heaver and I'm not sure if I will use cut nails and butt joints or M/T joints. I'm leaning towards M/T, the cut nails I'm not sure of.
Over on SMC there was a question on setting the iron in wood stock planes. Derek Cohen answered that one way he does it is to use a float glass setting jig. He was getting the usual forum scrum when someone posts something different. Problem with the scrum was I often use the same technique and it works very easily and quickly. While I do not use the glass jig for all setting it is very handy for initial settings after removal and replacement of the iron. Because of the pile on I dug out several of my woodies and the jig. After removing the irons and reseting them using the jig I made a photo of the planes and shavings after setting the iron with no other adjustment. Works well, doesn't coat much and can sure cut down on the setting learning curve.
The woodstore had some kind of Pine, not cheap, close to $5 USD a board foot but was in 12" width by 8' or so. I made Levi's toy box out of it and it worked pretty good because I used dovetails for the joinery and the boards I used were OK, a little wind and some cupping but not bad enough to keep the dovetails from pulling everything together. Which was good because the boards were too thin to take much off truing them up.
Cut to the Japanese tool box. The board that was left developed a bit of wind setting in the shop. So much there was no way to true it and have any board left. I decided to press on hoping I could pull the wind out while joining the box. I did but....it is a big but...the cut nails busted out on the last joint. I put a couple of screws at each corner, which is what I should have done in the first place or even better have chunked the board and used another straighter one for the build.
Here is a photo of the busted out nails. I will finish the box and use it in the shop, with the screws in the corners it is strong, just ugly, and will make good shop storage. The next Japanese tool box will be made of Poplar so I will have some wood to work with. It will be a little heaver and I'm not sure if I will use cut nails and butt joints or M/T joints. I'm leaning towards M/T, the cut nails I'm not sure of.
Over on SMC there was a question on setting the iron in wood stock planes. Derek Cohen answered that one way he does it is to use a float glass setting jig. He was getting the usual forum scrum when someone posts something different. Problem with the scrum was I often use the same technique and it works very easily and quickly. While I do not use the glass jig for all setting it is very handy for initial settings after removal and replacement of the iron. Because of the pile on I dug out several of my woodies and the jig. After removing the irons and reseting them using the jig I made a photo of the planes and shavings after setting the iron with no other adjustment. Works well, doesn't coat much and can sure cut down on the setting learning curve.
Happy 4th
ken
PS: I'm getting so forgetful someone just needs to shoot me. I send a box out yesterday with several goodies, one of which should have been a extra #3 Stanley. Bridger was over today and I had a #4 Stanley out to follow him home. When we went to the shop setting next to Bridger's #4 was the #3 base that should have been in the box along with the iron, chip breaker, and lever cap that are in the box.
Just shoot me.
Saturday, July 01, 2017
Photobucket Sucks Pond water
I've used Photobucket to host my blog photos from the get go back in 2005. Yesterday Photobucket issued new terms of service which does not allow third site publishing of my images. They, Photobucket, only want $399 USD per year for that privilege.
Long story short I've used Photobucket because when I started this blog Blogger would not allow uploads directly from my computer. Blogger does now and Photobucket can go suck pond water. It was a PITA to deal with anyway.
I can't tell if Photobucket wiped 12 years of photos off the blog, when I checked some of the early posts the photos are still available. I doubt I will republish all the blog's photos but there will be some going back and updating. What a PITA.
ken
Long story short I've used Photobucket because when I started this blog Blogger would not allow uploads directly from my computer. Blogger does now and Photobucket can go suck pond water. It was a PITA to deal with anyway.
I can't tell if Photobucket wiped 12 years of photos off the blog, when I checked some of the early posts the photos are still available. I doubt I will republish all the blog's photos but there will be some going back and updating. What a PITA.
ken
Monday, June 26, 2017
Loo's Side Table
Several weeks ago the girl child and hubby drove from Houston
to Tucson to visit and exchange their Honda Fit for our Dodge Cummins Diesel truck. They needed more truck, we needed a smaller "Toad" for the motorhome, sometimes things work out win win.
I was building a side table that had one of MsBubba's mosaics for the top as a Birthday present for Loo. I hoped to have it finished in time to go back to Houston with them but as usual I'm a little slow. The top was ready to go but I hadn't finished the base. We sent the top on home with the kids to be followed by the base once finished.
I put the first coat of Danish Oil on the base a couple of minutes ago and hope to go see my UPS girl in a couple of days. It will be good to get it out of the shop.
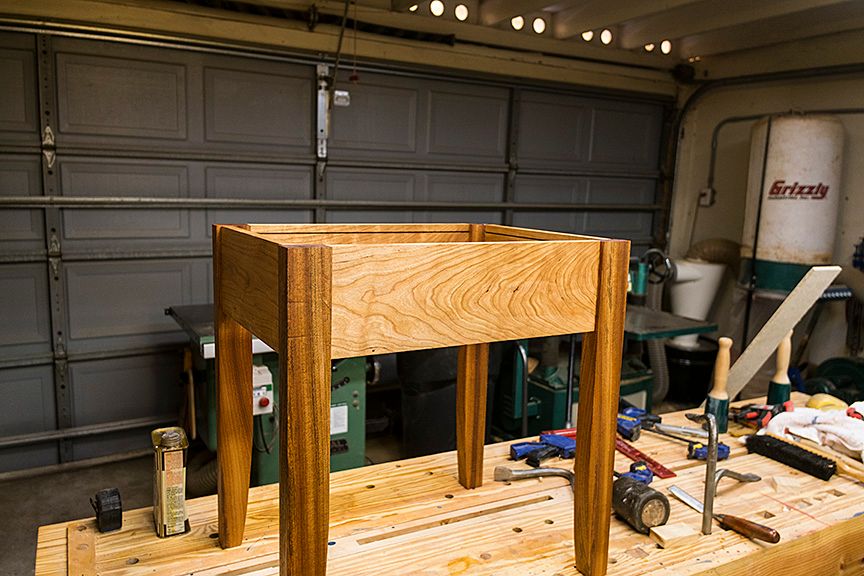
BTW, the mosaic top has a Sapele border and the legs are also Sapele. The aprons are some Cherry I had in the wood pile. It's not the best table I've made but.....
I thought I had a photo of the top but maybe not. Anyway here is the finished base.
to Tucson to visit and exchange their Honda Fit for our Dodge Cummins Diesel truck. They needed more truck, we needed a smaller "Toad" for the motorhome, sometimes things work out win win.
I was building a side table that had one of MsBubba's mosaics for the top as a Birthday present for Loo. I hoped to have it finished in time to go back to Houston with them but as usual I'm a little slow. The top was ready to go but I hadn't finished the base. We sent the top on home with the kids to be followed by the base once finished.
I put the first coat of Danish Oil on the base a couple of minutes ago and hope to go see my UPS girl in a couple of days. It will be good to get it out of the shop.
BTW, the mosaic top has a Sapele border and the legs are also Sapele. The aprons are some Cherry I had in the wood pile. It's not the best table I've made but.....
I thought I had a photo of the top but maybe not. Anyway here is the finished base.
Sunday, June 25, 2017
Lance Mannion and River View
Several days ago Lance Mannion posted this: "Felt my mortality weighing heavily on me this morning. Tried to keep the demons at bay by telling myself I could be around for another 30 years. The demons laughed. What's the point of that? they asked mockingly. I had to grant them the point.
Thirty more years? Might be a pleasanter prospect if I and nobody I knew were going to age and things would continue on pretty much the way they are. Not a lot to look forward to as it is. Not much I'm going to contribute with my persistent presence. I'm done. It's somebody else's turn. Don't want to die but not excited about living. Lately I've caught myself having fantasies that are influenced by Philip Jose Farmer's Riverworld novels except that instead of dying and being reborn down river I'm reborn back upstream and wake up as my twenty year old self, a young hero with prospects again.
These were pre-dawn thoughts. As soon as it got light I got in the car and headed for McDonald's. We're up at the old Mannion Homestead for the weekend so I drove down to the river and had my coffee on the riverbank...
I don't see much point in living thirty more years. Or twenty. Or ten. But contemplating (the) view...With a good cup of coffee? Continuing on another day seems like a good idea."
The post spoke to me, I understand.
Thirty more years? Might be a pleasanter prospect if I and nobody I knew were going to age and things would continue on pretty much the way they are. Not a lot to look forward to as it is. Not much I'm going to contribute with my persistent presence. I'm done. It's somebody else's turn. Don't want to die but not excited about living. Lately I've caught myself having fantasies that are influenced by Philip Jose Farmer's Riverworld novels except that instead of dying and being reborn down river I'm reborn back upstream and wake up as my twenty year old self, a young hero with prospects again.
These were pre-dawn thoughts. As soon as it got light I got in the car and headed for McDonald's. We're up at the old Mannion Homestead for the weekend so I drove down to the river and had my coffee on the riverbank...
I don't see much point in living thirty more years. Or twenty. Or ten. But contemplating (the) view...With a good cup of coffee? Continuing on another day seems like a good idea."
The post spoke to me, I understand.
Sunday, June 18, 2017
Tomorrow is Juneteen
Tomorrow is Juneteen. In a just and meet world it would be celebrated along with the 4th. That is not, speaks to who we are.
attribution: screenshot Erica McCarthy
Detail from Ed Dwight sculpture at the Texas African-American History Memorial in Austin, Texas.
Saturday, June 03, 2017
Back From Mexico
Back from Rocky Point and only 3 lbs. gained. Not too bad considering the number of tamales and tacos consumed. Have I posted that travel by Motorhome is the only way to go? Room for critters, food and drink at hand, and a head when needed, and most of all is the view. It doesn't get any better.
A view out the window on the way down between Tucson and Why. If you are a motorcycle LD Rider you probably know of Why, AZ. One of the bucket list rides is Why, Why Not.
What I love about roads in the Southwest is you can see the future, sometimes an hour or more ahead.
A view out the window on the way down between Tucson and Why. If you are a motorcycle LD Rider you probably know of Why, AZ. One of the bucket list rides is Why, Why Not.
What I love about roads in the Southwest is you can see the future, sometimes an hour or more ahead.
The view out the window in our camp site:
I call these two "Can't Anyone Play This Game:
One of the best parts of the whole trip I didn't get any photographs of. While floating in a protected area at low tide we ended up in the middle of close to a hundred feeding Brown Pelicans. Unlike White Pelicans which feed by herding bait fish into confined areas, Brown Pelicans feed by folding up their wings and diving into the school of fish from above. Catching a fish and at the same time scooping up a large amount of water. The pouch under their bill can hold up to three gal. of water along with the caught fish. After the dive the pelican will sit on the water with its head and bill down to drain the scooped up water before swallowing the fish. While all this is going on Gulls are in attendance hoping to steal the catch sometime standing on the pelican's back or head and pecking the pelican's bill. Cut to the chase: While feeding the pelicans could have cared less that we were in the middle of their feeding often diving within two or three feet of where we were floating. This went on for hours, what a show.
Sunday, May 28, 2017
Chopping Mortises
I'm making a side table for the girl child, The top will be a frame and substrate to hold one of MsBubba's ceramic mosaics. The base is some near 8/4 Sapele I had in the shop.
The top is made, it just needs cleaning up and the legs are dimensioned but not shaped. The aprons are dimensioned waiting to saw the tenons once I finish chopping the mortises. I'm half way through chopping the mortises, two legs finished and two to go.
While chopping the mortises I thought about making a post about technique. My guess is everyone has either tried and discarded this technique or they are currently using it and it is no big deal because I have a history of riding the short bus. Anyway one of the problems I've always had with chopping mortises is keeping the hole straight. To fix that I've started knifing the reference mark, the one on the face side and then coming back and undercutting the knife line. This gives a nice "v" grove on the reference mark that give a positive stop for the mortise chisel. Angle the chisel slightly, drag it to the reference mark, when it stops stand it upright and square, give it a whack. Lever and repeat until you have removed everything that doesn't look like a mortise hole.
A couple or three photos, I don't know if you can see but click 'em to big 'em and whatever, one is of the mortise.
Knifing the reference mark.
The top is made, it just needs cleaning up and the legs are dimensioned but not shaped. The aprons are dimensioned waiting to saw the tenons once I finish chopping the mortises. I'm half way through chopping the mortises, two legs finished and two to go.
While chopping the mortises I thought about making a post about technique. My guess is everyone has either tried and discarded this technique or they are currently using it and it is no big deal because I have a history of riding the short bus. Anyway one of the problems I've always had with chopping mortises is keeping the hole straight. To fix that I've started knifing the reference mark, the one on the face side and then coming back and undercutting the knife line. This gives a nice "v" grove on the reference mark that give a positive stop for the mortise chisel. Angle the chisel slightly, drag it to the reference mark, when it stops stand it upright and square, give it a whack. Lever and repeat until you have removed everything that doesn't look like a mortise hole.
A couple or three photos, I don't know if you can see but click 'em to big 'em and whatever, one is of the mortise.
Knifing the reference mark.
Cutting the grove:
The mortise hole:
One other thing I happened to find today. My favorite pig sticker it turns out is 5/16", I never knew that. I just knew it was smaller than 1/2" and larger than the 1/4" which made it perfect for table leg mortises. I usually clean out the mortises with a LN 1/4" mortise chisel just because I don't worry about braking it and because it doesn't really need to be that sharp. Today I wanted a sharp chisel, in other words a bench chisel to clean up the ends of the mortise. Lot of luck bubba, out of the hundred or so bench chisel on the walls of the shop there is not one 5/16" chisel. As luck would have it the new Pfeil chisels I bought the other day had a 8mm in the set. 8mm is just a thin red one larger than 5/16"so all was not lost but damn you would think out of all those chisel there would be a couple of 5/16" ones somewhere. But no joy.
Off to Mexico tomorrow AM for a couple or three days of beer, beach, tacos, and watching the dogs swim and grin from floppy ear to floppy ear. It doesn't get much better.
Monday, May 22, 2017
Japanese Steel Porn
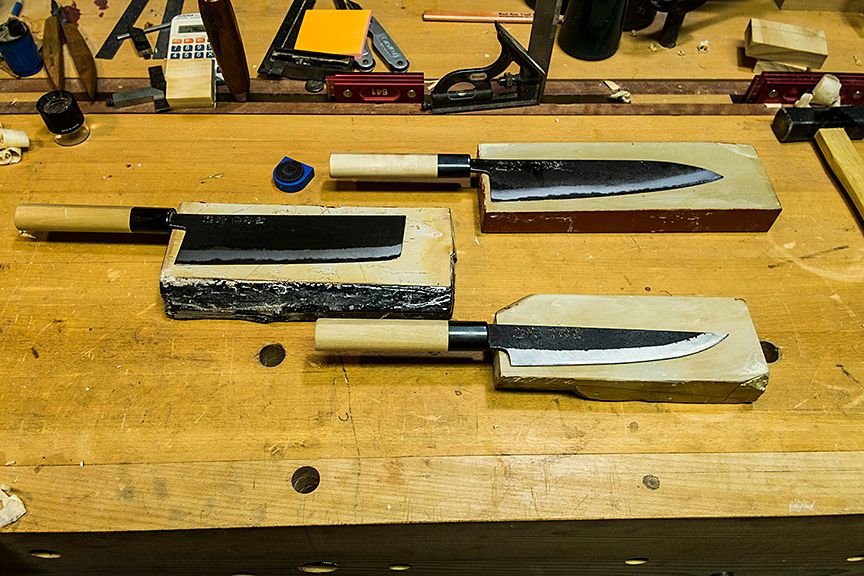
I've had three hand made high carbon steel Japanese kitchen knives for long enough to love 'em but a short enough time to still be amazed every time I use one . Like good Japanese chisels the knives are small works of art. They take a wonderful edge and feel good in hand with great balance and yet are very simple in appearance, ,almost looking unfinished compared to western knives.
A skilled blacksmith hand working high carbon steel can make magic. The cutter, chisel, plane iron, or knife produced can take and hold a cutting edge like no other. Every time I use one I break into a ear to ear grin.
The middle knife on the left is for slicing vegetables, the bottom right knife has a thicker blade and is used for de-boning and cutting heavier meats, and top right knife has a thinner blade and is for general purpose use but works very well slicing thin cuts from lighter meats such as fish. BTW, how do you like the way I snuck into the photo three of my natural water stones.
Last week when I was testing "sharpness" all three knives tested sharper than my best chisels, I can babble on but the only way to appreciate how good they are is to use 'em. After the first cut they no longer seem expensive.
About the only downside is they take more care than the typical stainless steel kitchen knife. BTW, nothing wrong with a stainless steel kitchen knife, I use them every day but when I'm in the kitchen for pleasure the Japanese knives come out to play.
ken
Friday, May 19, 2017
Pfeil Carpenter Chisels
As posted before I need more chisels like another hole in my head but....What can I say, the Pfeil chisels are very nice and at a good price point. To paraphrase Fabulous Frank, "Chisels will get you through times of no money better than money will get you through times of no chisels", or something like that.
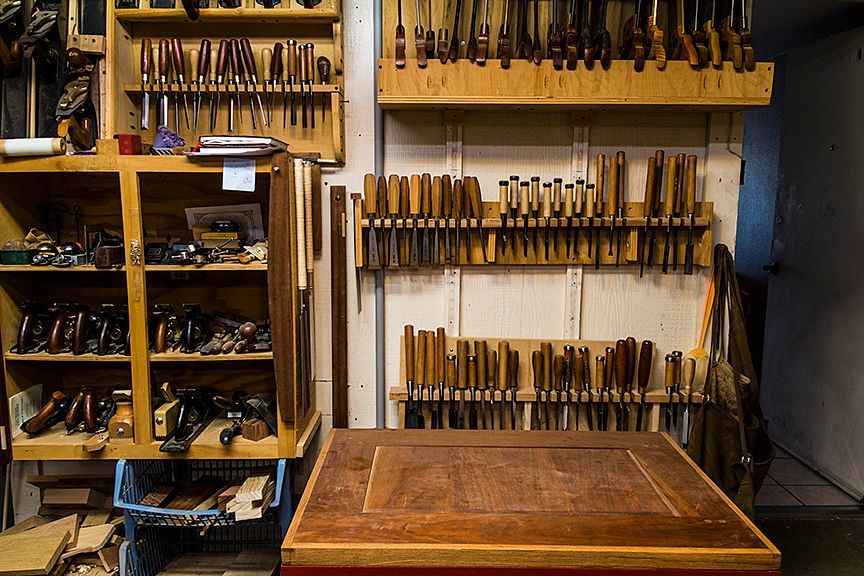
Of course when I made it home with the new chisels I had to re-arrange the chisel racks and find spaces for the new ones. The good news after much butt scratching and several test placements I found useable homes for all the chisels except for the crank-neck glue scrapper from Woodcraft. For now it will live in the center fill of the main work bench which is not a bad place for a beater chisel to call home. BTW, I can find many excuses to not make anything...Oh damn my chisels need re-arranging, that rocking chair will just have to wait. Look squirrels!
Here is a photo of the behind the main workbench chisel racks. There are two more racks, one over the sharpening bench and the other on the wall over the jointer. They are all full.
If the rest of the Pfeil chisels work and sharpen as well as the 19mm "test" chisel, I expect they will be used interchangeably with the Ashley Iles chisels.
My downsizing of the shop, of course, is not going well, it seems I throw or give away one thing and two replace it the next day. I swear someday there will only be 10 lbs of stuff in the 10 lb bag, but it may take awhile. Right now the biggest problem with space in the shop is wood storage. I have some very nice wood stored but because without fail nice sized cutoffs (and some not so nice sized) end up on top of the stored wood I can not get to it with out moving, I will not say tons of cutoffs, but a bunch of cutoffs. With the way the back is acting up I need help getting everything organized and MsBubba has been off playing Grandmother and when she's home our work schedules do not match. Oh woe is me. Whatever, I expect there is a nice weenie roast in the near future.
One of the things I'm going to try is using 50 gal trash cans to hold shorter cutoffs. It probably will not work any better but what the hey it will at lest make it easy to move 'em to the fire pit.
See you guys on down the road,
ken
Of course when I made it home with the new chisels I had to re-arrange the chisel racks and find spaces for the new ones. The good news after much butt scratching and several test placements I found useable homes for all the chisels except for the crank-neck glue scrapper from Woodcraft. For now it will live in the center fill of the main work bench which is not a bad place for a beater chisel to call home. BTW, I can find many excuses to not make anything...Oh damn my chisels need re-arranging, that rocking chair will just have to wait. Look squirrels!
Here is a photo of the behind the main workbench chisel racks. There are two more racks, one over the sharpening bench and the other on the wall over the jointer. They are all full.
If the rest of the Pfeil chisels work and sharpen as well as the 19mm "test" chisel, I expect they will be used interchangeably with the Ashley Iles chisels.
My downsizing of the shop, of course, is not going well, it seems I throw or give away one thing and two replace it the next day. I swear someday there will only be 10 lbs of stuff in the 10 lb bag, but it may take awhile. Right now the biggest problem with space in the shop is wood storage. I have some very nice wood stored but because without fail nice sized cutoffs (and some not so nice sized) end up on top of the stored wood I can not get to it with out moving, I will not say tons of cutoffs, but a bunch of cutoffs. With the way the back is acting up I need help getting everything organized and MsBubba has been off playing Grandmother and when she's home our work schedules do not match. Oh woe is me. Whatever, I expect there is a nice weenie roast in the near future.
One of the things I'm going to try is using 50 gal trash cans to hold shorter cutoffs. It probably will not work any better but what the hey it will at lest make it easy to move 'em to the fire pit.
See you guys on down the road,
ken
Sunday, May 14, 2017
Photos of New Toy
I grabbed a paring chisel off the rack and tested it. Off the rack it tested to 330 grams. After sharpening on Spyderco brown and white stones it tested to 210 grams.
See photo:
See photo:
After stropping on leather with 'green stuff' it tested to 160 grams:
I'm not sure how accurate either test was because I was holding the chisel with my left hand while shooting with the right but the numbers are in line with other tests.
Now the next question is: Is 150ish grams a good number or should I be working to lower it? So far 150 grams is the range I've found on different chisels with different steel, O-1, K-510, White Paper, and using different stones and freehand as well as jigged.
More fun with meaningless numbers to follow.
ken
Subscribe to:
Posts (Atom)