Sunday, June 29, 2014

Honey Locust

I've never worked with Honey Locust, of course you could say that about a lot of woods. The Wood Data Base list it as: "...Honey Locust can be difficult to work with hand and machine tools on account of its density, though it generally produces good results." With that info I decided to mill a small piece to cut a couple of dovetails and put some finish on. I did not find it difficult to work at all, it saws nicely, no problem with planing, cuts smoothly with a chisel and at least with "Tried and True" the finished look is very nice. I can get Honey Locust for about the same per BF as Red Oak, I think it is easier to work than Red Oak and the color and figure is more pleasing to my eye.

Kinda brings up a problem, I can always find Red Oak or for that matter Soft Maple, in this area both cost about the same as the Honey Locust. Do I keep the Honey Locust for furniture and go find some Soft Maple for my base or go ahead and do the workbench base in Honey Locust. Right now I'm leaning towards keeping the Honey Locust for other projects.


Bench Slab Final Glue Up

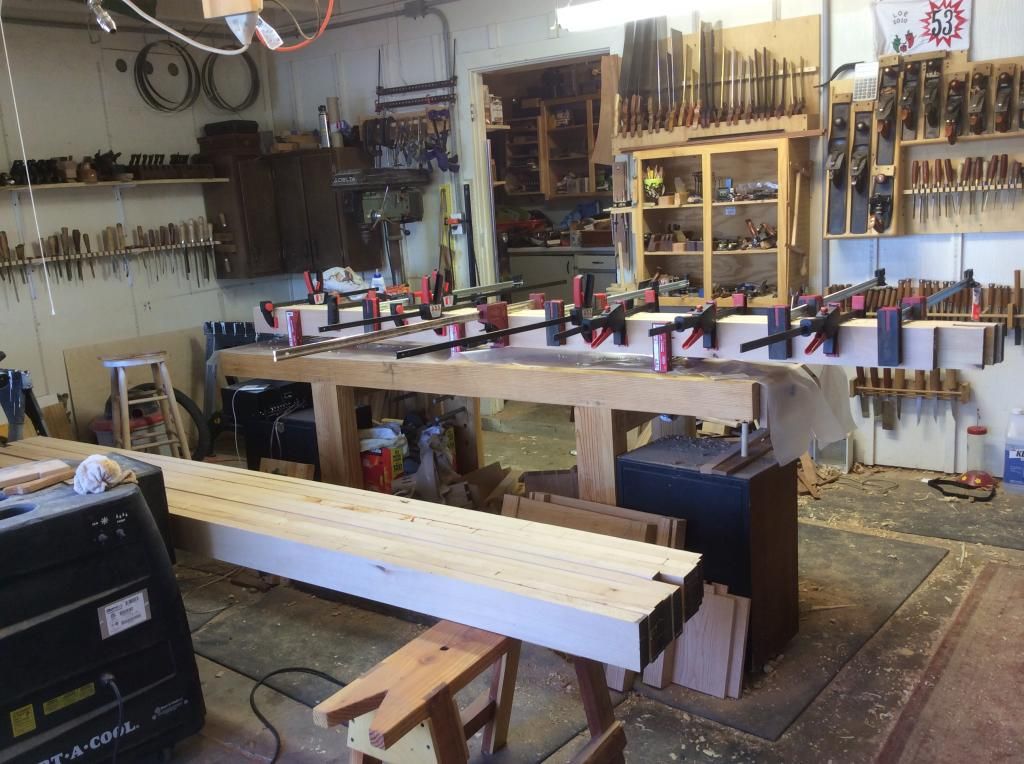
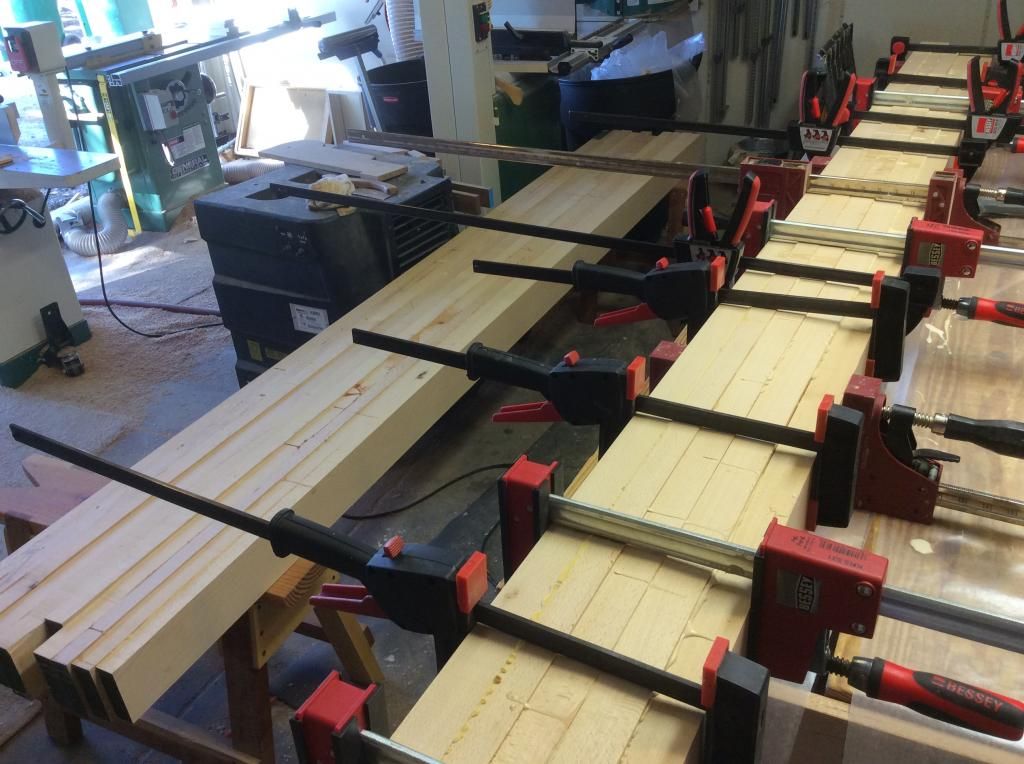
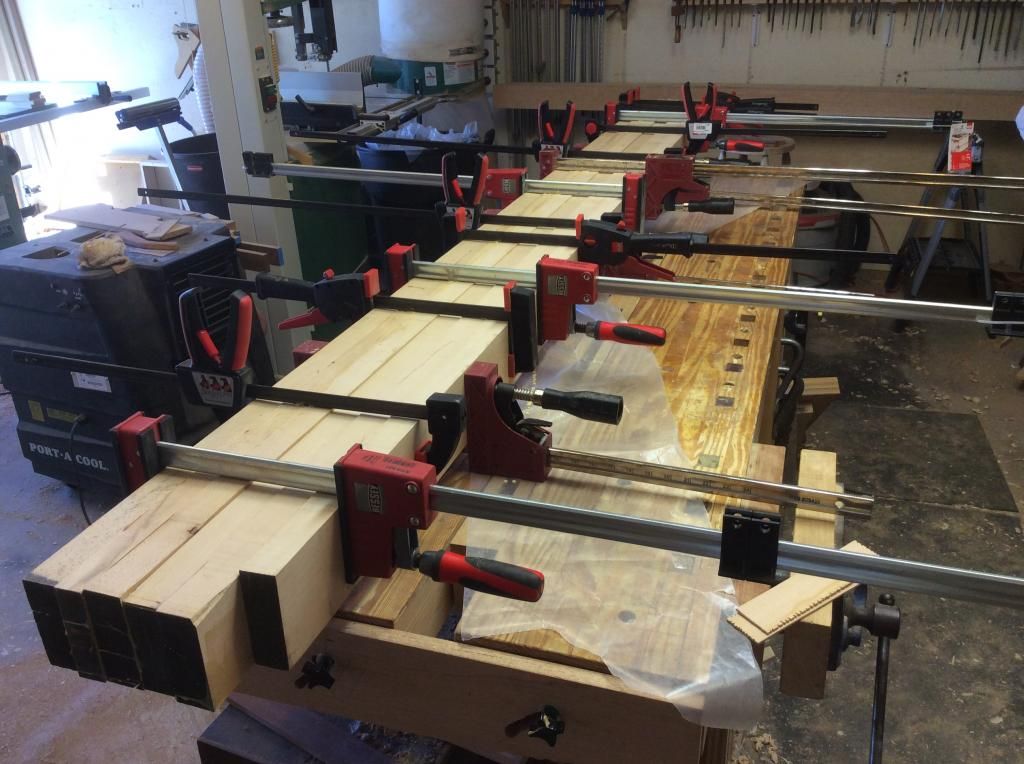
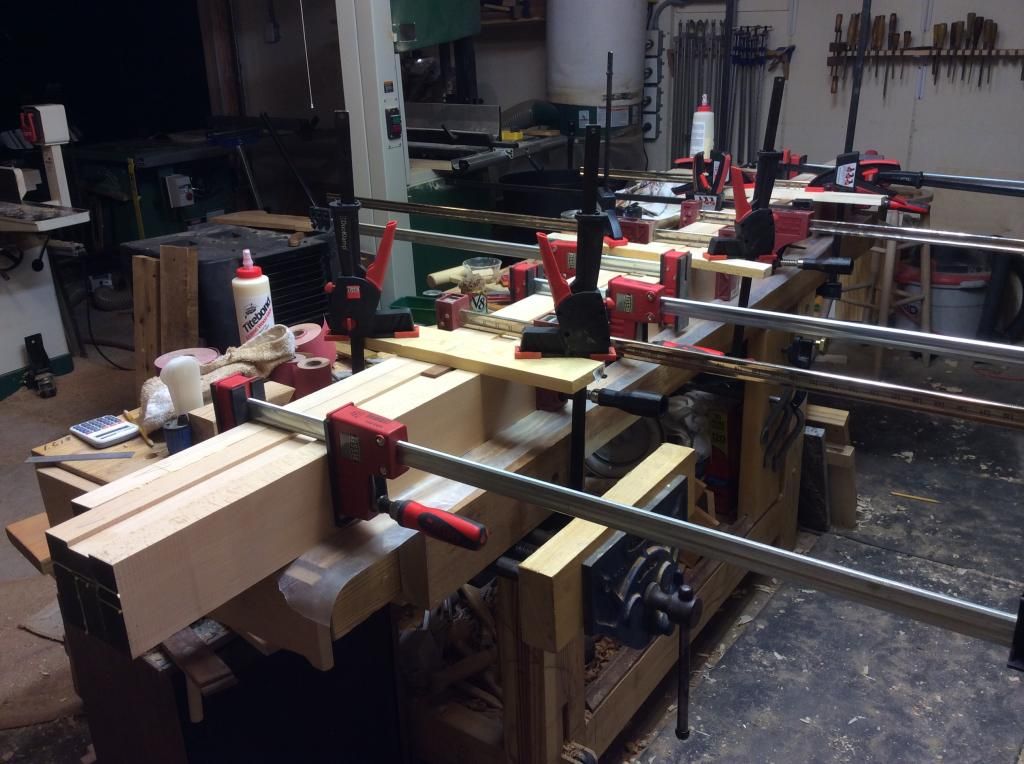
The final glue up of the slab is in the clamps. Later today I'll pull the clamps and move it aside to free the bench. I've 60 or so BF of 8/4 Honey Locust for the base that I hope to rough dimension this afternoon and if all goes well glue up the rough blanks for the legs and stretchers.

I doubt it will happen as the temp is forecast to hit around 105F and it is already warm in the shop....I expect the 105F forecast will be passed early and we may see 110F. Over 105F and it is pool and tall cold drink time, the shop can wait.

BTW, final slab dimensions will be 645mm wide, 2300mm long, with final thickness TBD. There will be an 80mm split off center, the front will be 370mm wide with the rear 195mm, the bench will have a Paramo 53 face vise on the left, dog holes along the front and near the middle, a bench jack, and no end vise, wagon or otherwise. The final height will be 900mm.

I've tried lots of bench configurations and different vises, face and end, over the years. This bench is the result of finding what works and what is used. As everyone works differently it might not work for you but I expect it will be close to a perfect bench for me with everything I need and nothing extra to get in the way.

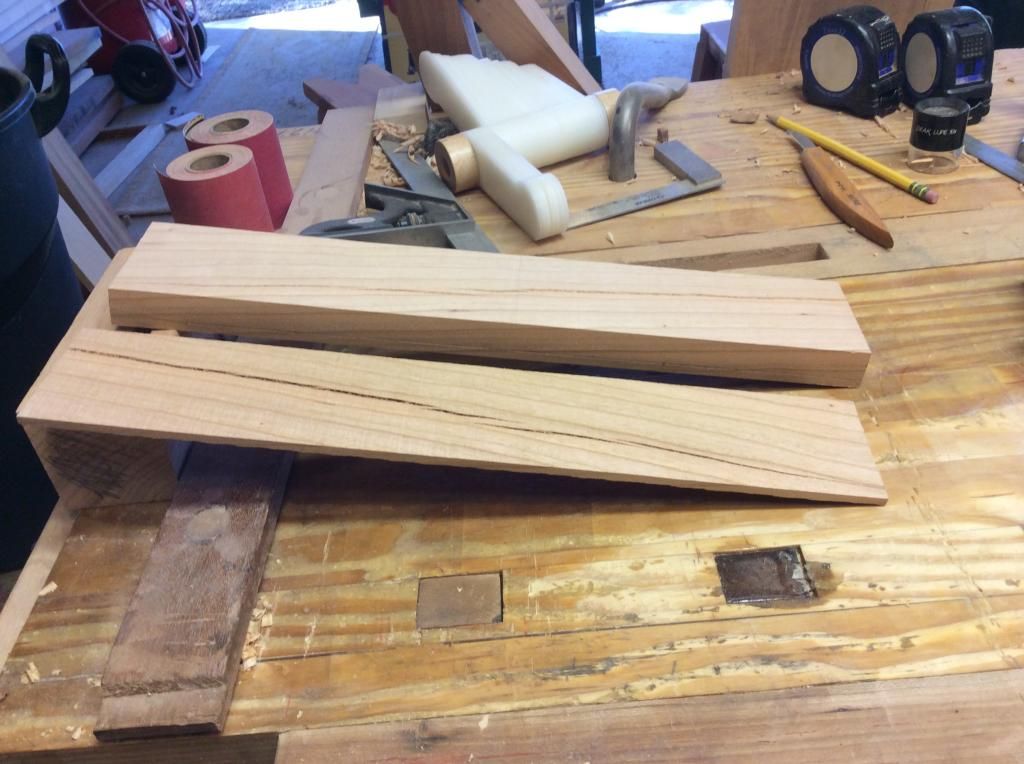
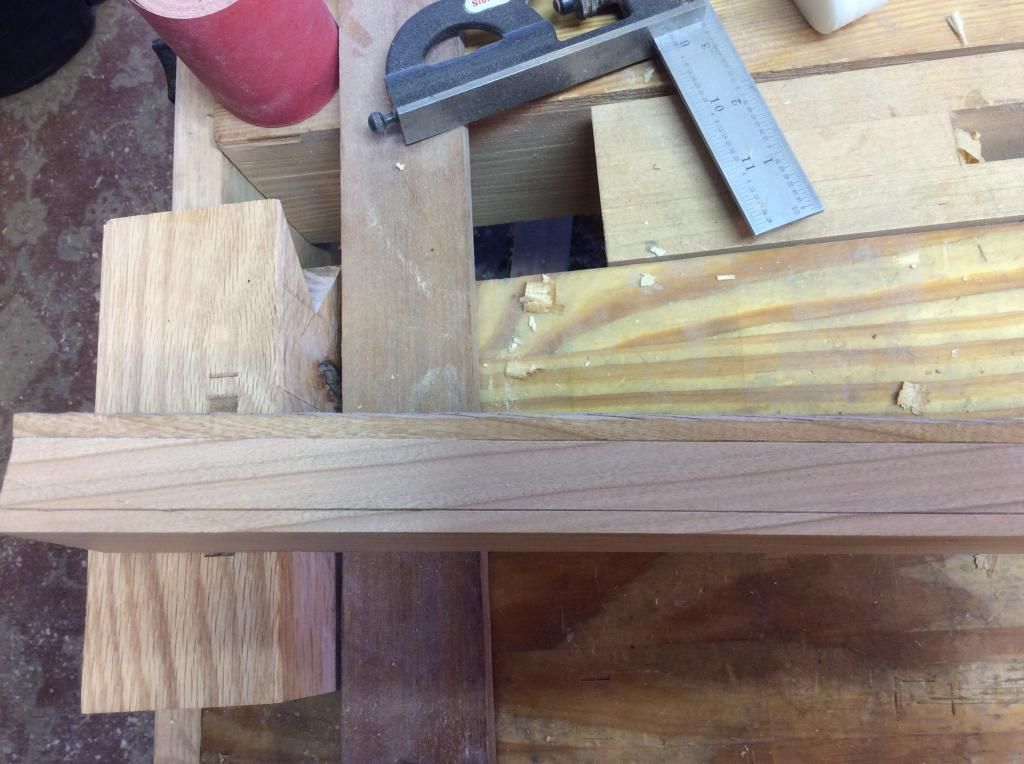
Two views of the final slab glue up with the front slab on the saw benches:


Friday, June 27, 2014

The Never Ending New Bench

I'm still working on the new bench slab, have some help this weekend so I expect to finish the slab by Sunday. I've made a couple of design decisions, I had been leaning towards a single top but a split top won because of ease of build and I like the slot to hold tools. What I will do is make the tops asymmetrical with the front top about 340mm wide, a 80mm split, and then the back top about 190 to 200 mm wide, giving a finished bench top of about 610mm.

I expect by the time every thing gets trued and dimensioned the top will be a touch over 100mm thick and close to 2300mm long. I will move my Paramo #52 from the old bench to the new one and reinstall the leg vise on the old bench. The new bench will not have an end vise, nor will it have a sliding deadman.

I will make a bench jack for it to replace the sliding deadman. I find about 99% of end vise jobs can be done just as well with holdfasts and battens and the few jobs that need an end vise can be taken care of with a Wonder Dog. No more than I use an end vise and because most end vise jobs can be done as well using other means, I can not justify the work to install one.

BTW, the reason for the asymmetrical top and one of the reasons I'm building a new bench is on my old bench the split is right where the dog holes needed to be for the holdfasts on many jobs.  My benches keep getting simpler with every new build but my guess is this one will be paired down to the essence of a work bench....All that is needed, nothing more and nothing less.


Sunday, June 22, 2014

Work OnThe New Bench

I'm out to the shop in a couple....need my coffee fix to kick start the old body....but can't spend too long putting it off. The WX man is calling for 105F today, this time of year heavy work needs to be finished before 10:00 AM then break until late afternoon before picking it up again. Makes for some nice afternoon naps but sure slows progress on whatever you are working on.

MsOK had other plans for me yesterday so I didn't get the second four board "unit" glued up but saved the fun for this AM. I figure I can have it glued and ready to move before I have to go to the Tile Store with MsOK.

I'm still conflicted on the base, the Honey Locust is heavy enough to work well but has a strong figure. As I'm making a "pretty" bench I'm not sure it will look good with the Beech slab. I may pick up some Soft Maple for the base or even some more Beech and save the Honey Locust for some table tops.


Saturday, June 21, 2014

Side Bead Molding Planes

Yesterday I received four side bead molding planes from Josh at Hyperkitten, Two 1/4" and two 3/8", the Griffiths 3/8" on the left is especially nice.

Too busy with the bench to spend time cleaning the irons up just yet but that will come, what I can see it doesn't look like they will take a lot of work to have user ready.


Friday, June 20, 2014

Started Glue Up

My ass is dragging, it was well over 100F today and I spent the day slinging 8/4 Beech around the shop. The joy of a one man shop. All the lumber is rough cut. My plans are to true three sides and glue up four boards at a time. Once I have enough four board units glued up to equal the width of the 20" planer I will glue the four board units together and true the fourth side. As the planned width of the top is 610mm (24"), after truing the main slab I will glue the edge boards to the main slab and hand plane them true.

MsOK can help me move the four board units around the shop but once I have the main slab glued up I'll need help moving it and running it through the planer.

When the slab is finished I will build the base. My neighborhood wood man had 60 BF of 8/4 Honey Locust for a fair price so it looks like the base will be Honey Locust. I'll do the base joinery once the slab is finished. The legs I'll get glued up maybe this weekend.

Because my benches are getting simpler with every build, this one will be a quick build.  If work doesn't interfere I could have it finished in a couple of weeks but I expect a good EFD will be near the first of August.

The first four board unit:


Thursday, June 19, 2014

Sharpening Bench

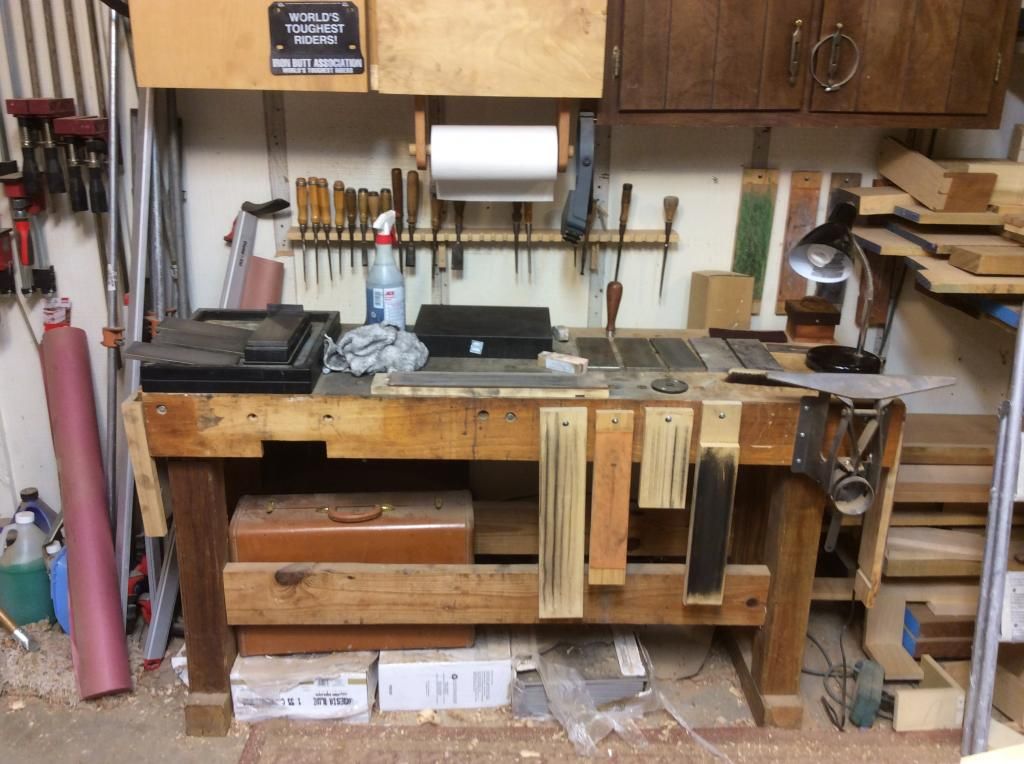
Just a post to show my sharpening bench. I put a dedicated sharpening bench almost on par with a solid work bench as necessary shop equipment.
Most of us tend to be lazy and if sharpening isn’t quick and easy we will put it off and digging out sharpening gear and setting it up is neither quick nor easy. It really makes little difference what system you use to sharpen they all work about the same but the best system in the world will not work if you do not use it. 
The bench should be dedicated to sharpening and within a step or two of your main work bench. It should hold whatever stones, strops, machines, and/or jigs you use to sharpen with an auxiliary area for storage of gear and supplies that are not used every day..
My sharpening bench meets most of those requirements and is about a meter off the working end of my main bench, it has all my “stones” laid out and my strops either in position or within easy reach if I want one that is not used often. On the right end is my saw vise and above the bench are stored stones, plates, saw files and other gear that are not used everyday.
When working all that is needed to refresh an edge is to step over to the bench, give the iron a couple of strokes on two stones, a fast strop and I’m back to work with a sharp edge. It is the same story at the end of the day, what irons I’ve used will get a fast touch up before putting them back on the rack.
When sharpening is easy and quick it ain’t no big deal.
My sharpening bench which BTW was my first woodworking bench, built back in the 80s of big box SYP:


Remember today is Juneteenth, celebrate responsibly. 


Sunday, June 15, 2014

Juneteenth: June 19 1865

Juneteenth is coming up this week. While we celebrate July 4th as the day of the Declaration of Independence and the founding of our nation it wasn't until almost 100 years later we as a nation began to live up to the words of the Declaration. "We hold these Truths to be self-evident, that all Men are created equal, that they are endowed by their Creator with certain unalienable Rights, that among these are Life, Liberty, and the Pursuit of Happiness".  Juneteenth marks the true start of our nation for all men and should be celebrated as such.

Starting the New Bench

The Beech for the new bench has been in the shop for a month or so, it should be reasonably stable as it came out of an AZ warehouse before my shop. I sorted and measured a couple of days ago and this morning with MsOKs help I started truing an edge so I can rip to rough width.

Four boards into the job MsOK pulled a back muscle, that ended work on the bench for today. You got to give the old gal credit she was game to try. I can finish truing an edge and even rip and dimension by myself but it sure is easier with a extra body to help. Once the slab glue up gets more than about eight boards wide a second set of muscles is a must have. I've a couple of helpers available, one was to help today but something else came up....Oh well, the joy of a one man shop.

If all goes as planned and after ripping the Beech doesn't turn into 3 meter bananas it should take 14 boards to get the wanted bench top width of 610mm (24'). I'm rough ripping to 110mm and should end up with a top a little over 100mm (4") thick.

I still haven't settled on a base wood. The Ash in the area is the same price as Soft Maple, both more than I want to pay for base wood but I may end up using Soft Maple. My local wood guy may have some 8/4 Honey Locust for almost $2 a BF less than the Maple and Ash. If it is true then the base will be Honey Locust.

Here are the boards we trued this AM, two 130mm wide and one 240mm wide. At least it's a start.


The next 240mm wide board is what did in MsOK's back. Wide and long 8/4 boards will do that.

Thursday, June 05, 2014

New Bench Appliance

I've reasonably good saw skills, not the world's best but not too bad either and I know how to use a chisel. Those skills along with a little understanding of marking out and dovetails are not that big a deal but....as always there is a but...In my experience there are two areas where you are likely to screw up dovetails, most of the time not too bad but enough to require a little work to make all the joints look as nice as you would like.

The two areas are marking the dependent joint and not properly judging the compressibility of the woods when sawing the dependent joint. Knowledge of compressibility just comes with using the woods, sometimes wood you think you know can bite you but stuff happens. When it does you either make the joint over if it splits, get busy demo-ing your chisel skills or showing your great woodworking skills by figuring out how to hide the gap.

Marking the dependent joint is where most of my DT screw ups happen. I've tried just about all the different ways, using a knife, using a pencil, using a ball point pin, tails first, pins first, the "140" trick, the 'blue tape" trick, you get the idea. I've tried most ways and they all work, some a little better than others but all of them allow you to screw up the marking occasionally and it doesn't take much of a miss to make a really ugly joint. In fact just marking and sawing works about as good as anything with no more or less gappy or too tight joints and miss aligned shoulders. BTW, I will get to the point, promise.

Several days ago on one of the woodworking blogs, I think Sawmill Creek, someone posted about a saw guide for making dovetails. I wasn't interested in the saw guide but I was also killing time at work so I followed the link. It was to David Barron's site and on it he had a video using the saw guide but what I found interesting was his Dovetail Alignment Board .

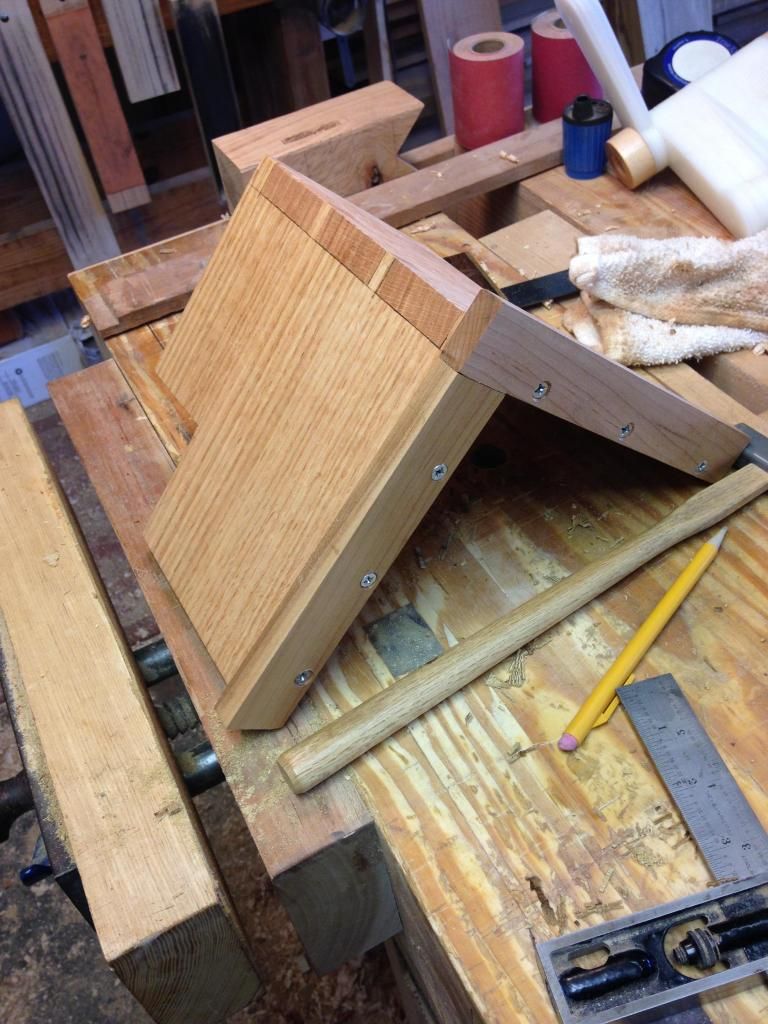
I cobbled together a copy the other day and all I can say is it works. It works much better than laying a plane on its side even when using the "140" trick and doesn't take the time to cut a rebate, I guess what I like about it is there are no extra steps to using the appliance.....just place your pin board in the jig, aline the shoulder of the tail board and hold the board against the fence and make your marks. It will not slip, if your marks are not deep enough just replace the tail board and make 'em deeper....it is really slick.

I know I'm probably late to the party as usual and the beer and food are already gone but that is the story of my life riding the short bus.

A couple of photos of the bench appliance:


The next time I cut some DT's I'll document using the jig.  


Sunday, June 01, 2014

Short Bus Rider Finally Catches the Long Bus

Only two reasons I've been so slow to go to a Lenox Tri-Master bandsaw blade, I'm a cheap SOB or I'm too dumb to walk the earth. If you know me, you know I'm not cheap. A good friend once said "Bubba you really don't like your money, do you?" he pretty much hit the target.

I finally ordered one and the USPS delivered it Saturday, because I had to clean the house and get things ready for MsOK's return (two large hairy dogs, a born slob, and three weeks of damage, there was a lot to do) I didn't have time to install it Saturday.

Bottom line, even taking into account most new blades make nice cuts, this one is worth the money. It cuts fast, smooth, and stayed square on the line. I'm glad I waited to re-saw the aprons for the hall table, I expect there will be a lot less waste and clean up.

Here are a couple of photos of the first cut with the Lenox TriMaster 1/2", I don't know if you can see in the second photo but it really stayed right on the line with no guidance from me other than holding the board against the fence and a smooth push.

Cut sides up:


Split the line and stayed straight:


Saturday, May 31, 2014

Adult Supervision

The critters and I will have some adult supervision once more, my guess is it will be a good thing. A life of eating and drinking what you want when you want it and sleeping at odd hours can't be good for your soul. Well maybe good for your soul but not so good for the body. Anyway as I type or maybe that should be input this I have one eye on Flight Aware, she has just crossed into Oklahoma and should be landing just before 2200MST.

I've done a few crossings riding in steerage and it ain't no fun, it's so bad we had a rule "Business or Better" for any crossing. Especially if we were going to relive a crew or pick up an aircraft and had to fly the next day. Anyway I expect she will be knackered but too tired and wired to sleep.

I should get a few attaboys, the house is clean, the plants did not die, and I finished a little box, a step stool, and the TFH, and only a few new tools snuck into the shop while she was gone. Not too bad.

I've rough cut the girl child's hall table's legs but have been holding off rough cutting the aprons because I had a new bandsaw blade on order. It came today, maybe I can get the aprons rough cut tomorrow so everything can have a day or two to finish doing stupid wood tricks and I can finish her wedding present before their 4th anniversary. I wouldn't want to rush things.

One last look, she is crossing Amarillo and will soon be in New Mexico and headed down hill.

Monday, May 26, 2014

There is a Season

As an ordained minister in The Church of The Flying Spaghetti Monster (FSM) and Dudeist Priest I should be allowed to borrow a little from my Judaist/Christian brothers. Whatever, I think it was Picasso that said "Everyone borrows, Artist steal". OK so maybe this isn't stealing but, and I'll get around to the point eventually. Ecclesiastes 3.1 said something like "For everything there is a season, and a time for every matter under the Heavens".

Well I've reached the end of a season, I'm hanging up my Motoport riding suit, LDComfort underwear, Shoei Helmet, Kangaroo gloves, and Sidi boots for the last time. The three motorcycles are for sale. I can no longer ride safely at night because of poor night vision and the riding I enjoy is Long Distance Endurance riding, ain't much chance of covering long distances riding only during the day. The season has passed, I've done almost everything I've wanted to do on a motorcycle, it's time to quit.

BTW, it has been one hell of a ride, I've met and ridden with some great folks. Some that can, will, and have done amazing things on motorcycles. I've showed many riders how to ride safely and in comfort through the desert no matter how hot it gets. I hope someone will carry on with that mission. But whatever, it is time for me to put The Dirty Fat Girl on the kickstand for the last time.

The Dirty Fat Girl, MsOK, and me running Hwy 180 in New Mexico:


Sturgis SD for the 69th Bike Week:


Luling, TX City Market BBQ:


Outside Ouray, CO:


California Coast:


Well you get the idea, it was great fun.


Saturday, May 24, 2014

Work Benches

As posted earlier, this last week was a tough one at work, I was in the short rows with no energy for the shop. Work, sleep, eat, and spend a few moments geeking on the web each day, that was pretty much the week.

One of the things I noticed was a number of posts on work bench builds and how folks obsess over their build and most of the time over things that do not make a rat's ass of difference. I will admit to trying different things, different vises, split tops, square dogs, round dogs and so on but I also find with each new build my bench gets simpler.

The vise you use really doesn't make a hill of beans for either face or tail. Go for the easy install and easy to use especially for the tail vise. Battens and holdfasts will do 99% of what a tail vise does, easier and better most of the time. Some day I will build a bench with out a tail vise and I'll bet I will never miss it. A good face vise, should hold, be fast and easy to adjust, and easy to install. Most early UK made metal vises fill those requirements i.e. Record 52 and its clones.

The only really important things about a bench are: Is it heavy enough? Is the joinery strong? And is it Goldilocks, neither too big nor too small?

Make it flat, heavy, and strong, everything else is lipstick on a pig.

New Philly Plane Classic Smoother

I received my new Classic Smoother from Philly Plane a couple of days ago. As I was in the short rows of a tough week at work I didn't have time to try it out until this AM. The iron was in good shape, maybe 5 minutes on the back and much less on the bevel and it was ready to go.

First impression is:....This is a freaking work of art, almost too beautiful to use. In fact when I showed it to a friend his first response was "...you are not going to use it. Are you? It should go in a display cabinet." Of course my answer was I'm going to use it and in use it is very nice. It is easy to set with just light taps, it holds the set well, and it leaves a pristine surface. It's a keeper.


Sunday, May 18, 2014

I Have a Tool Jones

I have to admit to a tool problem, put a new tool in hand and my pupils dilate, my breathing becomes heavy and labored, reason takes a vacation....it ain't pretty. It's one of the reasons my shop is full of little used tools. Ninety percent of my tools are well cared for and sharp tools ready to be used on whatever the project. The other 10% are in the process of being made ready or they are defective for some reason. But most of the tools are seldom used except for a core kit and that core kit is pretty small.

I would guess on most projects out of well over a hundred chisels I might use a 1/2 dozen, one of the pig stickers, a 1/8", 1/4"or 3/8", and a 1/2" bench chisel, and one of the paring chisels. Same story with saws, a 26"or 28" Atkins or Diston X-cut, one of the dovetail saws, a carcass X-cut, and a large tenon saw will take care of 99% of my sawing needs. Add in a router plane, a plow plane, a rabbet plane and one of the smothers plus a small wood stock planes. The misc stuff like a couple of marking gauges and marking knifes, dividers, dovetail markers, a mallet, a brace and a box of bits and I have all the kit needed for 95% of what I do.

That's a total of less than 50 individual tools and with that kit I can build almost anything if I add in a couple of bench appliances and a longer plane or two. And the truth is that is a damn generous kit.

I just came back from the shop where I roughly counted the tools on the wall behind the bench and those on the bench. there were over 200 individual tools, not counting scrappers, extra irons, straight edges, winding sticks or rules. I didn't count the tools on the west wall and cabinet, the east wall and cabinet, on the sharpening bench, nor in the tool room. My guess is well over a thousand hand tools stuck in various nooks and crannies around the shop.

If you stop and think it's pretty dumb because every one of those tools need care, used or not, and being very generous I need maybe 100 different tools. All I can say is somebody is a sucker.

Follow Up Photo

Ralph,

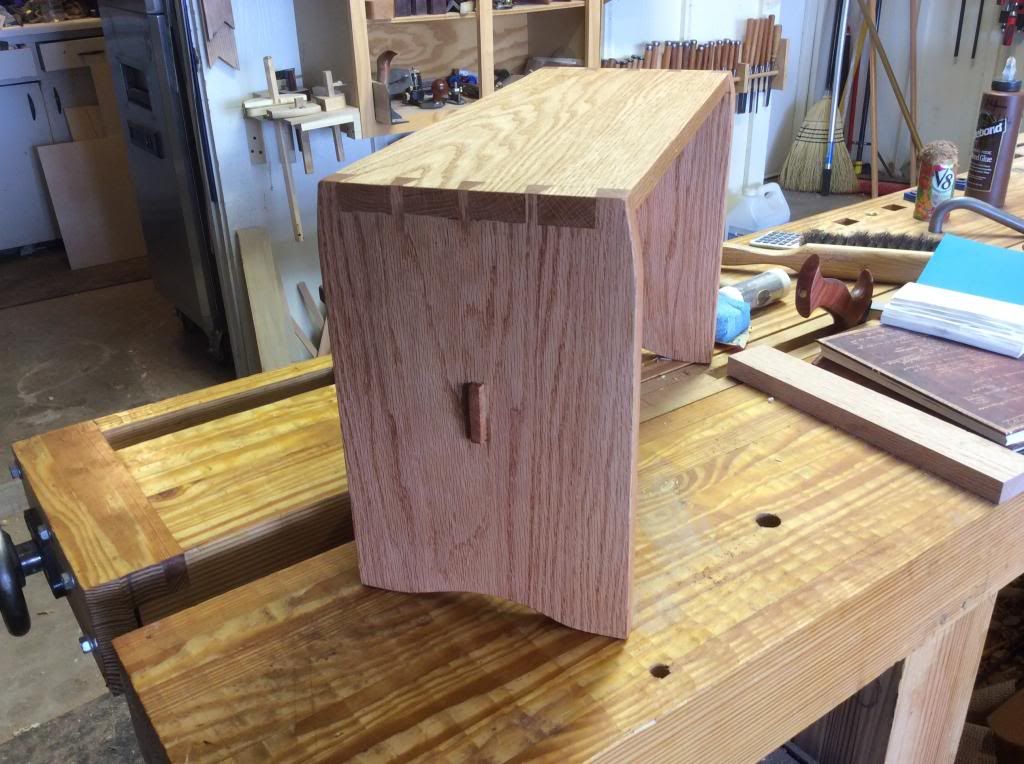
The top is 12-14mm narrower than the legs to (I hope) make it more stable. There is a slight flair running from about 50mm down the leg to the top so that the outer edge of the leg just meets the top edge of the top. Also I think the slight curve gives some relief, as does the curve on the stretcher, to the squareness of the basic stool.

Maybe you can see it in this photo:


ken  

Sunday

Summer is here early, it went over 100F yesterday. I have a swamp cooler in the shop and it will work to lower the shop temp 10 or so degrees until Monsoon season starts in July, but even with the cooler the amount of work that can be done in the afternoon is limited. Early morning is great and it isn't too bad after the sun goes down but mid afternoon you might as well give in and find a AC and something cool to drink. I was reminded of the facts of life in the desert yesterday as I finished up the step stool, I pushed a little hard as I was in the short rows and found myself getting the first symptoms heat injury. A short break with a couple of glasses of tea and remembering to turn on the swamp cooler took care of the problem. I love the desert, I love the heat but almost every year I have to be reminded to respect it.

BTW, with correct gear I can ride my motorcycle all day across the desert even as hot as 118F by using the same principals as the swam cooler. Only problem it's hard to get the swamp cooler to blow 85mph and still work in the shop :-).

I've been making this stool for awhile, it is sturdy and a easy build but also a good project to hone skills. Most I build out of Oak and finish with Tried and True and wax.


Tuesday, May 13, 2014

LV Tapered Single Iron

I made a wood stock for the small LV tapered single iron. It sure makes it easy not having to chop a mortice for the chip breaker screw.

I made a plane using the large single iron several weeks ago, for how I use wood stock planes it was too big. This one at 48mm wide is just a couple of mm wider than the Hock double iron I usually use. Functionally not any real difference in size between the LV and the Hock iron. The LV is a little longer than I like but I can get use to it. I wish LV made a little smaller iron for making a "Block" plane sized wood stock.

Use will tell but it seems to hold the set better and is a little easier to fine tune the set.....Could just be first impression or wishful thinking. Did I mention how much easier the build is :-)?


The new LV irons are really flat, about three strokes on the 3mu diamond stone and the back was polished across the cutting edge. Three or four strokes on the "fine" diamond turned a burr on the bevel, a couple more on the 3mu to polish, a fast strop and the iron was ready to go. Not bad for a new out of the box iron. I'm use to irons taking an hour or more (sometimes days) getting prepped for first use, These new LV irons are the flattest I've found, I'm not sure what they changed but what ever they did it's working. 

Monday, May 12, 2014

Monday Tool Porn

This has been the first three day weekend where I haven't taken PTO in a long time. When I first started the current job three day weekends were the normal but that changed a couple of years ago. We went from running one line a week always starting on Monday to the current system of 23/7 (the Sim has to be down for maintenance for 1 hour every 24) with lines starting whenever. Bottom line for the last year or so most weeks have been 6 day weeks and if 5 the days off have been split....Ain't no way to live life. I hope the suits have gotten the message.

Anyway it has been nice to not feel rushed. The first day I finished the TFH, yesterday I did some house chores and tool maintenance. Today more tool maintenance and cut some blanks for wood stock planes, making one. I believe this one will be a keeper, I may shorten the back a little and will give it a coat of BLO.

The blanks:


The finished plane:


BTW, the new plane is next to the wood stock I use more than any other, it is my go to for chamfering and trimming. It is so light and easy to use either one handed or with both. The metal ones are good for heavy work but for light trimming I will pick up one of the wood stocks.