Friday, April 27, 2018

More Of The 10lbs In A 5lb Space

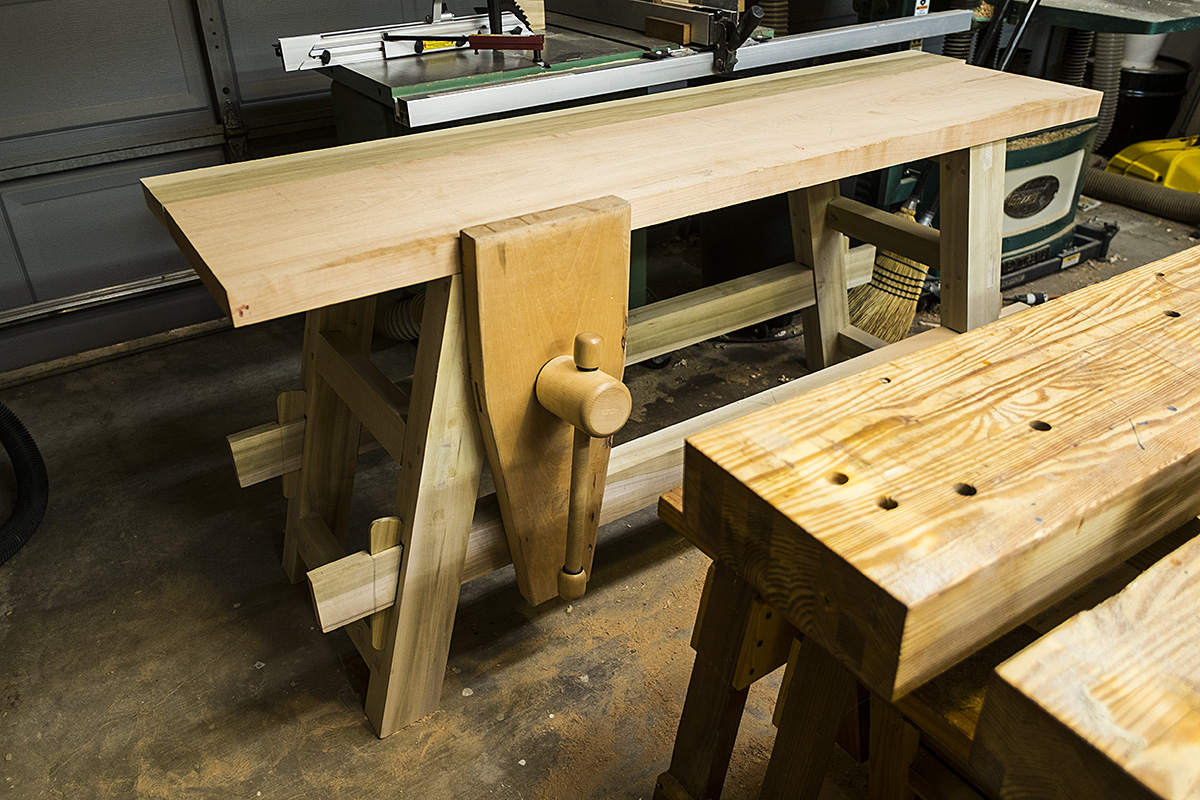
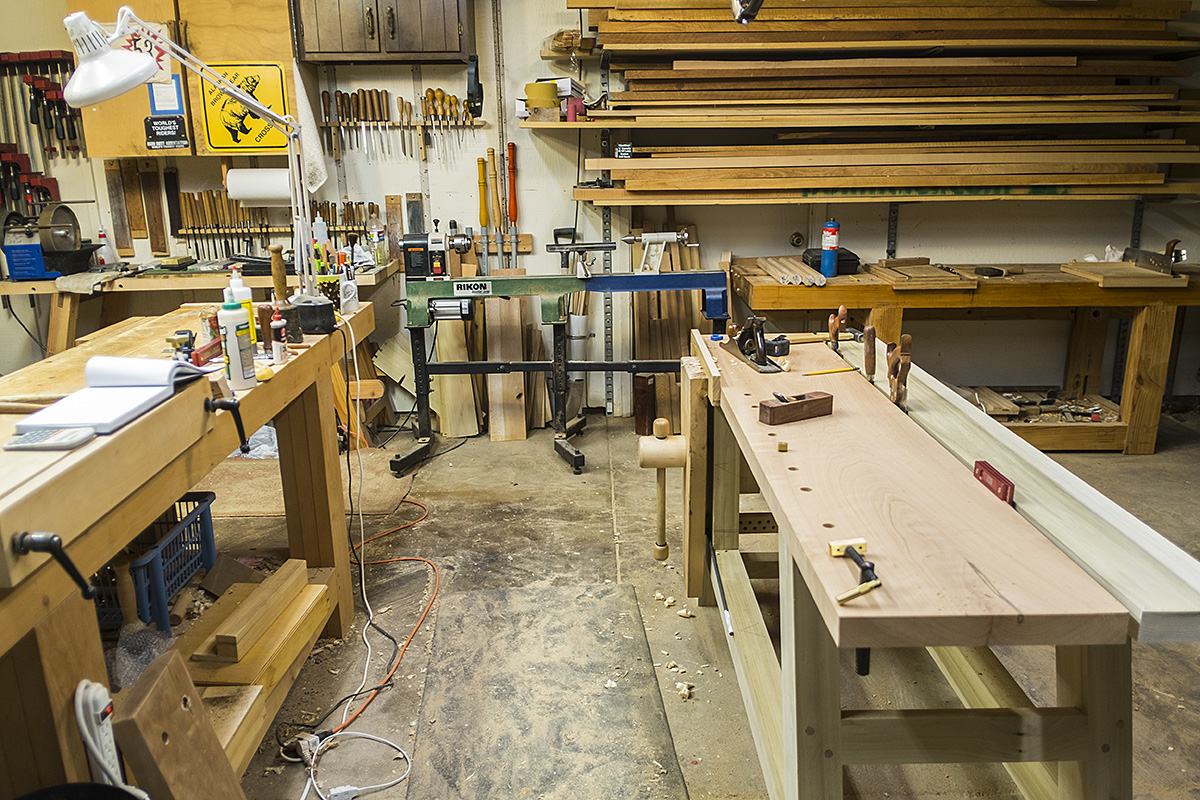
I rearranged the deck chairs this afternoon in hopes of finding room to work in the shop. The old assembly/joiner bench moved to the East wall of the shop, under the wood stack. The new bench moved to where the old assembly/joiner bench called home and the main bench stayed in place.

Because the Moravian bench is smaller it gives the feeling of more space in the shop. We will see how it works out but whatever, I want the chance to work on the travel bench before the Fall PNW trip.

From behind the main bench with travel bench and old assembly bench to the left:


Looking West to East:


Another West to East:

One of the things I've learned after building so many benches and then working on 'em is that most of the folks writing about workbenches are mostly talking out of their ass. I'm not sure I could do a better job or would want to but first time bench builders are not well served.

I'll go back to my mantra: Build it cheap, simple, strong, and quickly then go to work on it making furniture. After working on it for awhile build another correcting all the things that drive you barking at the moon mad about the first build. After three or four builds then if you wish spend a few bucks on nice wood.

Of course....YMMV.

ken

BTW, that's Sam the Wonder Dog photobombing the second photo. I'm sure he was looking for a rawhide bone.


Wednesday, April 25, 2018

Finished

Done!

The travel workbench is finished, kinda. The next time I have a reason to pull it apart I'll clean up the pencil marks, finish rounding off the tusk tenons and put some oil or finish on at least the base . None of that changes the bench functionality and the bench is fully functional as is.

I've done all the major jobs on it, edge and face plane, saw rip and crosscut, plow a groove, and chop end grain and the bench is rock solid, as solid as the main French/English bench.


Now comes the problem, where to put it. It is too good to just store in the Motorhome and only use on trips. I'm thinking I can move the assembly bench to under the wood storage and replace the assembly bench with the travel bench. Or I could give the assembly bench to MsBubba for her studio. What to do, what to do?

In some ways it is a nice problem to have but here is the sick part....I'm already thinking about making another one but slightly scaled up.

ken

Sunday, April 22, 2018

I Couldn't Resist

The two slabs are close to size, the rear one needs to be trimmed and both will need a little work on their faces.

Most of the bench is set in stone at this point. Base, Long Stretchers, and Vise Backer are 12/4 Poplar, the Short Stretchers and Back Slab are 8/4 Poplar, the front Slab is 8/4 Beech, and the Chop, IIRC, is 8/4 Red Oak. The Vise Screw is from Lake Erie Toolworks.

Anyway if you squint it kinda looks like it will look when finished.


There are still several days of work to go. The two slabs will need "blind pegging" and the pegs to hold 'em. There are two more mortises to chop, both shallow but a little long, and the mortise for the vise guide needs cutting into the Vise Backer. The Vice Backer also needs a 2 5/8th hole for the vise screw.  The slabs will also need final trim before I can roll the credits.

ken

Truing One Edge of Workbench Slab

I'm truing the reference (outside edge) edge of the Beech slab this morning. The edge wasn't 90 degrees to the face and was slightly wavy so first up was a woodie jack plane. For some reason once it was close I dug out the Battleship instead of one of the woodie jointers. I guess I felt I needed a workout. Whatever, I got one. Once MsBubba is up I'll get her to help run the other edge through the power jointer. It will be the inside edge and it doesn't need to be perfect.

The faces of the board are flat with no wind.  Once both edges are done I'll install the Beech slab to the base and do any clean up needed after installing the small Poplar back slab.

The bench will have a small split just wide enough to hold tools with the front Beech slab about 400mm and an ~130mm Poplar back slab. I've found asymmetrical slabs/work surfaces work very well and make the top of the bench easier to build and handle.

A couple of photos of truing the edge:


One of the LN #8. I'm too damn old to push that thing around for long. I'm sweating like a pig even after coffee and writing this post:


The board is just under 2200mm long. I'll trim about 400mm off for a final length of around 1800mm.

I dug out the wood screw, chop, and vise backer board and re-installed 'em on the sharpening bench (the first traveling bench) and they worked like a champ. I also did a quick place the chop on the new bench and it looks like all I'll need to make is a new vise backer board. That should save some time.

While I've never been a fan of leg vises, most of the ones I've tried have been finicky and don't really hold any better than one of the older English QR metal vises. This one with a wood screw is not bad, in fact I could grow to like it.

I think I hear a fat lady far off in the background, it's still a little faint but.....not long until the short rows.

ken

Saturday, April 21, 2018

Slab For The Travel Bench

From my experience with travel bench v1, a 8/4 slab is good enough. I really do not want to do a slab glue up for a 50mm thick or so slab. Problem, I do not have any wood in the wood pile that is thick enough and/or wide enough to make a usable slab.

Adding to that problem I went to bed last night and awoke with either a "cold" or a bad case of allergies, bottom line after a bad night I do not feel like doing anything other than drinking whiskey with some honey and feeling sorry for myself.  One problem with that plan, I want to work on the bench once I feel like it and the wood store is closed on Sunday.

What to do other than suck it up Bubba and make the trip. I did, and after going through the stacks at the wood store I couldn't find a single board that would work and almost gave up but I remembered they keep the European Beach inside with the $40 USD a board foot wood. At first glance the Beech stack did not look promising but hidden in back was a 8/4 X 400mm X 2200mm hunk of Beech that is perfect for the slab. Whip out the AmEx, throw it in the bed of the trunk and I have my slab with zero glue up....Life doesn't get better.

It is still whiskey and honey and feeling sorry for myself but at least I have the slab for when I can work on it.

ken

Friday, April 20, 2018

Travel Bench Base

The Travel bench base is together. Still to go is the slab, tool tray, vise backer, chop, and vise install. With the work schedule and MsBubba's needs I expect it will be touch and go finishing by Memorial Day weekend. I'd hoped to take it to Mexico for a shake down cruise before we head to the PNW. Maybe the 4th will work.

Anyway the base is solid as can be even without the slab. Here are a couple of photos:


From the other end:


While I'd like to start the slab my back is telling me no mas, no mas. I think instead I'll pour a glass of Laphroaig and get ready to watch Rachel and the Friday night news dump. We are living in interesting times. If all the things that have happened from the 40's till now hadn't happened and I tried to pitch a novel covering that period of my life i'd be laughed at and thought a nut.

I hope everyone has a good weekend, 

ken

Saturday, April 14, 2018

Fitting Long Stretchers In A One Man Shop

As much as I enjoy building workbenches I'm getting too damn old and weak to wrestle the big hunks of timber around the shop by myself without lots of breaks.

This morning I cut the tenons on the long stretchers and I'm fitting them to the base if my back holds up.

Here is a photo, the first two are fitted, two more to go:


From the other side:


It is a good thing it's a workbench and a traveling one at that, there are a few more boo-boos and tear outs than I would like. None will affect its function but....

After fitting the stretchers they will need to be marked for the wedge mortises.

I should go find the lumber for the slab today. If I don't it may be awhile before I get another chance.

ken

Friday, April 13, 2018

Panic In Casa Chaos

I just finished gluing up the two base assemblies for the traveling workbench.  The second through mortise tenon froze about 6mm  shy. Oh shit, oh shit were in the hell is Lumpy. I scrambled around finding Lumpy, clamps and a block to beat against and managed to get the joint to seat ok, not great but ok. BTW, I didn't have Lumpy or even clamps out because the dry fit went so well. Shame on me.

After gluing up the second base assemble I inspected the first one carefully and saw that I had a case of the dumbass with the first. Even though on something like a workbench I chisel mark and fill in the marks with a black pen on each piece so there is no question with tenon goes into which mortise. Well I guess there was a question because the #1 tenon was put in the #4 mortise. The good news is I get 'em all pretty close to the same size. The bad is I usually relieve the back shoulder slightly so the show side pulls up very tight. Guess what, the inside shoulder is beautiful the face one not so much.

I can tell myself it makes no never mind.....It's a workbench and after the first trip to the PNW the slight gap will be the least of it's booboos. Whatever, it still pisses me off that I can be so dumb.

Wednesday, April 11, 2018

Watergate to Pussygate Plus a Little Traveling Workbench

As someone who lived through the Cold War, Cuba, Vietnam, the treason of Nixon, Watergate, Reagan, the Bushes, and now Pussygate this is the first time I've been frightened of the final outcome. Whatever it will be, shit is getting real. 

On to something I can somewhat control the final outcome. I had a rare couple of days off in a row this past weekend and while I didn't get as much done as I could have the base of the traveling workbench is coming along.

A photo of the base waiting glue up:


As always click 'em to big 'em.

Next up is sawing the tenons for the long stretchers and gluing up a slab. I'll reuse the wood screw for the vise and I expect make a new chop. There is a ways to go and I'm not in the short rows yet but I can see 'em.

ken

Sunday, April 08, 2018

Saw Skills

Shannon Rogers over at Renaissance Woodworker made a statement that I've long felt was true but had never heard articulated. That saw skills were the foundational skill set of woodworking.

If you can saw to a line everything else is easy. We go on and on about sharpening, natural stones vs. man made, what steel is best HC vs. A2. Wood stock planes vs. metal and so on. Bottom line if you can saw, and any saw that is sharp will work from the cheapest to a fully blinged out Bad Axe, making joints is quick and easy. If you can not, well you are in for a lot of work that often does not turn out well.


An Organized Shop Is A Sign Of A Sick Mind

Over on one of the woodworking forums is a thread asking for photos of member's tool storage solutions. Of course this is a chance to show your shop which many have, myself included.

If there is a common theme to the photos it is most are too damn clean and organized. There has always been two camps, one has every tool having a place and every tool in its place. The other, every tool's place is where it was last used. Both groups seem to work efficiently unless a tool is either moved or misplaced.  I tend to fall in the middle, tools have a place but I'm not anal about it. That said, from my experience over many years of dealing with maintenance folks the last group tend to be a hell of a lot more fun to have a beer with after work.

Anyway, the posts started me thinking about what my shop looks like mid-project and that is today's subject. I'm in the fitting of joinery stage on the traveling workbench and here is my shop as I left it last night.

Main Bench:


Joinery Bench:


There is a little of every tool in its place but mostly where I last used the tool.

Moving on:

I've had a recently rare three days off in a row, for a year or so we have been running back to back lines with usually only one day off before starting another line or two. It is not sustainable and as much as I like my work if it keeps up retirement will soon follow.

To add to the three days off in a row, I will not say enjoyment but at least to the interest, the critters and I are living with no adult supervision for the next couple of weeks. MsBubba is in the UK for her Mom's 90th Bday.

Here's a whisky to Mom and 90 years vertical and looking down at the grass, cheers Mom.

ken


Friday, March 23, 2018

March 22 2018

MsBubba after 15 or 16 years, we are not sure, decided to make a honest man out of me. The 22nd was also my 75th Bday, damn time goes by fast. I guess MsBubba is now MrsBubba.

The kids came out from Houston to help celebrate and Jamie did the ceremony. A few friends also showed up for food and drink. Out of 75 this was the best.


One of the family:


Most important, Willie cooking:


ken


Sunday, March 11, 2018

eBay and ECEPlanes

eBay can still work but the noise to signal ratio is high and I think getting higher. That said the other day I found a hidden prince among the frogs. A little back story.

ECE traditional planes are one of the true bargains in the wood working world. For either ECE Smoother or Jack Highland Woodworking asks $110 USD. With either you get a plane with a good iron and cap iron that is usable right out of the box. Used Stanley's approach that price point and they will many times need work to put 'em to work.

Some time ago ECE went from the traditional "eared" escapement to a crosspin type escapement. I have both types and in truth both work well but from an aesthetic point I like the eared escapement.

Cut to the chase: While looking on eBay for Marple chisels and fillister planes I came across a "eared" ECE Smoothing plane that appeared NOS with the iron still in the wapper and in a box for about half the price of a new plane from Highland. It arrived the other day and it was NOS, every once in a while eBay works.

After sharpening the iron and on a small hunk of pine:


The differences between the ECE Smoother and the Jack are small. The Jack is a couple of silly mm's longer, so little unless they are side by side you would not notice and the Smoother's iron is bedded at 50 degrees vs. the Jack iron at 45 degrees. With a second iron the Jack could fill both functions.

Both planes side by side showing the difference between the "new" escapement and the old traditional "eared" one:


ken


Monday, March 05, 2018

Signing My Work

I have no need for a name stamp. If anyone ever wanted to find out who made something of mine all they need is a DNA test.

The critters made sure I didn't get a lot of sleep tonight. First it was Sam at 2330 wanting to go pee, then Maggie needing the same at 0130. In between It was fitful in and out sleep. After Maggie's wake up woof I couldn't go back to sleep. Of course both critters are in their beds and snoring away. I'm the only fool awake and chopping mortises.

Which brings me to the DNA. As usual I haven't a clue when or how, I was just beavering away when I noticed a puddle of blood on the leg I was working.  After a quick inspection of both hands I found the source, the outside edge of my left palm. Now the question is how in the hell do you cut yourself there.

I have a 0800 "show" this morning, hope the bleeding stops in time to finish up the last through mortise before donning the monkey suit. Whatever, when I finish and make it home it is back to pulling wires and installing outlets.

ken

Sunday, March 04, 2018

Have I Ever Told You How Much I Hate Pulling Wire

MsBubba wants lights in the back garden. Our house was built in the 70's and did not have a single external outlet when we bought it. Over the years I've added a few but not enough to keep the boss happy. A couple of problems with adding circuits is the house's main load center is full as is MsBubba's studio load center and about the only other source is the shop's load center. The bad news is it is full as well but there was one 20 amp breaker that was a single. I changed it out for a 20 amp double and started pulling wires. After spending most of the morning cussing and muttering and with only two trips to HD I have wire to a junction box under the patio roof. Over the next couple of weeks with more cussing and muttering along with more trips to Home Depot I'll add three or four outlets and some lights over the patio bar.

Before I was rudely reminded I had promised to wire the back garden this morning I was making good progress on the travel bench. The top brindle joints on all four legs are cut and two of the four stretcher through mortises are finished. With one good day in the shop I can finish the base. Problem is between work and the Grandpeanut coming to Tucson in a couple of weeks I'm not sure when that one good day will happen.

A photo of the legs in progress:


ken


Wednesday, February 28, 2018

I broke down the 12/4 Poplar yesterday into four legs (still two legs to a blank) and two long stretchers. Wrestling around the two hunks of timber and getting them through the bandsaw by myself was interesting. I ain't as strong nor is my back as able as it was when I was a pup.

Here are the parts ready to start prepping to working dimensions.


If work forgets I exist, today is my last day for the week. We have thought about going to Mexico for a four day weekend but It looks to be a little cool for the beach. Still a coin flip which way we go. Beer and tacos or honey do's, I'm not sure which will win, kinda above my pay grade.

ken

Tuesday, February 27, 2018

Started New Travel Bench

Last year's travel bench replaced my old sharpening bench after the PNW trip. It served well on the trip but it is now in use in the shop and not available for travel.

I made a trip to the woodstore yesterday, they had some 12/4 Poplar in stock at a fair price for the desert so it will be the base wood. I also picked up a small piece of 8/4 Poplar for the short cross stretchers.

I rough cut the 8/4 short stretchers yesterday. The 12/4 stock is marked for rough cutting to size for the legs and long stretchers. The woodstore was short on 8/4 Beech for the slab, it will require a return trip.

A photo of the Poplar, even Poplar is a heavy sucker once it gets 12/4 thick.


Here is last year's bench:


ken


Sunday, February 25, 2018

Split

Just as I feared, figured, best guessed, I knew it would but did it anyway, the Cherry top split. I don't know if you can see but the top left and bottom right mortises have split almost full length of the top.


Problem is I didn't have any Poplar or other split resistant wood of the correct size in the wood pile and I did have this Cherry cut off. This was a trial build so what the hell, might as well use the Cherry.

The good news is the legs are fine and all I have to do is make another top out of a wood that does not split as easily as Cherry. The other good news is I learned a bit about chair making which bottom line this is about. Baby steps dontcha know.

ken

Saturday, February 24, 2018

Shaping Hard Maple Legs

I'm building a staked low stool with a Cherry seat/top and Hard Maple legs. It is my first go at the form so once finished it may never see the light of day.

The boring and reaming of the seat is pretty straight forward or so I think. Once the legs are set we'll see how straight forward it is. I've finished one leg and I'm using it as a pattern for the others. The third leg is about 80% shaped and I will finish shaping the fourth leg before going back to the lathe to do the tenons on the three without tenons.

BTW, shaping Hard Maple is work. Here are a couple of photos the jig/leg holder and shaping of the third leg in progress.

From the front:


From my viewpoint:


The ECE woodie is perfect for this job, light, not too long, easy on the hands and has good iron.

ken


Friday, February 23, 2018

I Will Not Use FedEx As Long As They Support the NRA

The title says it all. I could not look myself in the mirror in the mornings knowing I was supporting a company that funded a political organization providing tools for mass killers no matter how many good folks are members.

Back to woodworking:

Today I'm making legs for a small vernacular stool and have been reminded how much work there is to shaping Maple. Add in I seldom turn, my best guess it has been at least several years since the last time I did a couple of chisel handles, these leg tenons should be fun.

Here is a photo of the leg shaping jig and the mess left from shaping one leg:


A photo of the shaped leg in the lathe so I can form the tenon:


This is a project that may never see the light of day but whatever it should be fun.

ken