Saturday, April 30, 2016

First Coat of Paint

Just what the title said. I'm making the second tray while waiting for the first coat of "Red Pepper" milk paint to dry.

It will take a couple more coats of the Red Pepper and then it will be decision time....Stay Red or use a overcoat of another color. One of the things I like about Milk paint is as it wears it doesn't flake but will reveal the paint and/or wood under the top coat. If I decide to go with a different top coat the question is.....Which one? Black always works well with a red under coat, I've never tried Blue over red and think it might be interesting. I expect yellow or green would be kinda indifferent.

Whatever I'm ready to move on to either the travel work bench or some shop furniture, unless MsBubba has other plans.


ken


Friday, April 29, 2016

One Down,,,,One to Go

Heard a loud "pop" in my right shoulder a couple of days ago while doing some honey do's around the house. I've a appointment with the Shoulder Doc Monday, I expect he will want to cut. In the meantime I'm learning to work one handed .

I'm pretty much in the short rows on the tool box, one tray down and one to go. I expect I'll finish the second tray in the AM. Then it is just paint and lid to finish the sucker off.

I'd been holding off on the top, waiting for the new Plano Vertical Glue Press to arrive, turns out UPS delivered it last Monday, "Left on Doorstep". Whatever, Advanced Machinery has found it and will see it is on its way this coming Monday.

I've a spreader holding the saw till in place while the hide glue sets and I've tried a few things to see how they fit. Only problem found so far is the Japanese paring chisels are too tall to fit on a side wall, I'll have to make a paring chisel till in one of the trays.

If I can stay out of MsBubba's line of sight tomorrow it will have at least a couple of coats of milk paint by sundown.


I've found some very nice 4/4 Cherry shorts at an attractive price. The second tray is Cherry from the shorts and I plan on using them for the lid and panel. If I do, the lid and panel will be left natural with just a BLO finish. The inside will be left unfinished down to leaving the pencil marks and joinery notes. My excuse:....It's a tool box.

ken 


Monday, April 25, 2016

More You Gotta Love Hot Hide Glue

One more reason to love hot hide glue. When I went to put the bottom of the first tray in the box, the top runners were a silly mm too wide.  What to do, what to do? After running through all the options the best and easiest was to dig out the heat gun and a wet rag to undo the glue up. No harm no foul, cut about 6mm off the runner and re-glued 'em. Anyway, I'm stopping at two trays, both about 250mm deep. Tomorrow I will finish the trays and start the lid.

ken

You Gotta Love Hot Hide Glue

I'm working on the inside of the tool box. I needed a break from moving that sucker around. With making the partitions and trays there is no lifting and grunting, just some ass scratching trying to figure out where everything goes and how big it needs to be. The good news is once the lower tray runners are installed right or wrong it is pretty much a done deal except for deciding on one more or two more trays.

For installing runners and dividers inside a box there ain't nothing better than hot hide glue because it is almost impossible to set clamps. With hot hide glue you can just do a "rub joint". As you should be able to see in the photo, the lower runners are setting on a spacer as I wait for the glue to cure.

Once the glue cures I'll decide on one or two more trays. I'm leaning towards two more but....I need to see how much space is left after the the lower tray is completed.


The saw till is on the left side of the photo (will be the front of the tool box) and it has 4 slots for saws. I figure two hand saws, one X-cut and one rip and two back saws both carcass. space on the right is for the molding planes and H&R's. Center area is for the bench planes and maybe a joinery plane or two. 

I expect there will be room for a chisel till on the front wall over the plane till and maybe on on the back wall as well, it will depend on how wide I make the trays.

No matter how big you make it, and this box is too big, you run out of room before you run out of tools.

Sunday, April 24, 2016

More Tool Box

The tool box shell is kinda done. It has a coat of Shellac to seal the Cypress and I expect I'll paint the outside with some color of Milk Paint. Maybe Blue or Yellow, who knows. I've a big can of Black and a big can of Barn Red, it could end up with any of  'em.

I should be farther along but....Life always steps up anytime you get cocky. This time along with the stone I've been in AFib for the last couple of days. My energy level ends about the time I walk to the shop. Bottom line, I've been working through it but production level is pretty low. Besides it is a heavy sucker and every time it needs turning over it kicks my ass.


Lots of less than perfect work in the making but it is square enough and strong enough to do the job. Of course MsBubba during one of the many times she helped move it to a new position said...."Oh this would make a perfect toy box for the grandpeanut". She didn't call him the grandpeanut but I've got to have some freedom of expression. Of course she is correct, a slightly smaller version would make a good toy box for Levi....Maybe by the Winter Solstices Celebration.

I'll start on the frame and panel for the lid tomorrow as well as the trays. Neither of which should take too long. 


Thursday, April 21, 2016

Tool Box Update

I've been beavering away on the tool box, at least my version of beavering away. I just finished glueing the upper skirt on. Tomorrow will see the bottom installed and a start on the rails and stiles for the top. I expect I'll wait for the Plano panel vise to arrive before glueing up the top's central panel.


I may start on the trays as well. The box is sized for three trays, one large and two smaller ones. 

It could all go reasonably quickly, the Doc will not give me a return to work sign off for another week....Oh darn, I have to stay home and work in the shop.

Anyway pooky and paint on the outside, enough tools inside to hide the mistakes. It should work well for it's intended job and not be too ugly.

The "splotchy" look is where I used a wet rag to wipe glue off just before taking the photo. There was a bunch of it on the end panel. 

ken

Wednesday, April 20, 2016

Kidney Stone

I will not go into all the gory details, there is not much of anything more boring than someone else's medical condition but.....This time is special :-). The E.R. could have made a good porn movie, the nurse was young and beautiful with very long blonde hair and the Doc matched her in every detail other than her hair was a little shorter. The only thing missing was a good male lead.

Anyway, got up yesterday morning not feeling on top of my game but semi-functional. Even tried to get ahold of any of the "suits" to get someone to takeover my afternoon clients. No suits were available, I was functioning, and this pair of clients are among my favorite to work with, so it was off to work I go. I made it through the Brief and we, the clients and I, moved into the Simulator for four hours of sitting in a dark box with my pushing different combinations of buttons so as to make their life miserable. Me? I usually have a great time, said with a diabolical laugh.

Cutting to the chase, about the time the Sim came on full motion the Kidney stone kicked into overdrive. Whoo Nelly...push the Motion button to bring that sucker off motion (takes forever when you are in a hurry, which I was). After a visit to the head for a Porcelain Buick drive, I got a friend to drive me home, then MsBubba to drive to the E.R. and once they gave me the "happy juice" I went about casting the rest of my porn movie.

BTW, I have a high pain tolerance, not much slows me down.....this kicked my butt.

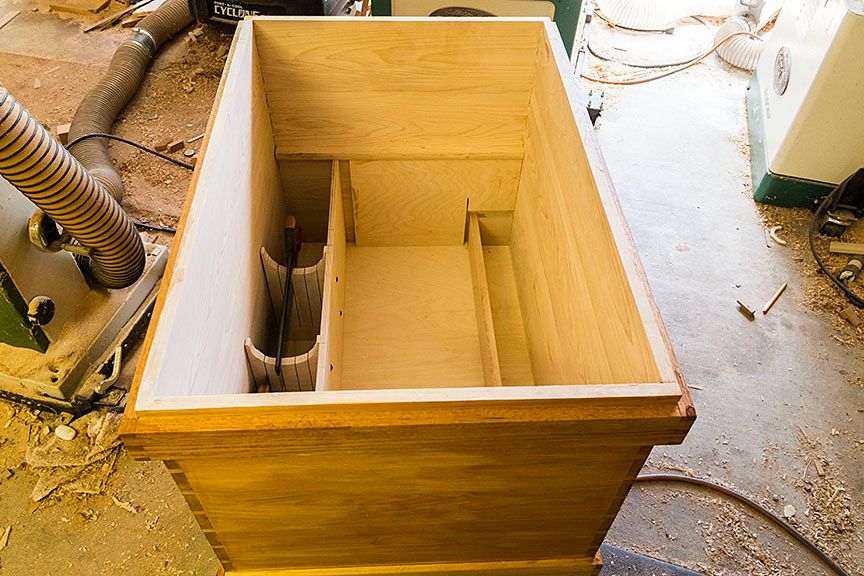
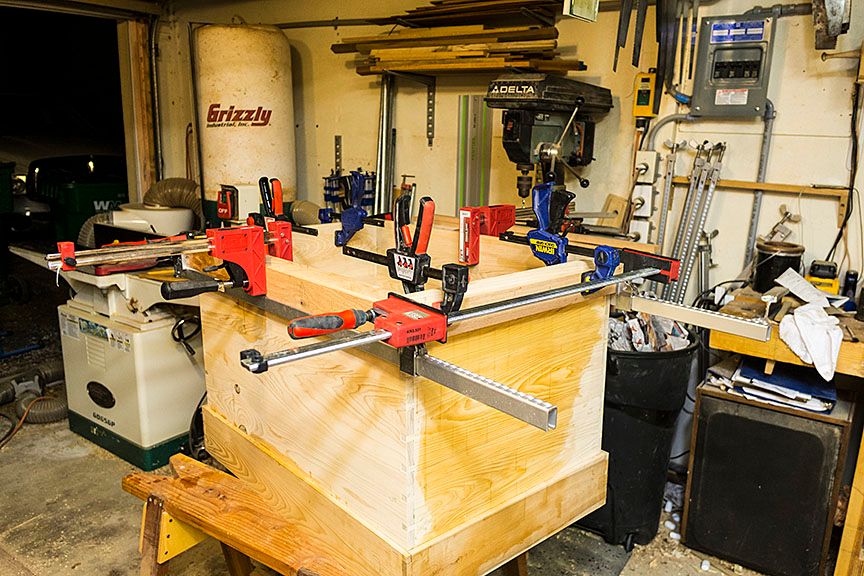
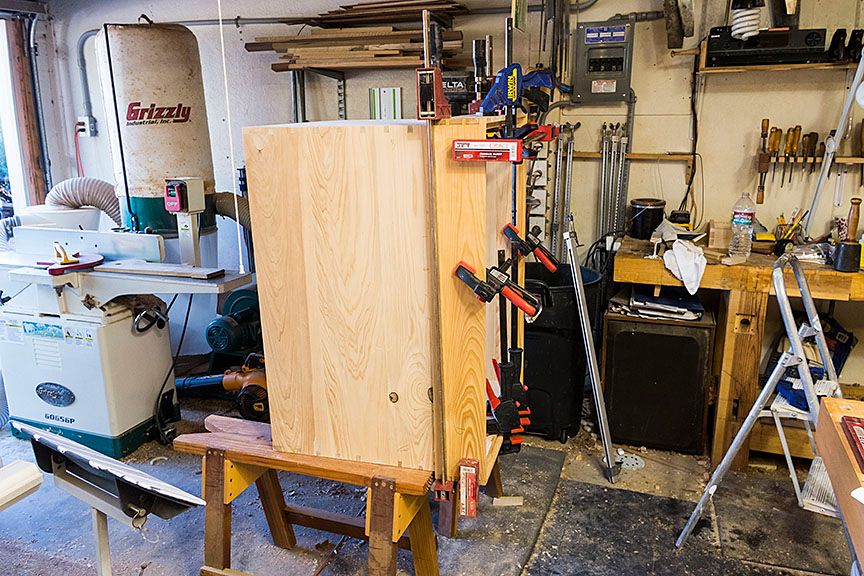
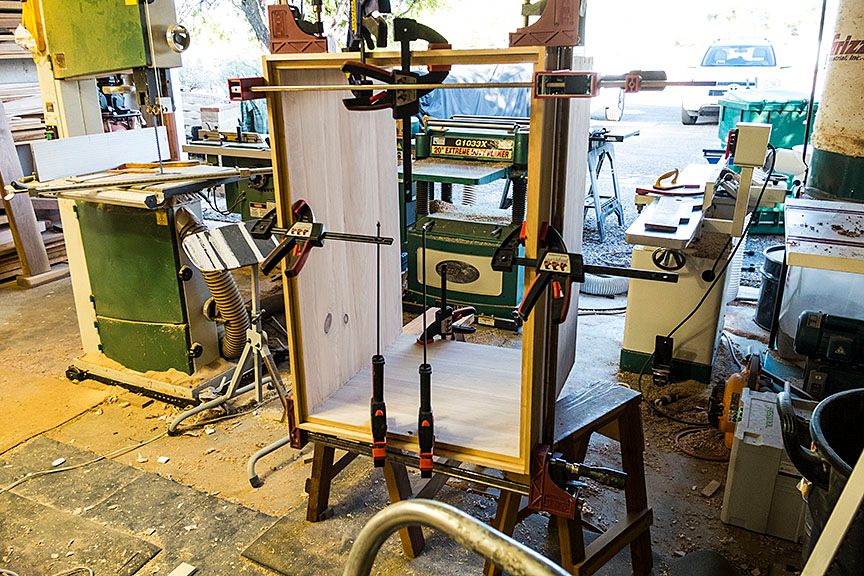
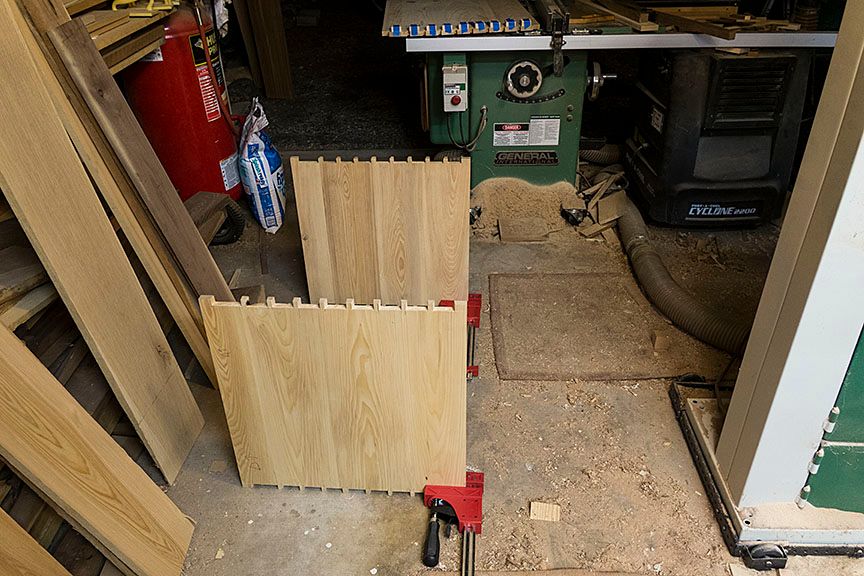
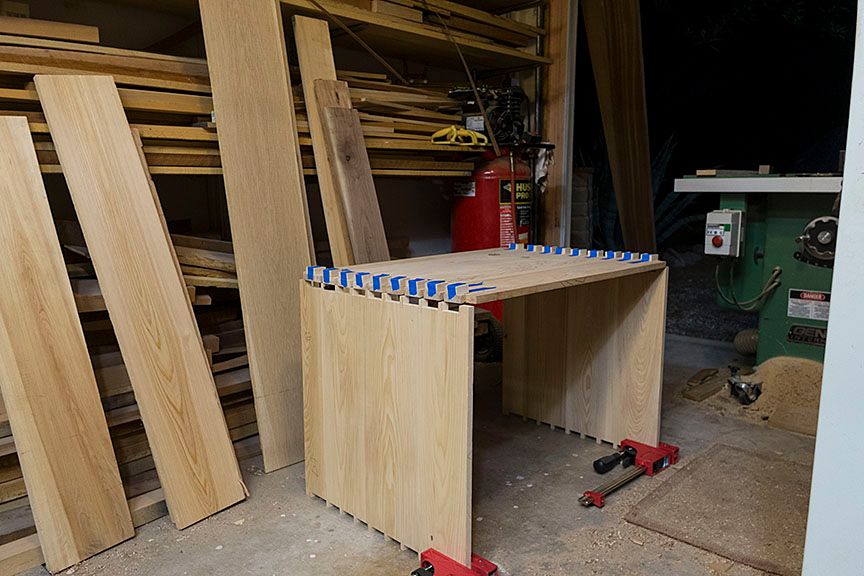
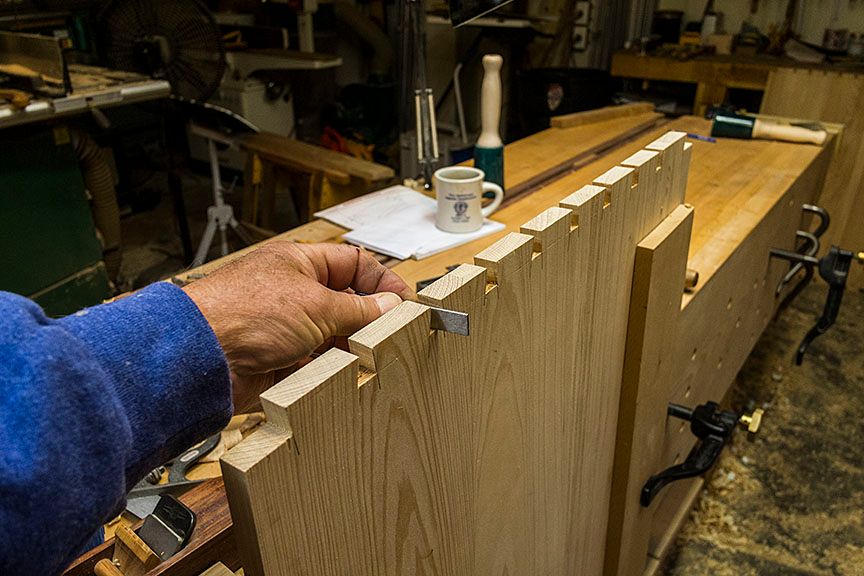
I did get a little done to the Tool Box before leaving for work and the E.R. I found a nice hunk of Red Oak, enough to make the upper skirt, and I got it rough dimensioned. I think there is also enough to make the top's dust skirt as well. If not, I'll use the cut offs of whatever I find for the rails and stiles. I should make some progress on the box as I expect to take a few days off while waiting for the stone to finish passing.

One other thing, while putzing around in the shop I found useable wall space for a Plano Vertical Glue Press, I expect I'll be seeing my UPS girl soon.

Sunday, April 17, 2016

Tool Box Progress

The bottom skirt is on the tool box. The box is what it is and the bottom skirt is cooking. It is not my best work but, it is square, the joinery is bullet proof and there is nothing that a little "pooky" (highly technical term for water putty or anything else used to hide screw ups) and paint can't fix.

Bottom goes on next. I still can't decide between Cypress or Baltic Birch ply. Top Skirt and a lid to go, both should be reasonably quick because neither will require much butt scratching. The next three days I'm working a mid day shift and not much gets done either before or after work on that schedule. If the current work schedule holds and I get a couple or three days off in a row following the next three it will not be long before I finish this sucker.

Rob Porcaro over at Heartwood pointed me to something that could be useful. I expect a Plano glue press   is in my furture.  A Plano glue press would have helped on this glue up and I expect the panels would have been at least 3 or 4 mil thicker if I had used one.

A couple of photos, you can't tell but under those clamps is a skirt attached to the bottom of a tool box:


Another view:


ken


Friday, April 15, 2016

Tool Room

For the last week or so I've been "cleaning" the Tool Room aka Fibber McGee's closet. It had finally become unusable, you can only have so much stuff in a finite space before it becomes no mas, no mas.

The Tool Room reached that point a couple of months ago. Anyway I've been beavering away, picking up each treasure and giving it a thumb's up or down. The ups mostly had to be put in a holding area until space was created, the downs went to a holding area on the front deck.

MsBubba has been understanding so far.

While it is a long way from done you can almost see progress and a kinda image of how it will be once finished. Of course once finished the process starts anew. "What do I do with this thingamajig? Hell I don't know, stick it in the tool room." A year or so later I'm back to posting a "Tool Room" post.

Here is what has come out so far:


The tool room from the right end:


In the other direction:


From the door way:


Still a ways to go and a lot of junk on the floor but.....

When I've needed a break from cleaning, well maybe you can't call it cleaning a better term is maybe moving stuff from one pile to another, I've worked on the tool box. It's not the best box I've made but it should be square enough and strong enough to use as a tool box. Paint and pooky can hide a ton of sins.


Click 'em to big 'em.

ken


Thursday, April 07, 2016

Simple Answers

For as long as I can remember I've tried to live by two principals. The first is a quote from Plato:"Opinions without knowledge are shameful and ugly things". The second is a quote from ken hatch: "There are no simple answers to complex problems, if there were it wouldn't be a problem". I ran across a cartoon today that encapsulates the second quote.


Wednesday, April 06, 2016

Glued Up

The sucker is glued up.

When it has been awhile since the last big box glue up you forget just how much work it is to do without a helper. Everything is too far away, falls off, or slips. Anyway here is my basic set up for solo glue up:


Checking the position and making sure things fit:


Glued up and square for now. We will see when the clamps come off, as you can see I had to pull it square....Never a good sign. Other than being very soft the Cypress was nice to work with hand tools but.....At least this batch of Cypress, never stopped doing stupid wood tricks. I finally gave up and figured the dovetails will pull it straight enough for a tool box or it will make a nice fire. Once out of the clamps what will it be, firewood and I start over or I make a lid and some trays. Either way works for me. 


While waiting for decision time, tool box, firewood, tool box, firewood.....It is on to cleaning out the shop.

I'm making three piles. The first is "junk" no one would want and going to Goodwill, the second is for Craig's List, things that are too big to ship or not worth much but still too good for Goodwill, and the third is a eBay pile, some of which I'll list here as well. One of the eBay items will be my Tormek T-7 system with most of the accessories and three wheels, the standard, a Japanese 3000 water stone, and a (IIRC) 180 CBN wheel. Watch the blog because I'll list thing here first before listing on eBay.

ken 


Monday, April 04, 2016

Back To Chopping

Because of the size of the panels I used a turning saw to saw most of the pin waste on the tail boards. It works and is faster than chopping and paring but......There is that damn but, life would be so much easier with out buts. With no support and a soft wood like Cypress if there is any waste greater than a mm I do not think you can get a chisel sharp enough to prevent tear out. Anyway that's my story. On the pin board I've gone back to my normal chop/pare leaving support wood in the socket until the last little chop.  It makes a much nicer socket floor. The only problem is it is slow.

Work forgot I'm alive this week and I've a few days off in a row, yesterday I had entertainment duties but today has been a shop day. By tomorrow I should have a box or at least four sides to a box.

Here is a photo checking the floor of the pin sockets:


The Cypress is easy to work other than needing care to prevent tear out and denting easily but damn it loves stupid wood tricks. I've given up on trying to keep it square and flat. I figure once I glue it up the dovetails will hold it close enough for a tool chest. If not, maybe it will make a good butt massager.

ken