The two areas are marking the dependent joint and not properly judging the compressibility of the woods when sawing the dependent joint. Knowledge of compressibility just comes with using the woods, sometimes wood you think you know can bite you but stuff happens. When it does you either make the joint over if it splits, get busy demo-ing your chisel skills or showing your great woodworking skills by figuring out how to hide the gap.
Marking the dependent joint is where most of my DT screw ups happen. I've tried just about all the different ways, using a knife, using a pencil, using a ball point pin, tails first, pins first, the "140" trick, the 'blue tape" trick, you get the idea. I've tried most ways and they all work, some a little better than others but all of them allow you to screw up the marking occasionally and it doesn't take much of a miss to make a really ugly joint. In fact just marking and sawing works about as good as anything with no more or less gappy or too tight joints and miss aligned shoulders. BTW, I will get to the point, promise.
Several days ago on one of the woodworking blogs, I think Sawmill Creek, someone posted about a saw guide for making dovetails. I wasn't interested in the saw guide but I was also killing time at work so I followed the link. It was to David Barron's site and on it he had a video using the saw guide but what I found interesting was his Dovetail Alignment Board .
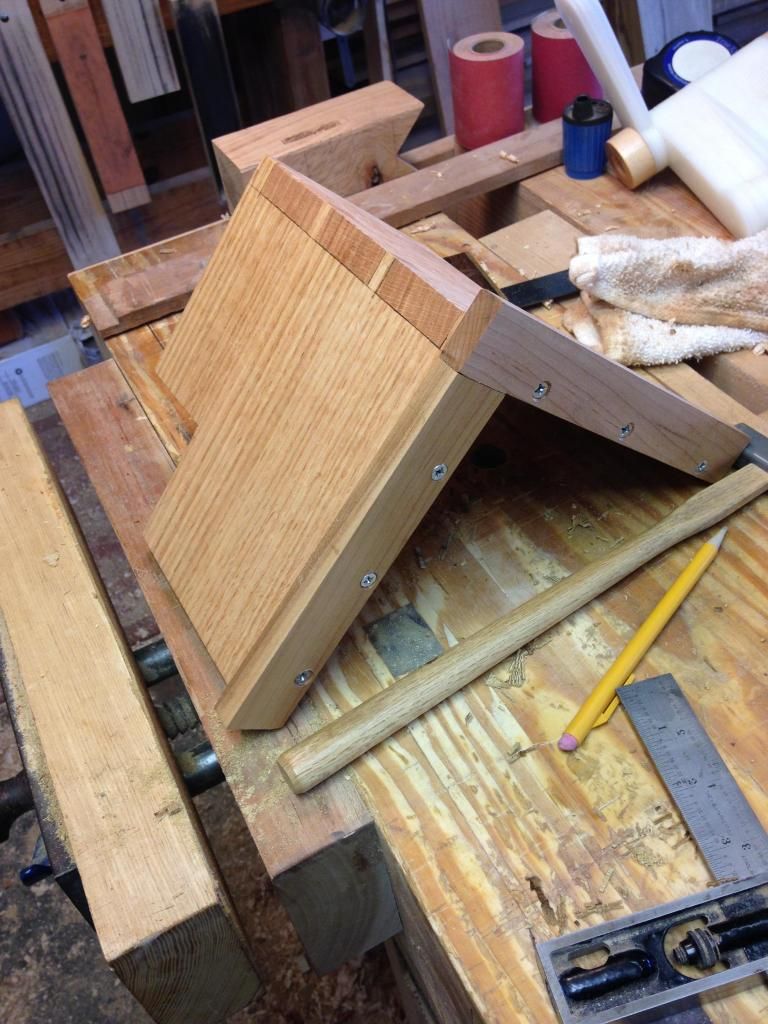
I cobbled together a copy the other day and all I can say is it works. It works much better than laying a plane on its side even when using the "140" trick and doesn't take the time to cut a rebate, I guess what I like about it is there are no extra steps to using the appliance.....just place your pin board in the jig, aline the shoulder of the tail board and hold the board against the fence and make your marks. It will not slip, if your marks are not deep enough just replace the tail board and make 'em deeper....it is really slick.
I know I'm probably late to the party as usual and the beer and food are already gone but that is the story of my life riding the short bus.
A couple of photos of the bench appliance:
The next time I cut some DT's I'll document using the jig.


do you have a link to the video please?
ReplyDeletethx
bert
bert,
ReplyDeleteI believe this is the link:
https://www.youtube.com/watch?v=ibyTMTLjaq8
ken
Hi Ken,
ReplyDeleteI used that alignment board for a while. It does work but I've since go back to doing the alignment by hand again.
Ralph,
ReplyDeleteWhat were your down sides?
I can see it being just one more thing you have to deal with but I like the way it trues the bottom reference and allows making stronger striking lines. But like I posted, all the other "fixes" end up being more trouble than just marking, sawing and chopping.
We will see.
Are you doing most of your truing by hand now? Seems to be from your latest posts.
I'm out the door to work...not much shop time with this weeks schedule, by the time I'm home it's too hot to work in the shop. A cool one and the AC is the only way to survive.
ken
This alignment jig was first published in shop tip book Percy Blanford (my edition is 2007) who has authored over a hundred books. Of course, David Baron may have come up with the same idea by myself, though he hasn't said where his design came from.
ReplyDeleteSimon
Hi Ken,
ReplyDeleteno real downsides other then having to dig it out to use it. I started making a boatload of sliding lid boxes and I couldn't use it for them.
Stopped using it and never went back to it.
I did have to fuss with it a bit at first because when I tightened down on it in my vise it would cock slightly.