Thursday, March 31, 2016

Sawing The Tails

We made it back from Fort Davis/Big Bend, Texas Monday evening. Close to a perfect trip length, about 600 miles, an easy one day drive. Easy for me though MsBubba may be warming up to the idea of a Class A motorhome.

I've early AM shows at work all week so progress will still be slow on the tool box/work bench. I did get the tail boards sawn and most of the pin waste removed. The pin sockets are ready to be cleaned. BTW, what a PITA big panels are to work. Here are a few photos of the tail boards.

Tail board marked out:


Sawing the tails:


Most of pin waste removed:


Most of the time I do not saw out the waste. On smaller projects it is just as fast to chop but on panels this large I go for a "turning" saw to remove most of the waste.

I received a box with four saws from Mike Allen last Thursday just as we were walking out the door for Fort Davis. I didn't have time to open the box and look at the saws until yesterday, the saws were very well packed. After unpacking the four, I used the 8ppi x-cut to saw the end off a hunk of 8/4 Cherry that was handy. What a great saw, more with photos when I have time.

ken 


Thursday, March 24, 2016

Tail Board...It's Better to Be Lucky

I didn't plan, just grabbed a dimension out of my ass...."that looks about right". Turns out "that looks about right" just fits in the Moxon and because of the the size of the panel it will be easier to saw the tails and pins in the Moxon. Cut to the chase Bubba.....The boards just fit, a silly mm more and they would not fit. I expect if that silly mm had been there I would be figuring out the best way to get rid of it on all four panels instead of photographing the panels in the vise.


No sawing for a few days. The monkey suit goes on after I finish morning coffee and it's off to sit in a dark box for four hours. After finishing the dark box sitting I'm driving to Fort Davis, Texas for the weekend with the whole crew, MsBubba, Sam the Wonder Dog, Sweet Maggie Dog, and the 5th wheel in tow.

See you guys on down the road,

ken
  

Wednesday, March 23, 2016

Voigt Jack

I'm almost through prepping the panels for the tool chest build. Steve Voigt send me a new Jack, it arrived just in time to help with the panels. What a sweet plane, While I used the ECE Try for some of the prep, most of the grunt work was done by the PhillyPlane Jack and Steve's Jack. with final smoothing done with Steve's Smoother. The PhillyPlane Jack has a lot of camber, just slightly less than the ECE scrub, Steve's came with almost perfect camber for a Jack. Working the three of 'em made getting the panels ready for dovetailing a piece of cake.

I made an unforced error cutting one of the panels to final size and left a big honking knot right in the dovetail line. Can you say "Condor Tail" to work around the knot. Anyway here are the three on the final panel, from left to right the PhillyPlane Jack, Steve's Jack. and Steve's Smoother:


One more of the three:


If you have any interest in using wood stock planes you need to act fast while the wait time for a new Steve Voigt plane is reasonable. As far as I know Steve is the only maker making classic double iron planes. It is too long a subject to go into tonight/this morning but that is a very good reason to buy one of his planes as is the fact they are beautifully made and are a joy to use right out of the box.

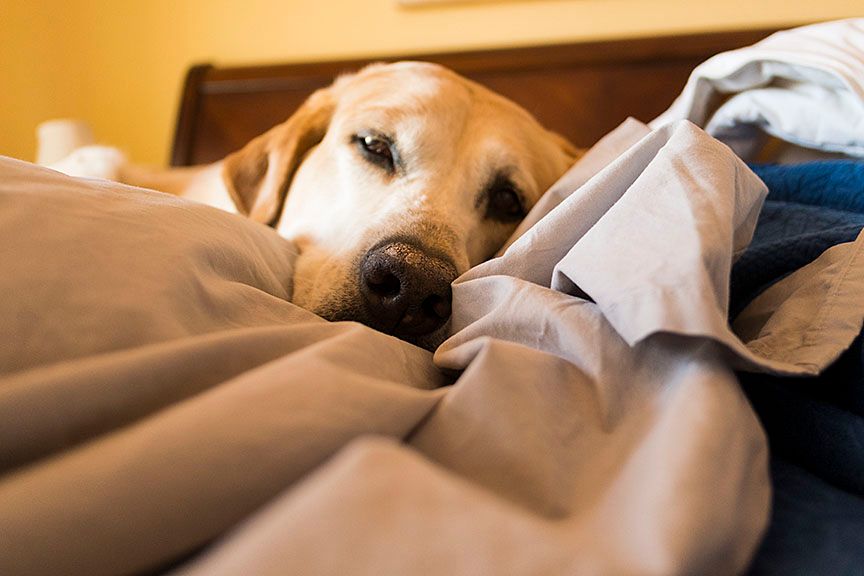
Sam the Wonder Dog has recovered and is back to his old self, demanding treats and scratches. He had me worried for a couple of days as he is getting older. Here is a photo of MsBubba and Sam on the day he followed me home from the dog pound in 2010, a true pound puppy. BTW, you have to question how he ended up in the pound, he was almost perfectly trained, healed like a show dog and knew most of the standard commands, it was love at first sight.


Remember click 'em to big 'em,

ken


Saturday, March 19, 2016

Whisky Snob

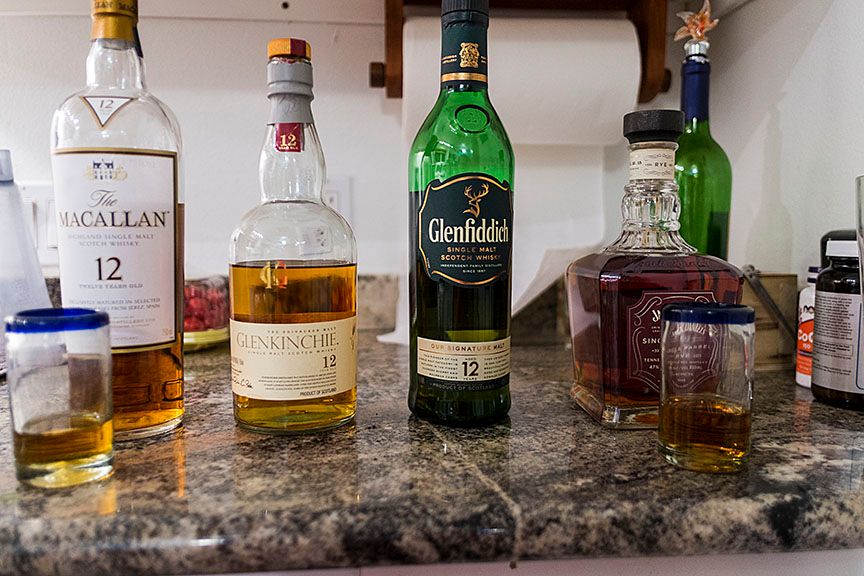
I may be becoming a Whisky snob. My line up of single malts grows by the week and there are even a few bottles of Whiskey joining in the queue.

While I'm a neophyte at this Whisky thing there are a couple generalizations I think I can make, wrong or not, Lowland Whisky has a more peat/smokey taste while the Highland Whisky's have less peat and more fruit flavors. If you like fruity/sweet Whisky go for for one of the American Whiskeys, I have a glass of Jack Daniel's Single Barrel Rye on my desk as I type, it is like drinking desert.

The price/smoothness/taste sweet spot for Whisky seems to be 12 years old, after 12 years the price takes off like a Lear 24 headed for FL450 with little change in taste or smoothness. Or maybe I just haven't enough tasting experience to tell the difference.

Anyway here is the current line up, not necessarily my favorites but the bottles that are open and I'm trying. The second from the left, Glenkinchie, is one of my favorite Lowland, peaty, Whisky's.  I do not know if you can see in the photo but the Jack Daniel's on the right is much darker than the McCallan on the left. I suspect that is because of different types of casks used in aging.


Sam the Wonder Dog is a little under the WX, he gurgles when he pants, it's off to the Vet Monday. In the mean time he is getting away with things he knows better than to do.


I worked this AM, so what's new, but found a couple of minutes for shop time. Some spent prepping the panels for the tool chest build but mostly taking care of a couple of trim problems in the RV. BTW, tools are good. I had some Home Depot 1/4 round I tried to make look "right" but no joy. So I dug through the wood pile and found a Red Oak cutoff, trued an edge then went to work with a "horned" smoother to get it close to shape and finished with one of the "rounds".  The more I use my woodies the more I like 'em. I've a couple more coming from Steve Voigt, a Jack that is in the mail as I type, and a Try that should come soon.

Next weekend we are off to Fort Davis, Texas with the RV in tow to see the Grandpeanut and do some star gazing. See you'll on down the road.

ken


Sunday, March 06, 2016

Tool Chest First Panel Glue Up

The Cypress has set for a couple or three days and is still reasonably straight and I have several hours before putting on the monkey suit for work. Might as well get a panel glued up.

First task is to decide out how the boards will fit, taking grain direction, and reference side into consideration and to mark out the panel. The task is easier for these panel because they will be painted so no need to include figure in the decision.

Here is the first panel marked out with a furniture maker's triangle, face mark, lines across the joint line to help aline the panels while prepping the glue surfaces, a ">" to show expected grain direction, and a "A" to indicate panel position in the box:


After marking out the panel I put pairs of the boards in the vise to true their glue edges. The first step is to create a shallow hollow in the middle of the glue edges:


Then come back and take full length shavings:


Glue pot warming up the liquid hide glue:


Glued and cooking:


Just three more to go before starting the dovetails.


Wednesday, March 02, 2016

Tool Chest

I know I'm a broken record but....Work is crazy, I'm in the middle of 13 days in a row. We are going to have a come to Jesus meeting soon and if they can not give some reasonable assurance that the abuse will stop I'm going part time.  I hate to do it because I still enjoy my job and feel I'm returning some of the investment others made in me when I first started flying....Enough kvetching, on to something at least interesting to me and maybe to you.

The boss aka sweetie pie, bunny rabbit, light of my life, and even more important SWMBO has been on my case to make a tool chest and small work bench to carry when we go RVing. She has noticed after a couple of days of sitting in an RV park I'm ready to be back in the shop. There is only so much beer, whisky and tacos a man can enjoy at one time. Usually it is a couple or three days for me. Anyway that is the back story.

Today I had a couple of spare minutes and used them to prep some cypress for the tool chest. It is rough dimensioned and stickered.  I'll give the wood a couple of days to settle and then cut to final dimensions and clean up any stupid wood tricks.

The outside of the chest will be approximately 600mm X 900mm X  600mm. Here is a photo of the stickered wood. If you squint you might be able to see a tool chest or maybe not.