Saturday, November 29, 2014

Caleb James Side Bead Plane

USPS delivered my Celab James 3/8 side bead plane this afternoon. I had to run a bead straight out of the box.....Sweet.


He was Schwarzed a few months ago and is running slow on filling orders but the plane is worth the wait. He closed orders for awhile but I think he is taking pre-orders again.

I have pantry doors to paint, I'm finding every excuse in the book to put it off. My hands are black from sharpening every hunk of iron I can find in the shop as well as flatting every stone in the sharpening cabinet. If I really get desperate I've several dozen saws that need some TLC....or I could just go and paint the damn doors. 

Thursday, November 27, 2014

T-Day

Let me wish all a good T-Day, of all the holidays T-Day and Juneteen are the only ones I celebrate. Well, I take that back a little....December 22th (Ms OK's B-Day) is the most important day of the year and woe is me if there is not great joy and remembrance on that day.

I've a four day weekend with nothing planned, it should be good but I expect will pass all too quickly.

Wednesday, November 26, 2014

Different Strokes, What Blows Your Skirt, I Can't Believe, Whatever


There's a new post of a bench build on one of the woodworking forums. The bench has four vises, two face vises on opposite sides, one a leg vise the other a metal face vise, and two end vises, one a wagon and the other a face type vise mounted in end vise position.  I counted over 50 dog holes set to be used with the four vises. A sliding deadman and a crochet to the left of the leg vise. In addition there are six 2"X3" holes down the middle of the bench for whatever. I can not imagine working on the bench but I expect the builder had fun planning it out.

BTW, sometime ago I posted somewhere about Swiss Army knife work benches.....I didn't have a clue, this is the penultimate Swiss Army knife bench.  

I know, I know.....all of the above in the title apply but....damn, sometimes something is so far over the top all you can do is, to quote David Bromberg's Bullfrog Blues, You just got to wonder. This time what in the hell the builder was thinking. One thing I know, I've got to learn to stay off bench building threads on the intertubes.

Tuesday, November 25, 2014

Changed Face Vise

I finally tired of fooling with the leg vise on the old bench and dropped kicked it through the bench vise goal posts into its rightful spot...Hidden in the "tool room" never to be seen. At least until I build another bench and can use the new in the box also stored in the tool room crisscross with it.

It was replaced with an old English metal QR vise, I believe a Paramo but it could be a Record, I had stored in the same tool room. It is a smaller #150 which is not as robust as the #52 but as it is on the secondary bench that shouldn't be a problem. Anyway, it is installed with leather lined wood jaws. I stuck a longish board in outboard of the center and tightened down. Very little racking even with out a spacer and there wasn't any way with a foot of leverage the board would move.

Same song different verse: The leg vise looks "right" on a French style bench and when it is in adjustment works pretty good, not better than an older English metal QR but works OK. The metal vise is no fuss, always works the same, if it racks a little it is easy to take care of with a spacer and is quicker to go from one size object to the next. Pretty and traditional vs. functional, for me not much of a contest. Of course as with all things woodworking and most things life.....YMMV.


BTW, I worked several years on that bench with the leg vise installed. From the get go it worked OK but would occasionally go out of adjustment and become "sticky". A couple of minutes rolling around on the floor in the shavings and saw dust and it would be back to normal and work fine but never better than any other good vise. With no real advantage in holding or speed the leg vise just isn't worth the every month or so up close and personal inspections of my floor maintenance. Of course the dogs might disagree, they figured my being on the floor was play time and an invitation to lick my face.  

Sunday, November 23, 2014

To Strop Or Not

I have Japanese chisels in both #1 and #2 White Steel, either takes an incredible edge straight off the stone and the edge will last. I also have a set of the newer Stanley SW 750's with Chrome Steel, they take a good edge but straight off the stone the edge fractures at the first touch of wood and the chisel dulls very quickly. If I strop on some leather charged with Herb's Yellowstone, the chisel feels the same, not as sharp as the Japanese chisels but close and the edge will not fracture as quickly. Either chisel makes a good working chisel but each needs a different approach to sharpening.

Just an observation, time to go strap a Sim to my ass for most of the day.


Friday, November 21, 2014

Bench Curmudgeon

I guess I'm a curmudgeon. Whatever. If it is in fashion I don't like it. I don't set out to dislike the bench appliance or vise, in fact I'm usually a fairly early adapter with high hopes that it will be the end all of work bench aids. But it is kinda like the country song line about looking for love in all the wrong places. Usually no joy.

Leg vises and wagon vises are the "it" vises today, almost every new bench build has one or both. As I've posted before: BTDT and didn't like the T-Shirt. I've tried using leg vises on benches other than mine thinking maybe I did a poor install, not the case at least on the ones I've tried. Maybe others have better luck but I find leg vises fussy and slow to use and frankly they hold no better than my English QR metal vise. Basically no working advantage and a hell of a lot more work to install, kinda lose lose. I must add: Leg vises can be pretty and I guess sexy in a bench vise way, where my QR vise is kinda like granny's underwear, not very attractive but it sure is functional.

Wagon vises, what can I say other than I just do not find there is a need for end vises. There are other and better ways to hold work and the wagon vise is also a PITA to install maybe not as bad as a classic tail vise but still....Again BTDT, same shitty T-Shirt.

The latest is the Moxon vise. I had to try one and this time I was late to the party. I had high hopes for it and I could see some real possibilities for the Moxon but in practice not so good. It does what it was designed to do and that is to hold wide boards. It clamps down tight but....there is that damn but that always pops up...at least on my bench it vibrates when sawing. I tried it on both benches same result, tried with different holdfasts, both the regular whack 'em kind and the LV screw down ones, same result.  Bottom line: The Moxon is stored under the bench to maybe be retrieved if I'm doing dovetails on a wide case....maybe.

I'm sure there are folks out there that have used other ways of holding work on their benches and still find a leg vise the best option as I sure there are folks that can not do without an end vise, I glad you have found what works for you. For the folks just starting on their first bench build, remember just because it is in fashion and everyones building a bench with leg vises and/or wagon vises they may not be the best option.

Thursday, November 20, 2014

Kitchen Pantry Update

It, the kitchen pantry, is getting close to finished, the joinery is done on the three sets of doors, just peg and glue the last set then finish painting the whole shebang and hang 'em. Well maybe not that close but.....

As with anything to do with fixing, changing or remodeling an older house it is a PITA, give me new construction any day. Just too much time spent scratching your ass trying to figure a way to make it fit, make it look square, and keep it from looking like a total kluge. 


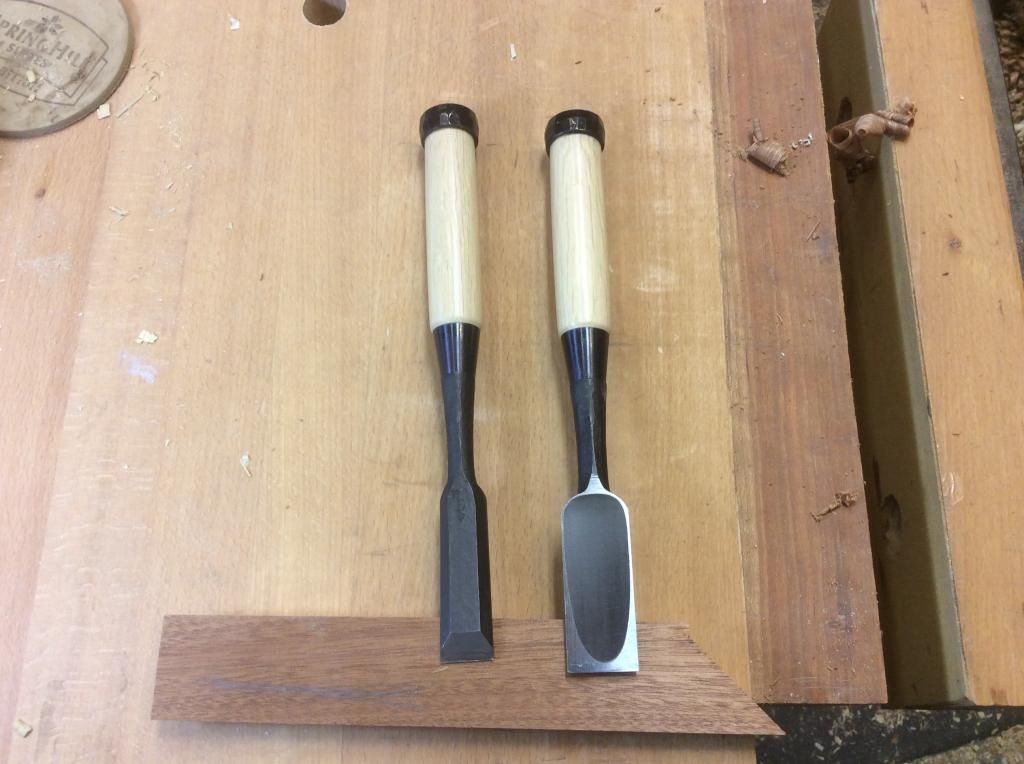
I used one of the new Kikuhiromaru chisels last night to pare and fit the door tenons. It was really sweet, incredibly sharp, felt just as sharp when finished as when I started (looked that way as well), and as with most Japanese chisels very light and balanced in hand. I should have time next week to finish prepping the set or at least the ones I will use the most.  

Off to work....gotta fill the cockpit with smoke today and watch what happens. Always a fun time.

BTW Ralph, I expect it is just the normal ebb and flow. I've been doing this as a journal for a few years with times of good activity and others of little.

Tuesday, November 18, 2014

Prepping the New Japanese Chisels

I've started on prepping the new chisels, I'll do a few at a time, fitting them in between other project. First job is to remove the ring and the lacquer coating the chisel.  An easy way to re-fit the ring is to hammer the end to compress the fibers. When the ring is re-installed soak the handle for 15-20 minutes in water to soften and expand the handle. After the handle has soaked, again with the hammer mushroom the top with glancing blows. Then on to honing the iron.

The first chisel's back was flat and polishing was very quick. The bevel had a little belly, I started out on the 2000 stone and it was soon apparent I needed to go down.....Ended up using the 600 EZLap to remove the belly before I could move on to polishing the bevel.


I finished MsOK's picture frame yesterday and the middle two doors for the kitchen pantry, down to two more grooves on the bottom two doors. Pantry project is finally in the short rows.  

Saturday, November 15, 2014

Kikuhiromaru Chisels

My set of of Kikuhiromaru chisels came in todays mail. Number 1 White Steel, White Oak handles, and hand hammered finish. A little bing never hurts.

No chance to prep 'em today, maybe start on a couple tomorrow. Whatever I'm interested in seeing how they feel once prepped and ready to work.


Sunday, November 09, 2014

Instructing

I instruct for a living and like most folks that take pride in their work think I'm pretty good at it.  But I learned something a couple of days ago, I do not think I can teach wood working. I'm helping (teaching) a co-worker build a work bench. The build is in my shop because that is where the tools are plus I can do other projects while my co-worker works on his bench.

I'm using the classic "show one", "observe one", "do one" method of teaching the process of joinery and to some degree we are ending up with joints. The phase "it is a work bench" has been uttered more than once and thank the Flying Spaghetti Monster for draw bores. It is a work bench and I expect when finished with the help of pinned joints it will function but damn it's going to be ugly.

While one co-worker was working on his bench Friday another was over so I could install the replacement trim on his motorhome. I think I posted several weeks ago about the trim, how it was made of MDF with a picture of wood glued on and how the dealer had FUed the repair job so badly the owner of the motorhome refused to take it back for warranty work.  Anyway, the motorhome was in my driveway, I had the trim pieces to cut to final size and fit, the bench builder was hard at work with a lack of close supervision, the critters were in critter heaven. In other words Casa Chaos was living up to its name.

With only a few glitches we got the trim installed and even though the new trim is Cherry stained to match the pictures of Cherry it looked pretty good when finished. It wasn't a perfect match but it didn't shout "I'm different". Whatever the owner was happy of course that could be because of the three Martinis he had before leaving for home. If the work isn't perfect give 'em booze.

Back to the poorly supervised bench builder. When I marked up the legs for the stretcher mortices I stressed that the mark up process was the most stressful part of the build and at each stage before cutting or chopping anything if there is any question place the parts in their intended position and confirm that yes indeed that is where the mortice goes. Do I need to go any farther.... One leg will have a big "plug" next to its long stretcher. What the hell, "It's a workbench".

BTW, the day before as I watched the bench builder pare the knife line on a tenon I noticed he was getting some resistance, I looked at the chisel he was using and as expected it needed sharpening. After sharpening the chisel and giving it back I had no more than turned my back before hearing "fuck" and the chisel hitting the bench. Of course blood was squirting everywhere, he had damn near taken a finger tip off. Paper towels, liquid hide glue, and duct tape took care of the problem and he went back to work cutting wood instead of flesh.

I was letting the bench builder use my Stanley 750s because they are a reasonably good chisel and of my bench chisels the most bulletproof.  After everyone left Friday I picked up the chisels the bench builder was using and couldn't believe anyone could use a chisel in as bad shape. The fractured edges looked like a hag's mouth. I would guess the worst one needed at least a mm of steel removed to get pass the fractures. I haven't a clue how edges could be so destroyed.....As stated earlier....Ain't no way I could ever teach wood working.        

Wednesday, November 05, 2014

Hide Glue

I've been a convert to Liquid Hide Glue, both the Titebond and Old Brown Glue, for some time. It's good glue, nice to work and works well but I've also read about hot Hide Glue and some of the differences between the two such as being able to do "rub joints." I had to put a glue pot on my want list.

After looking at several and dithering for what seems forever I ordered TFWW's copper lined glue pot. The UPS girl or maybe more accurate the FedEx guy delivered it and a couple of other things a few days ago. Nice pot. I finally had a glue up to do last night and fired the pot up, put in a hand full of dried hide glue and some water. After heating and guessing at how it should look, I went with thin syrup, I did a rub joint. Damn, it worked.....just a few seconds and there was no way the two pieces of wood were coming apart. Next up were the M/T joints of the two small doors, no muss or fuss, just painted the tenons and the pins and stuck it together. Pretty nice stuff.